Ever wondered how to take pictures of stars? Maybe you don’t know what gear you needor what camera settings are best for night sky photography. WellI know from experience that taking pictures of stars can be a challengebut once you learn the basics and get it rightit can be hugely rewarding and you’ll be able to shoot some stunning photos.
In this post I’m going to share with you everything you need to know about astrophotography to help you get awesome photos of the night sky. This includes camera settingsgear you needtips on composition and lots more!
Whether you’re wondering how to photograph a comettake pictures of the milky wayphotograph a meteor showeror just want to capture some star trailsthis post will answer all your questions.
Let’s get started.
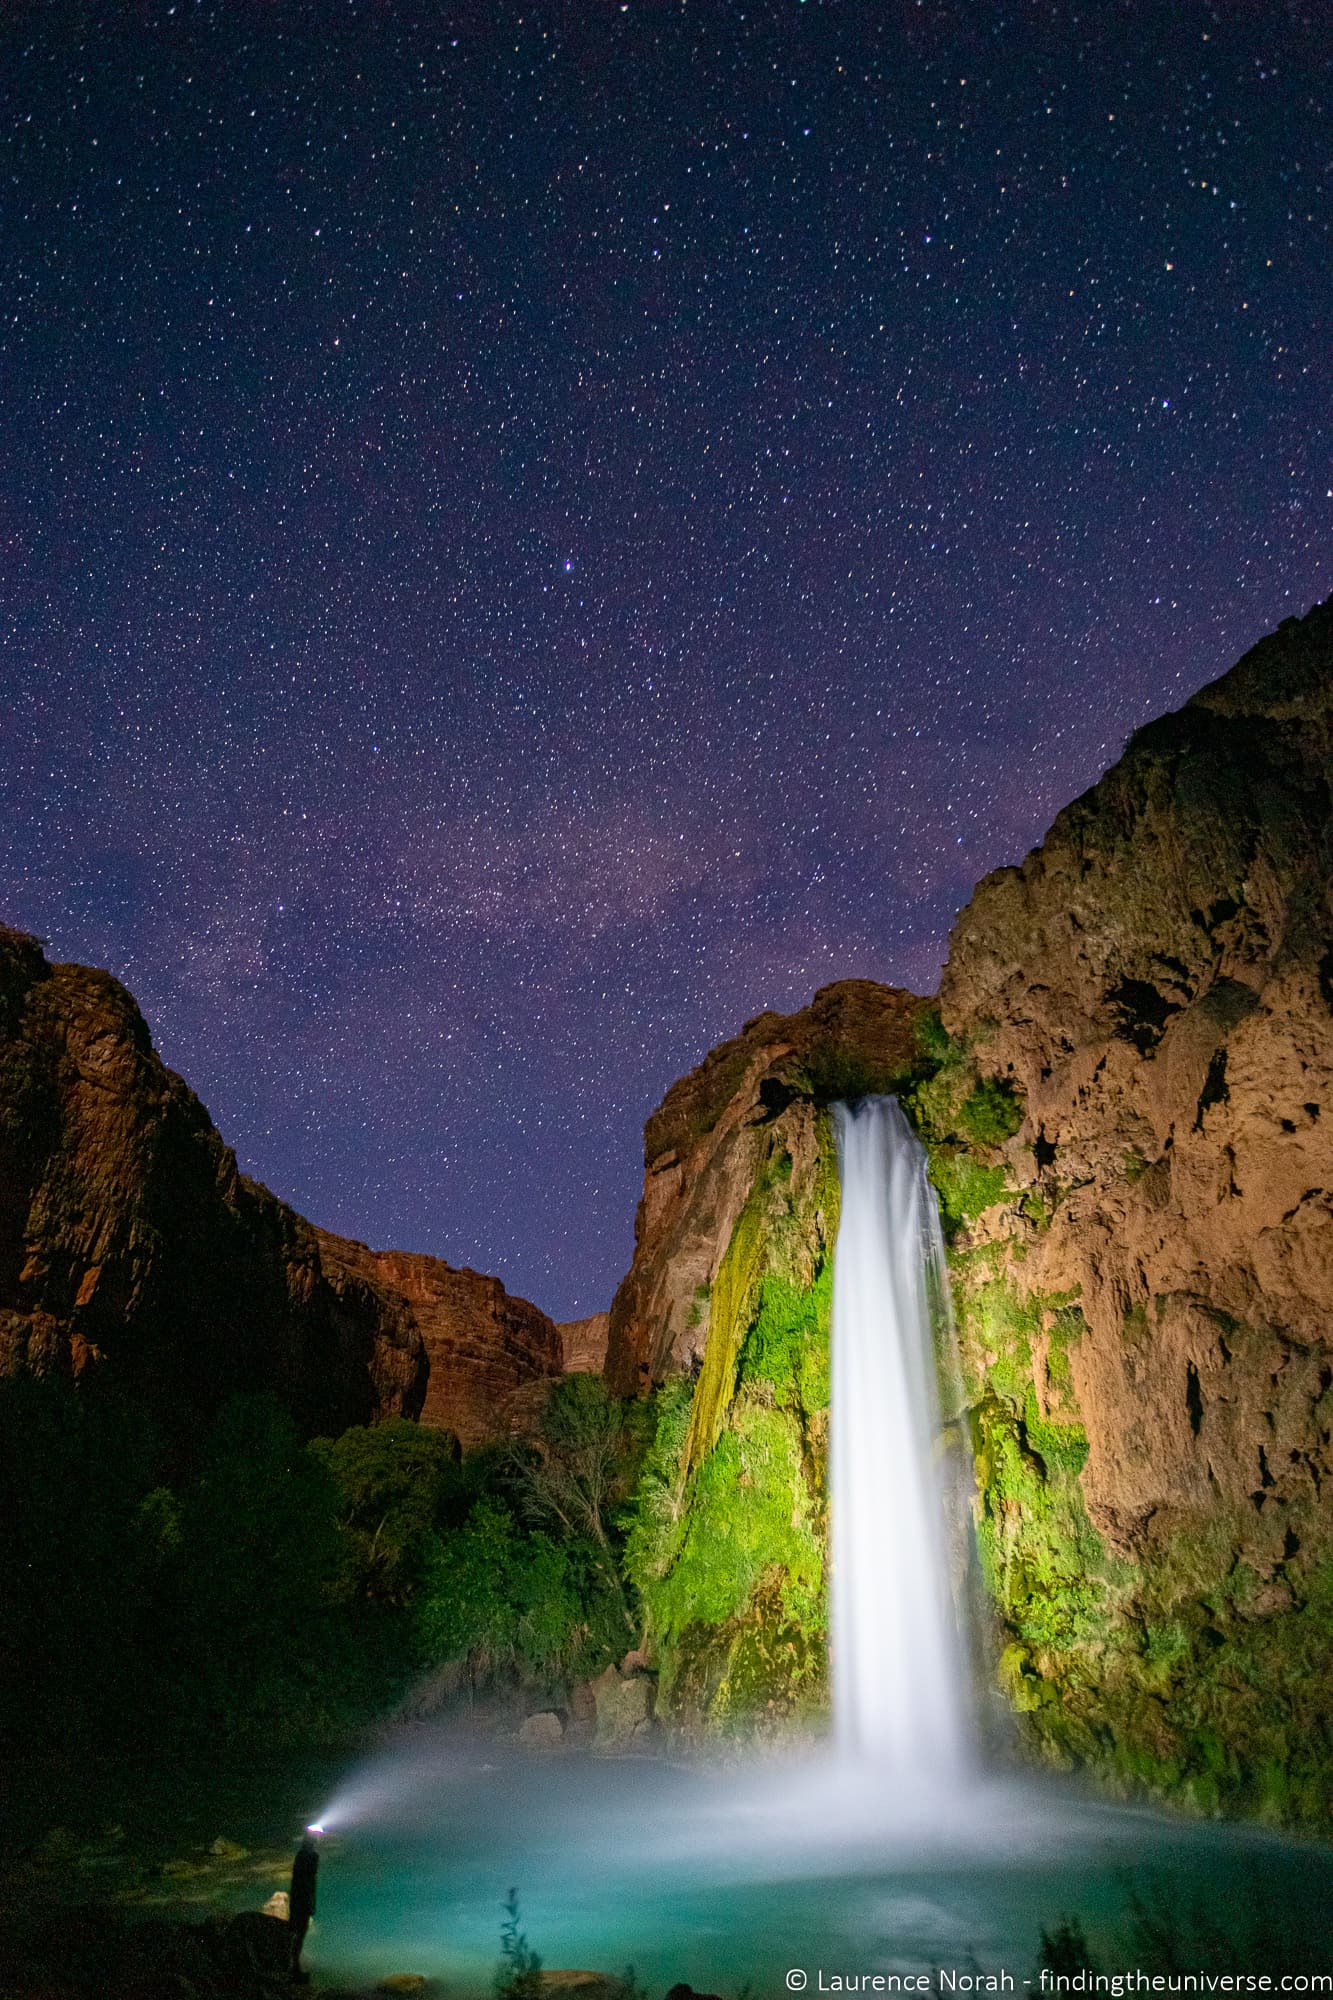
Table of Contents:
Photography Gear you Need to Take Pictures of Stars
First we’re going to cover the photography gear you need for star photographywhich might be less than you suspect. Then we’ll discuss the different types of night sky photos you can takeand the camera settings you need to use.
There are a few pieces of photography equipment that you will find will make star photography easier. These are as follows.
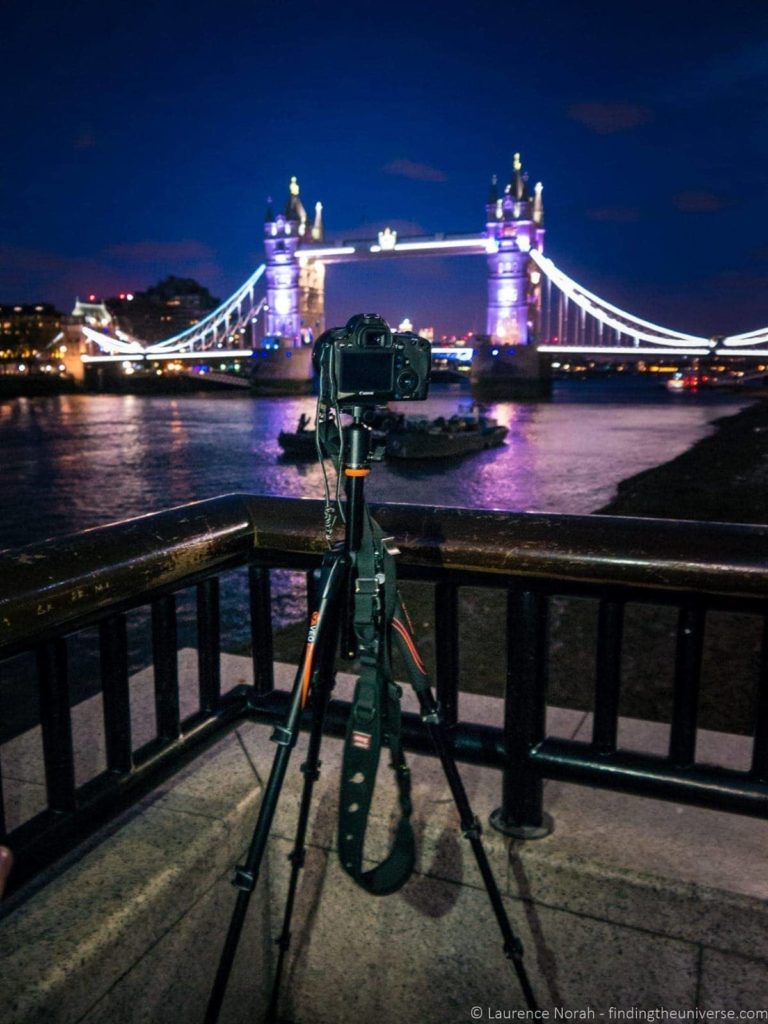
1 – A Tripod
Probably the most essential photography accessory to help you take pictures of stars is a tripod. This is because you need to have the camera kept still for time periods that are measured in secondsand there’s no way you can hold the camera totally still in your hand for that long.
Of courseif you wanted to balance your camera on a rock or something other than a tripodthat is feasiblebut my advice is that a tripod is a great way to improve your photography in so many ways (read why here)so you should just get one.
See this post for advice on picking the right travel tripodwith suggestions at a wide range of price points.
2 – A Remote Shutter Release
A remote shutter release is a tool that acts as an external shutter button to your camera. The simplest remote shutters are just a cable with a single button on that you connect to your camera. More advanced modelsalso known as intervalometersallow you set up sequences of shots over time. So for exampleyou can set your camera to take 100 images of 30 seconds each.
The reason you need a remote shutter release for taking pictures of the stars is two-fold. Firsteven with your camera on a tripodthe act of depressing the shutter button can cause small movements that result in image blur. The remote shutter release removes this problem.
The second reason is thatmost cameras require a remote shutter release for exposures over 30 seconds.when shooting in what is usually called “BULB” modewhere the shutter effectively stays open for as long as you depress the shutter button.
See here for a listing of remote shutters – make sure you get a model that is compatible with your particular camera brand and model number. They are relatively inexpensive – for examplethis Amazon model for Canon cameras is under $10. You can also get remote buttons for smartphones.
One thing – before you invest in a remote shutter releasecheck if your camera has WiFi and a companion smartphone app. If soyou can likely use your phone as a remote shutter release and save yourself buying one.
3 – A Camera with a Manual or BULB Mode
Obviouslyyou are going to need some form of camera for astrophotography. The main feature that your camera should have to make life easier for you is a manual modewhich means you can control all the important settings yourself.
For the best resultsthe settings you need to be able to change are the shutter speed and the ISOand it is good if you can also adjust the aperture.
You don’t need a high end DSLR for night sky photographyand you can in fact take pictures of stars with a smartphone if you are so inclined. The main thing is that you are able to adjust the shutter speed and mount it to a tripod.
4 – Ideally a camera with a large sensor and a fastwide-angle lens
To get the best results when you take photos of the stars you will need two things – a camera with a big sensorand a lens with an aperture that opens as wide as possible. Howeveryou can still get reasonable results (see below) using a less advanced camera like a smartphone or even a point and shoot camera.
Howevera bigger sensor will capture more of the available lightmeaning you will get better results when shooting at night. Ideally you will want a full frame camera to get the best results. See this guide to picking a travel camera for some suggested models.
The lens you use is also an important factor. A wide angle lens means you can get more of the sky into your shot. A wide aperture means that camera will let more light inalso giving you better results. Apertures are measured in “f” stopsand you want something like f/4 or greater – f/2.8 to f/1.2 would be perfect. See more on camera terminology here.
If you have an interchangeable lens camera like a DSLR or mirrorless camerathis is the sort of lens that is often recommended for astrophotography. Or thisif your budget will stretch to it. Just make sure you buy a lens that is compatible with your brand and model of camera.
How to Take Pictures of Stars
Now I’m going to go over the exact settings and my tips for taking pictures of stars.
Camera Settings for Taking Pictures of the Stars
Setting your camera up to take photos of the stars is not too hard. Firstyou will want to put the camera into manual mode (usually “M” on the mode dial)as well as manual focus mode (usually via a switch on the lens). If your camera doesn’t have either of these optionsthen try and find a long exposure mode at the very leastand some way to set the focus to infinity.
We also recommend shooting in RAWso you have more control over the editing process and can get the most out of your photos. See our guide to RAW in photography hereas well as a list of our favourite photo editing applications here.
You’ll want to set the camera up on your tripodand have it pointing at the sky. Set the aperture to as wide as it will go (usually a number between f/1.2 and f/5.6)and set the ISO to between 1600 and 6400 (this will depend on the capabilities of your camera).
You will want to set a shutter speed of between ten and twenty seconds to start with. In summary:
- Shutter speed: 10 – 20 seconds
- ISO: 1600 – 6400
- Aperture: f/1.2 – f/5.6 (the smaller the number the better)
One of the harder things in star photography is getting focus. It will usually be too dark for your camera to automatically focusso use manual focus mode. One tip is to use the camera’s display and zoom in on any bright stars it picks upthen use manual focus to make the star sharp.
Once that is all donepress the remote release buttonand wait. After the time is upyou should have an image of the stars that you can use as a benchmark to adjust your settings if necessaryand also to recompose any parts of the shot.
Depending on the type of star photo you want to takeyour settings will vary slightly.
There are two types of star photography that you can take. These are static photoswhich depict the night sky as we see itand star trail shotswhich are taken over long periods of timeand show the stars as trails of light as they move across the sky.
These two types of star photography are similarbut they require you to go about setting your shot up a little differently. I’ll go over these now.
How to Take Static Pictures of the Stars
Static star pictures are a little bit more gear dependentbecause you are limited by how long you can take the picture before the stars start to move across the sky. The time for this varies depending on your focal lengthbut as a general rule of thumbexposures longer than around 20 to 30 seconds tend to start showing the movement of the stars.
You can calculate the maximum exposure for your setup using the rule of 600. Basicallydivide 600 by the focal length you are shooting atand that’s your maximum shutter speed.
For exampleif you are shooting with a 100mm lens600/100 = 6. So your maximum shutter speed would be six seconds before the stars start to track in the sky. With a 16mm wide angle lens600/16 = 37.5 secondsgiving you a bit more time to capture the light.
In both cases thoughyou don’t have a huge amount of time to capture the static night sky before the stars start to create trails. As a result of thisstatic star pictures are the images that tend to require higher end cameras and lenseswhich let you capture enough light in the window of time available before the movement of the stars changes the look of the shot.
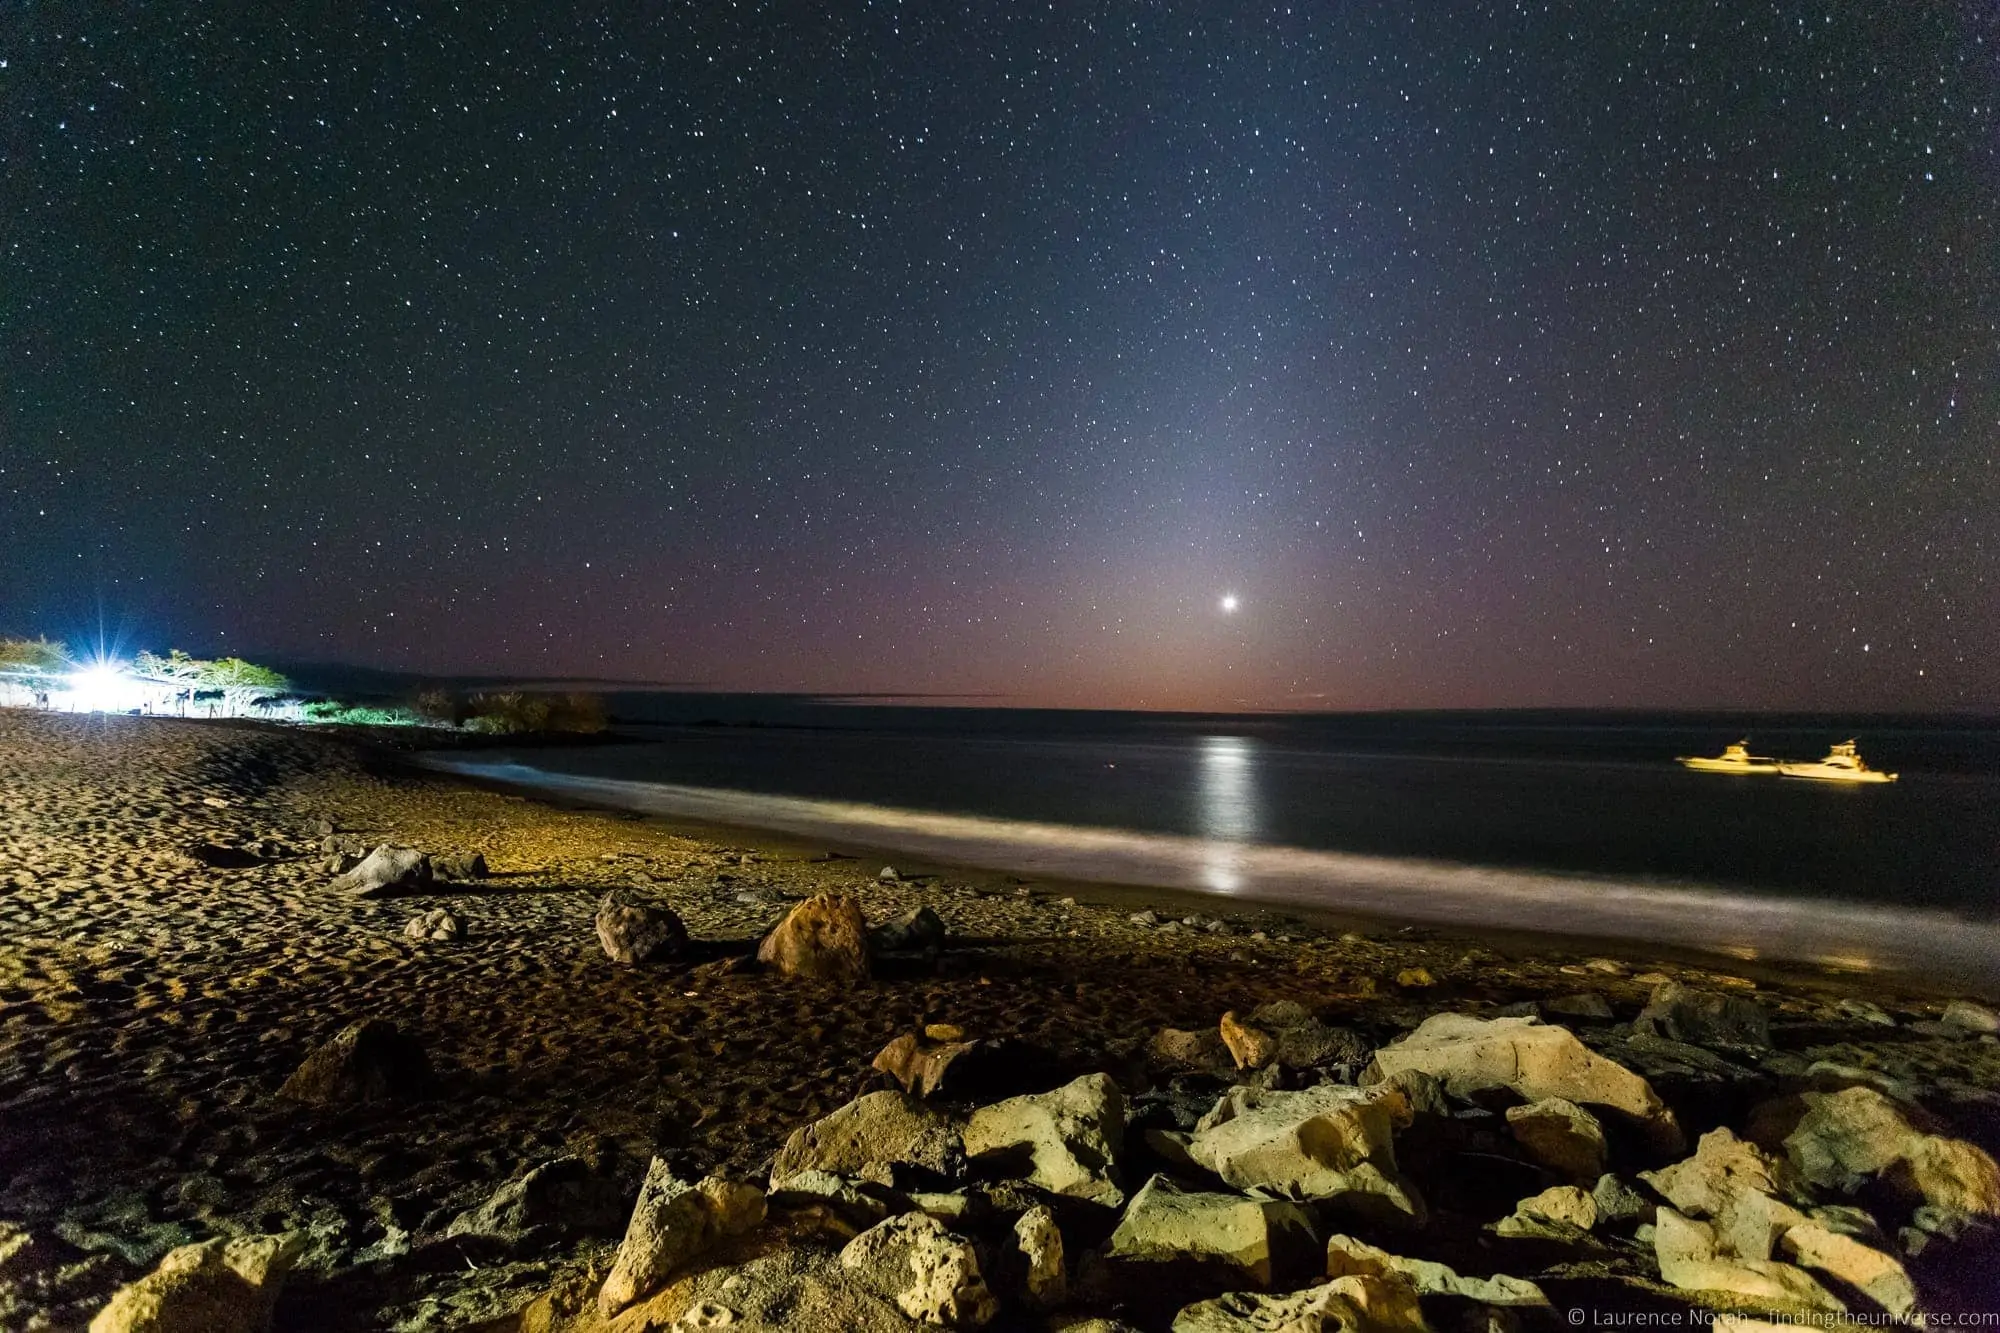
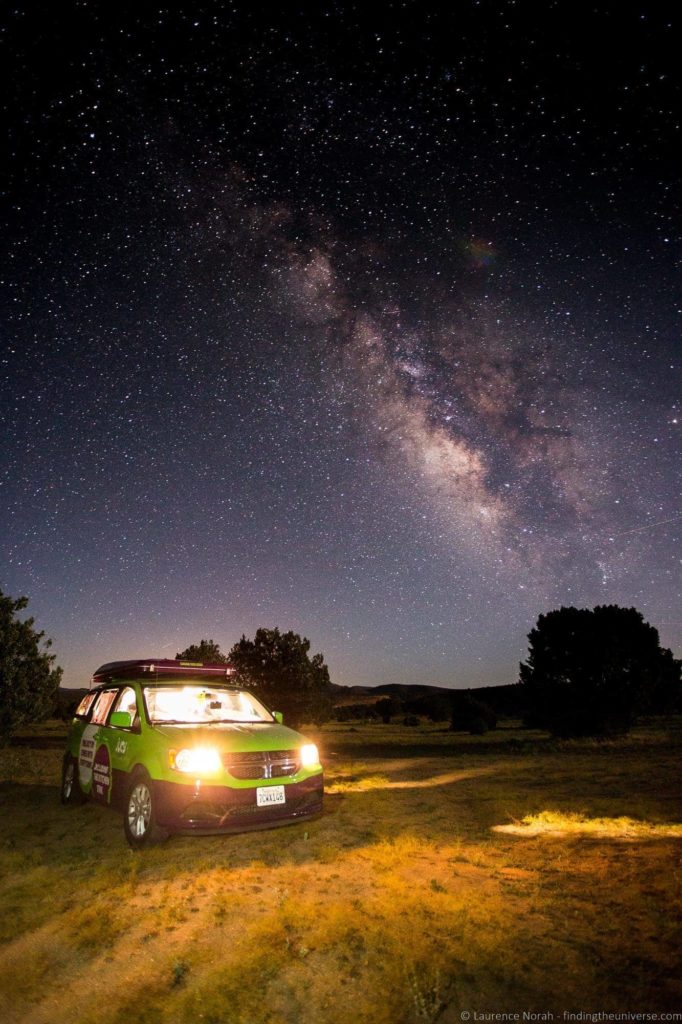
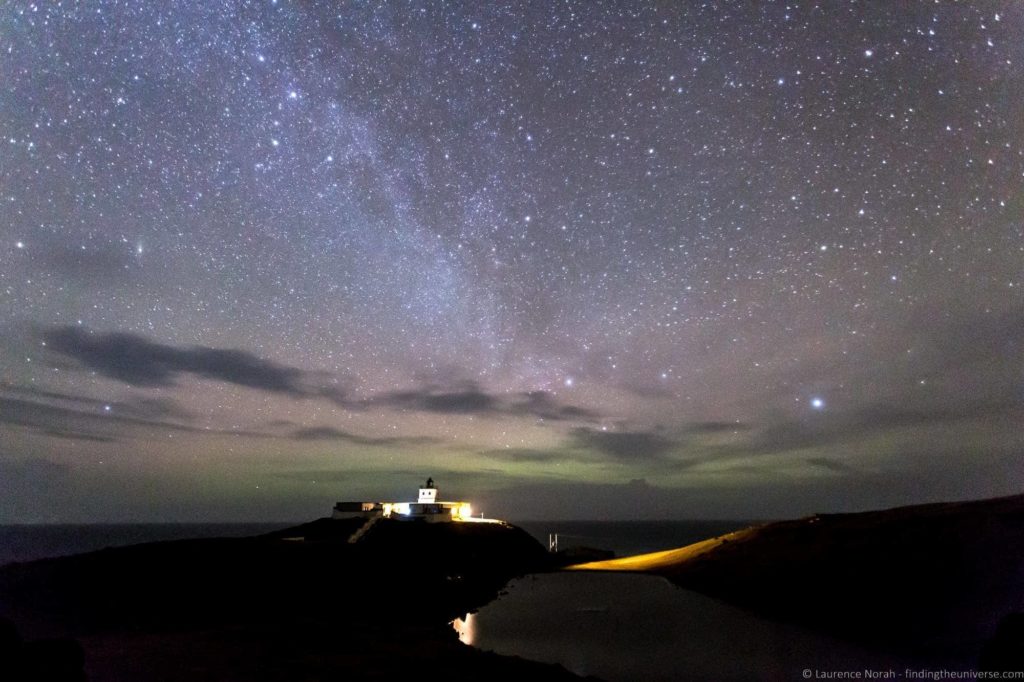
For static shots of the starscomposition is of course important. The milky way is a popular feature to compose aroundacting as a giant leading line into the cosmos.
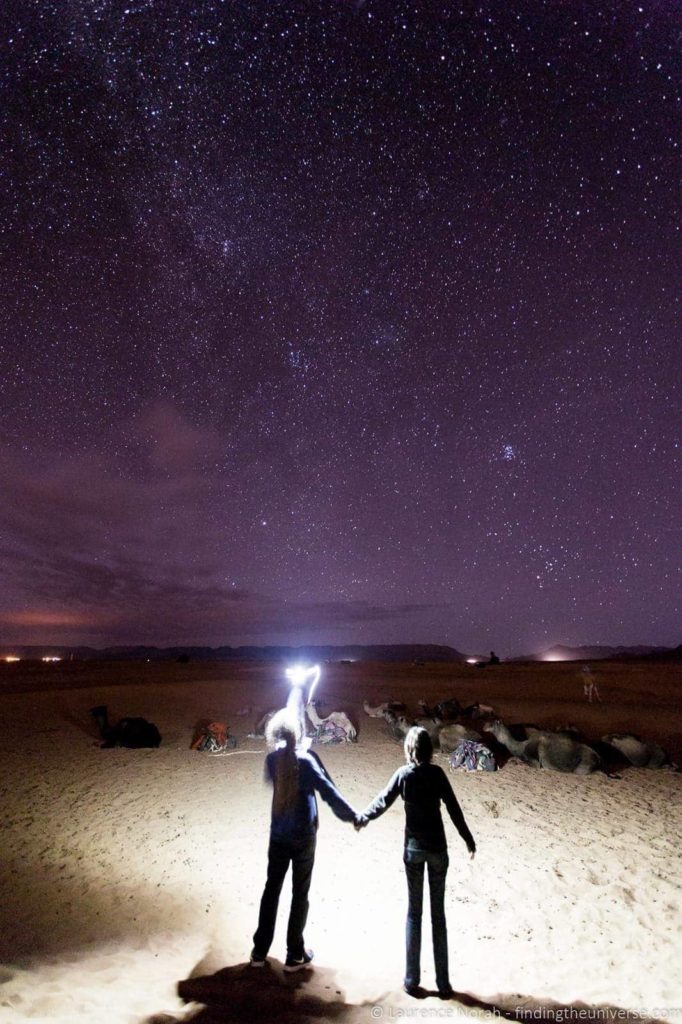
Having something in the foregroundsuch as a lighthousetreeor interesting structureis also a good idea – a plain shot of the stars isn’t always that impressive. If there isn’t much available light in the foregroundyou can illuminate the object with a flashlight – it doesn’t take very much light usually to make foreground objects stand out.
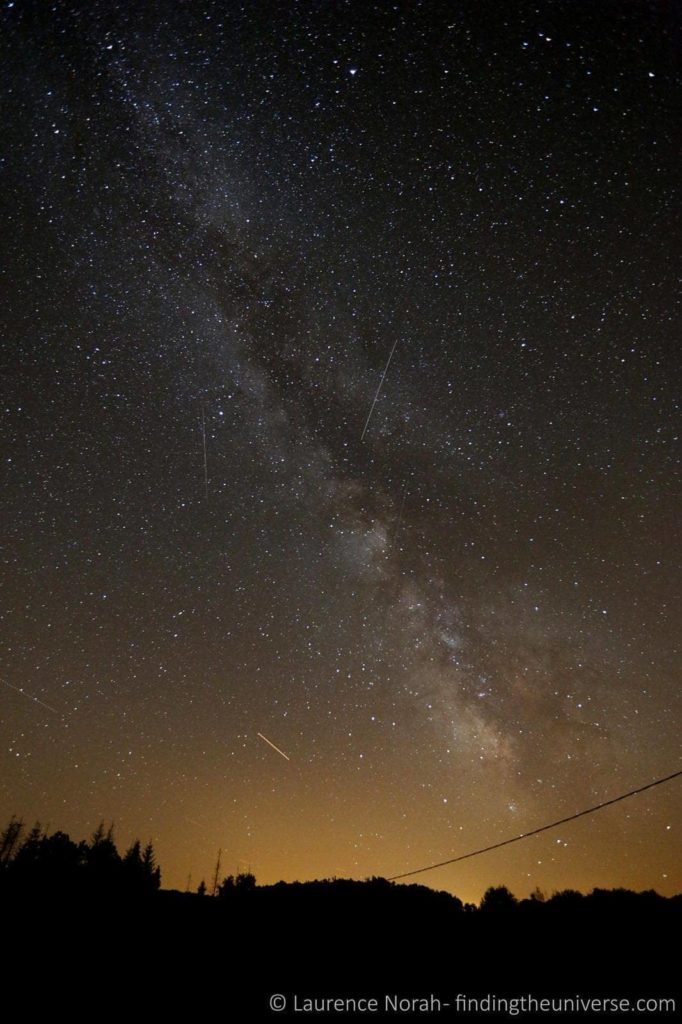
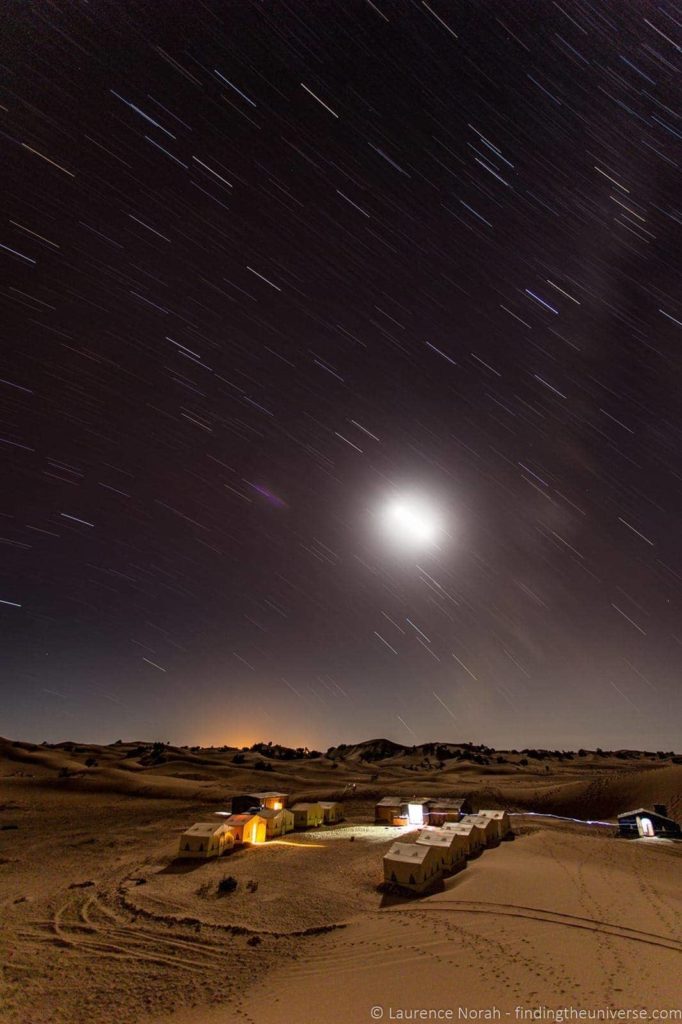
The settings for static star shots are what I would recommend for photographing events like meteor showers. Meteor showers happen fairly frequently throughout the yearsuch as the Perseids meteor shower which happens in August most years.
A static star shot will capture the beauty of the night sky with the meteors streaking through it. In the shot below you can see how this might look with a couple of meteors caught in the middle of the frame near the milky way (the line at the bottom is a plane).
How to Make Star Trail Photos
Star trails are a more accessible form of astrophotographyand one that you can do more easily with less expensive equipment. All you need is timeand a clear sky.
Againyou will want to set your equipment up on a tripodand plan your composition carefully. You will want to take a few test shots before committing to your final image to make sure everything looks as you want it – you don’t want to waste hours on a shot that isn’t quite right!
You will also want to have an idea of which direction the star trails are going to go. In the northern hemispherean easy tip is to find the north starwhich stays fixed. All the other stars will appear to rotate around the north starso if you use the north star in your compositionyou will get circular star trails.
Once you have the image properly framed and composedyou have to decide how long to expose the shot for. If you are using a high quality camerathen the best option is to do a series of shorter exposuresaround thirty secondswhich you can then stack together in a software tool like Adobe Photoshop.
Shooting a series of shorter thirty second exposures and then stacking them in software will result in cleaner imagesas super long exposures (over 30 seconds) can result in images with random pixels of different colourknown as sensor noise. To shoot a series like thisyou will need an intervalometerwhich will handle taking the sequence of shots for you.
If you are shooting with a smartphoneor a camera with a smaller sensor like a consumer SLRcompact cameraor mirrorlessthen you will probably want to use longer shutter speeds in order to get all the light in. You can also reduce the ISO down to a more reasonable 100 – 400. I’d suggest trying for exposures of an hour or longer and seeing how you do.
How to take pictures of stars with Android or iOS smartphones
It is possible to take photos of the night sky with an iPhone or Android smartphonebut don’t expect miracle results. The small sensors inside a smartphone restrict what you can dobut it is certainly possible. Photos of the Northern Lights for exampleare more than possible with a smartphone – see our guide to photographing the northern lights for more.
You will still need a tripod and some form of remote releaseas well as an app that lets you take longer exposures. For exampleon the iPhone you can download the NightCap Camera appand on Android there are a number of camera apps like Camera FV-5 which offers this feature.
Some recent smartphones have built in astrophotography modessuch as the Pixel phones from Google. If you mount these cameras onto a tripodthe phone will detect it is stationary and offer you the option to take a photo of the night sky. This will take some time (30 seconds to a few minutes)but will give much better results.
Whilst most smartphones without a dedicated night mode or astrophotography mode are unlikely to be able to pick up individual stars in the skyvery long exposures (measured in minutes or hours)will let you capture star trail shots. If you are feeling more advancedyou can pair a smartphone with a telephoto lenswhich will let you get shots of subjects such as the moon.
Finallyif you have access to a telescopeyou can put your smartphone camera to the eyepieceusing an adaptor like thiswhich will let you get really nice results of objects like the moon and take advantage of the optics in your telescope.
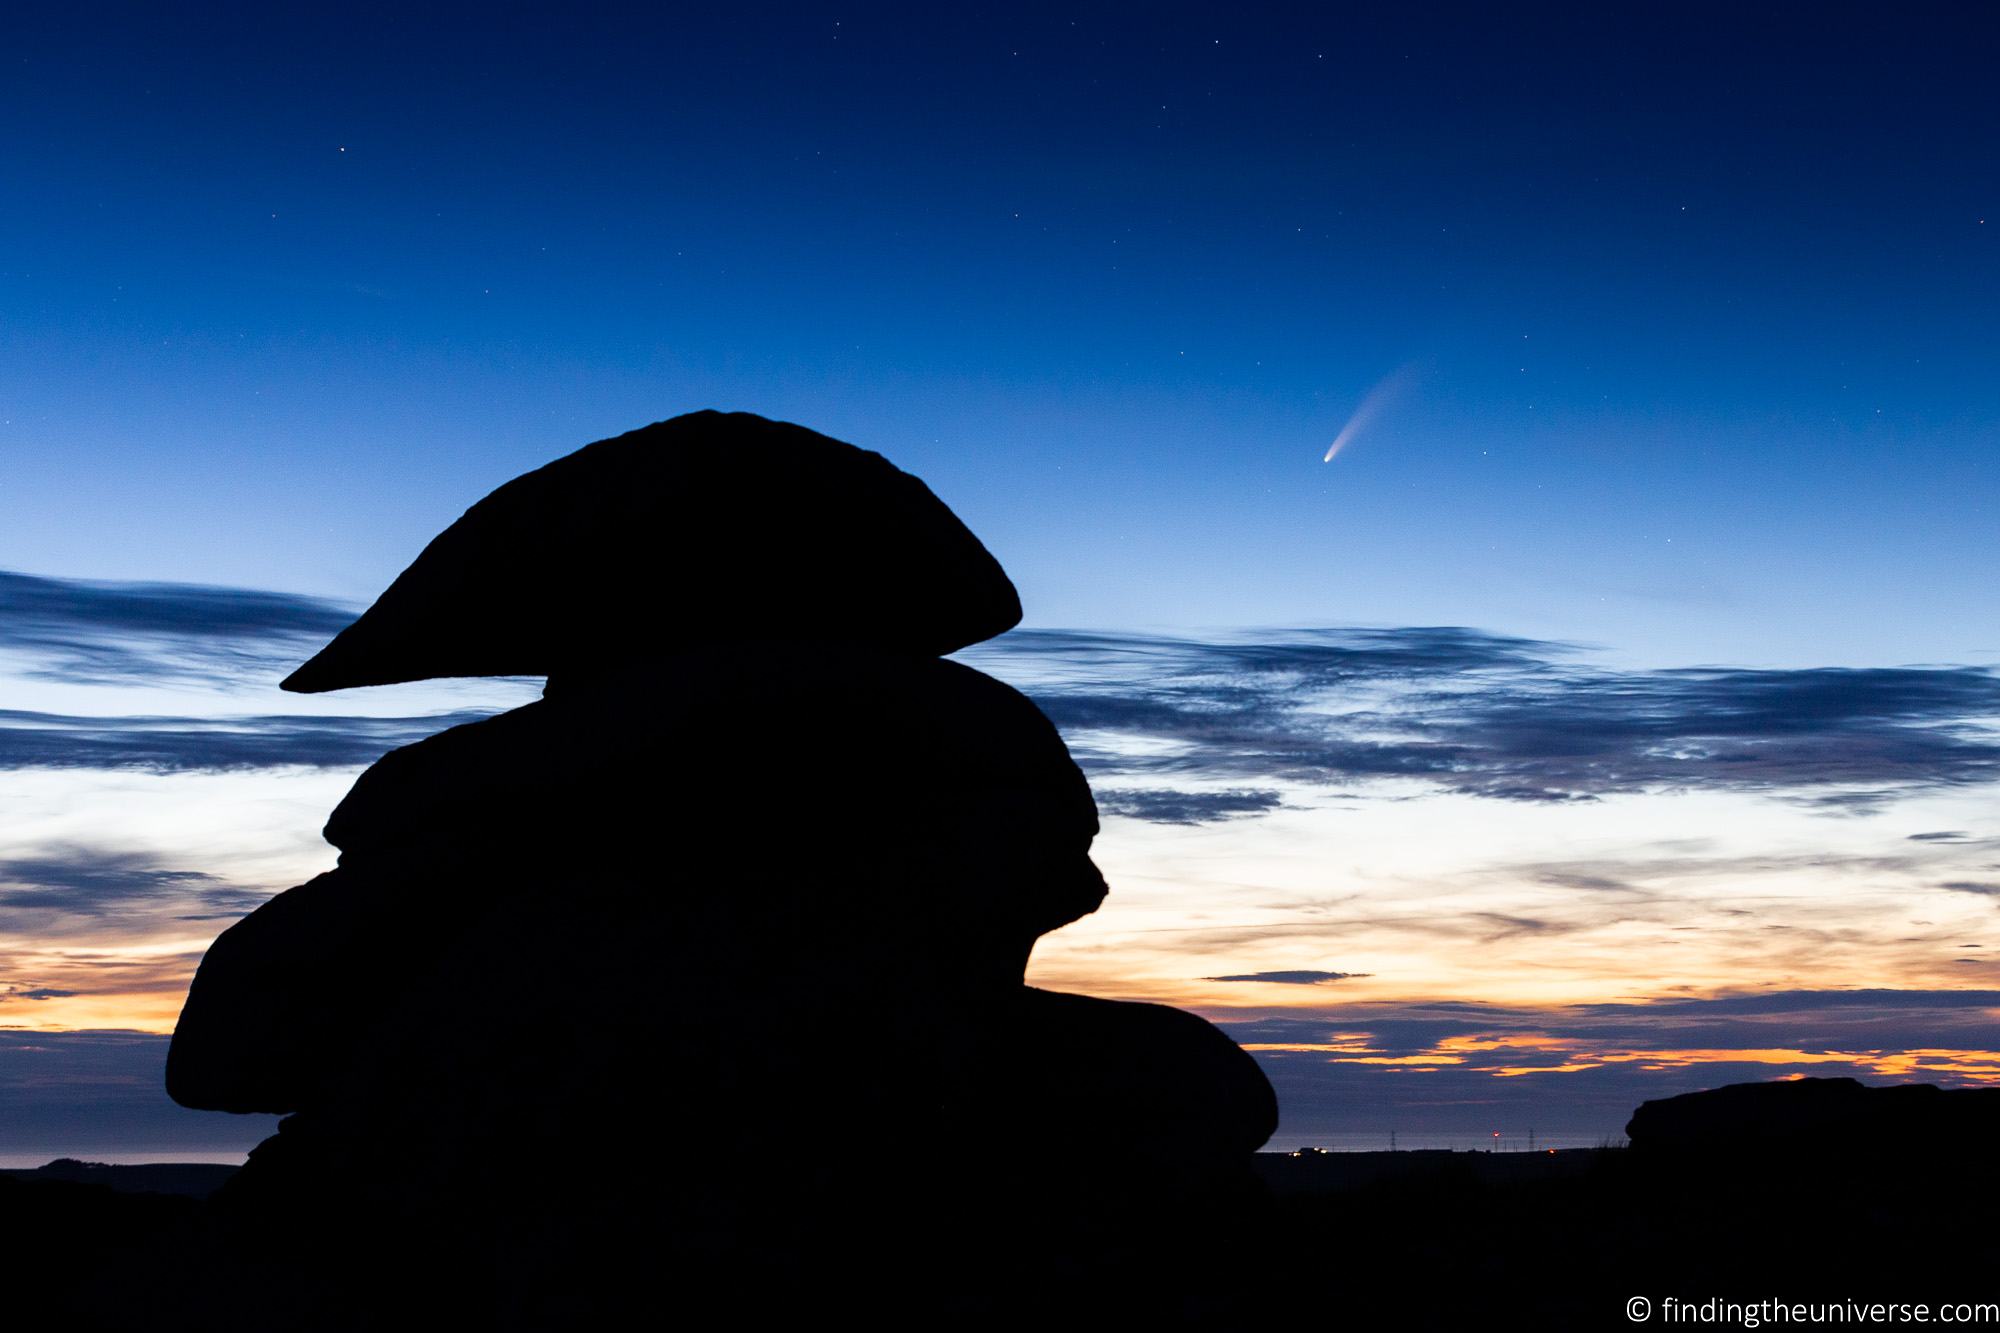
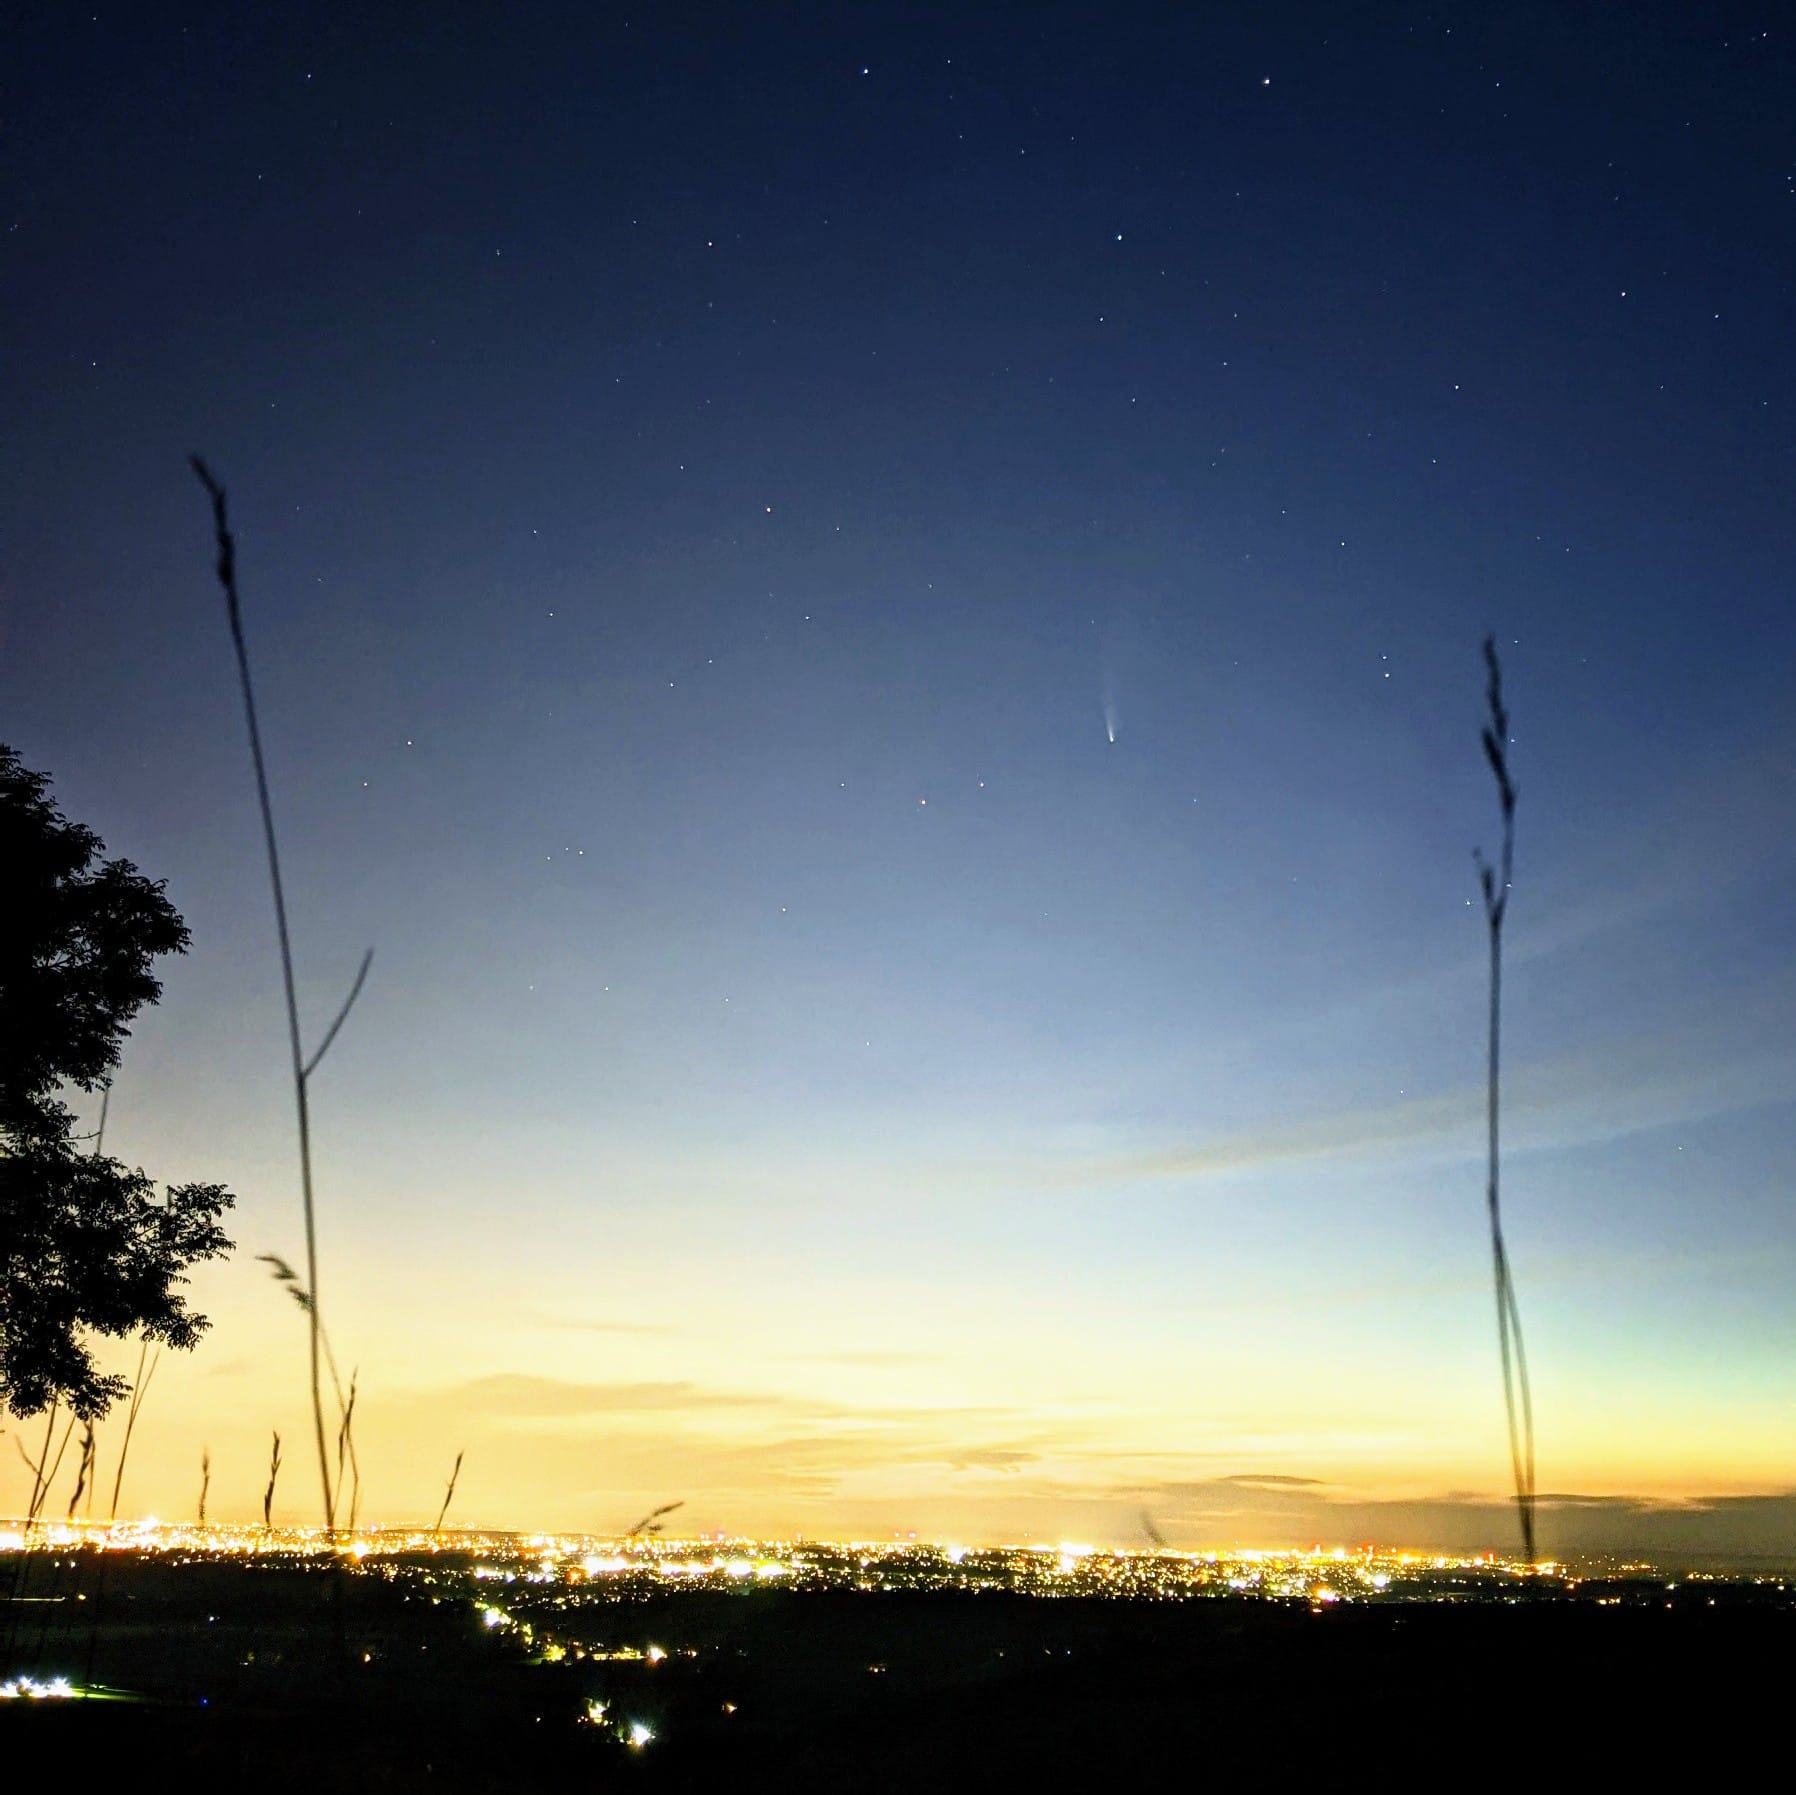
The below image shows a comet in the night sky with stars and was taken with my Google Pixel phone in astrophotography mode while the phone was mounted on a mini tripod. I was quite impressed by what it could do!
Apps to Help with Night Sky Photography
There are a few apps that are useful for night sky photography.
Firstit’s useful to have an app that can show you the location of the starsso you can orientate your shot and find things like the Milky Way or the North Star. I like the Sky Map app for Androidand Star Chart is a good option for iPhone.
Nextknowing what time it gets dark wherever you are in the world is very useful. For that I use the Golden Hour appwhich will tell you lots of useful information about the light at different times of the day.
Finallyif you’re into chasing the Aurorayou should get an app to notify you of aurora activity. There are a few optionsI like My Aurora Forecast which has lots of useful features.
Can you take Night Sky Photos with a Camera without Manual Settings or Interchangeable Lenses?
It is certainly possible to take photos of the night sky without needing a fancy camerabut you may be limited in terms of the quality of the images you getand how long you can shoot for.
I would definitely recommend checking your camera or phone manual to see what options you have for longer exposuresto see what you might be able to achieve.
Further Reading on Photography
Hopefully this post has helped you understand some of the concepts you need to understand in order to take pictures of stars and get started with night sky photography in general. I’ve got a few more resources around photography which I think you will find usefulwhich are:
- My series of photography tips articleswhich contain many more posts like this oneto help you improve your photographyas well as this introduction to taking better photos.
- If you need inspiration for locations for your next shoottake a look at my series of photography location guides
- Our always updated guides to the best travel camerathe best travel camera lensand the best compact camera for travel
- If you’re looking for more advice on specific tips for different scenarioswe also have you covered. See our guide to Northern Lights photography, long exposure photography, fireworks photography, tips for taking photos of starssnow photographyand cold weather photography.
- A guide to neutral density filters and tips for taking pictures of yourself
- If you’re in the market for a new camera to take picture of stars with after reading this postsee my guide to picking the best camera to help you decide what to buy.
Looking to Improve Your Photography?
If you found this post helpfuland you want to improve your photography overallyou might want to check out my online travel photography course.
Since launching the course in 2016I’ve already helped over 2,000 students learn how to take better photos. The course covers pretty much everything you need to knowfrom the basics of how a camera worksthrough to compositionlightand photo editing.
It also has a lot more detail on night photographyincluding astrophotography and tips on photographing the moonas well as tips on long exposure photographyflash photographyand HDR photography.
You get feedback from me as you progress through assignmentsaccess to webinarsinterviews and videosas well as exclusive membership of a Facebook group where you can get feedback on your work and take part in regular fun photo challenges.
It’s available for an amazing one-off price for lifetime accessand I think you should check it out. Which you can do by clicking here.
And that’s it for this post on astrophotography! Hopefully you’re all fired up to get out and take some awesome pictures of the sky. As alwaysif you have any questions or feedbacklet me know in the comments below.

Jim Brannan says
This seems like a strange option to offer on phones these days. Most people living in cities don’t even get to see stars anymore.
Laurence Norah says
Truebut hopefully they might want to head out of the cities to at least try the feature out 😀
Emily Hines says
These are so helpful! I haven’t experimented with star photos but this guide makes it look easy.
Laurence Norah says
Thanks! It just takes a bit of practice 😀
Amanda says
Thanks for this! I’ve managed to take some nice shots of the Northern Lightsbut have yet to master star photography – I think I’m not setting my ISO high enough! Hopefully I’ll have some opportunities to try some of these tips in New Zealand this month!
Laurence Norah says
Yepa high ISO is definitely key to success for static star pictures! Looking forward to seeing your results 😀
budget jan says
I just purchased the NightCap camera app for my iphone after reading about it in this post. Can’t wait to try it on the night sky! Wonderful inspiring photos.
Laurence Norah says
My pleasure – let me know how it works for you!
Kristin says
This is so awesomeyou guys! I admit: I’ve never really played with star photographymainly because I rarely travel with my tripod. But now you’ve inspired me to take it with me on my next big-sky adventure. Thanks for these tips!
Laurence Norah says
Our pleasureand thanks very much! Hopefully you get out and get some awesome star photos now 🙂