


Shopify isn’t just an e-commerce platform. It’s an intuitive service that guides determined online sellers to build a fully fleshed-out website.
This guide lays out the steps to set up a Shopify store.
Whether you’re an entrepreneur with a brick-and-mortar store looking to establish yourself online or a new business looking to harness the power of Shopifythis Shopify tutorial for beginners is for you.
How to Set Up Shopify Store Step-by-Step
Here is everything potential merchants need to know about setting up their own online store with Shopify.
Step 1: Create An Account with Shopify
Creating a Shopify account is the first step to starting an online Shopify store. What most people need is an email address and a passwordand that’s it!
Is Setting Up A Store On Shopify Free?
A Shopify store is free to use for the first three days. During that timemerchants may add products to their storescreate collectionsand design their stores and websitesamong many other things.
Shopifyhoweverdoesn’t have a “free forever” version if that’s what you’re after.
After the three free daysShopify charges users $1 for their first month; that is if users decide to continue using Shopify.
After the one-dollar monthusers will need to choose a plan.
Choose a Shopify Plan

There are three main Shopify plans to choose from:
- Basic (39 USD/mo Monthly Billing; 29 USD/mo Annual Billing)
- Shopify (105 USD/mo Monthly Billing; 79 USD/mo Annual Billing)
- Advanced (399 USD/mo Monthly Billing; 299 USD/mo Annual Billing)
Step 2: Add Your Products
This is the first thing Shopify suggests most users do. Adding products allows Shopify to keep inventory and lets users manage product information from one dashboard.

To add productsfirstnavigate to “Products” on the lefthand-side menu.

Thenclick on “Add Product” on the upper right.

Fill out the necessary fields with the corresponding information for each item. Indicate the TitleDescriptionand Price of each catalog item.
Alsohave as much media as possible.
This will make the product appear more engaging to store visitorspiquing their interest. Shopify accepts imagesvideosand 3D models. If you have the resources to provide all threego for it.
Drag and drop the respective files onto the “Media” box to add photos and videos that will represent the product on your Shopify store.

Also indicate the item’s weightif applicable. This will allow Shopify to estimate shipping costs.
Once everything’s filled outhit “Save.”
Repeat the above-mentioned process for every product you wish to sell on your Shopify store.
Whenever a product is presented on the Shopify-created siteits details will automatically reflect updated information edited from the product management dashboard.
Step 3: Build the Shopify Website
Now that products are added to Shopify’s systemwe may proceed with building the customer-facing site.
The Shopify-powered site serves the following purposes:
- The business’ online front
- An online brand experience
- An online store; an additional source of sales
- Official news sourcegood for PR
Here’s how merchants can build their Shopify site:
Select a Shopify Theme
Shopify themes are starting templates used to build sites and stores. Themes have their own designs (e.g.fontcolor scheme)sectionsbuilt-in appsand functionality.
Upon setting up a Shopify accountShopify already provides users with a theme they can use — the “Dawn” theme. Most starting e-commerce stores can benefit from this free default theme’s cleanuncluttered look.
But if you’re an established store that needs more stylistic features and store functionalityyou may opt for paid themes.
Paid themes provide heightened functionality for your storesuch as upselling and cross-selling features and sale notifications.
Here’s how you can select and apply a theme to your store:

From the "Themes" tab underneath "Online Store," click on “Add Theme.”
A drop-down will appear. Click on “Visit Theme Store.”
Click “Explore Themes” and look for the theme that best suits your brand.
If you’re a food businessan ideal theme would be the free Taste theme.
Electronics retailers can benefit from Electroa high-speed Shopify theme.
Do note that every theme is just a starting point. You’ll have ample customization opportunities later to build a more engaging and on-brand site.
Build an Enticing Homepage
Go to the “Themes” tab from the Shopify admin panel.
Then click “Customize.”
This will take you to Shopify’s website builder. Take some time to explore the builder. It will become more intuitive after a while.
For the homepagethis part must contain the following:
- A hero image with a brief but descript text about the brand’s value offering
- Product details that distinguish it from what’s currently on the market
- Some UGC and testimonials.
Once these items are there and you’re satisfied with your editsclick “Save” to apply your changes.
There are tons of ways to go about creating the homepageso much sothat an entire article can be dedicated to creating a stellar one.
For nowwe’ll focus on setting up your Shopify store.
Creating High-Converting Product Pages
The Dawn theme includes templated product pages for each product you’ve added to Shopify (Refer to “Step 2: Add Your Products”).
Howeveryou may need to customize your product pages beyond what Dawn automatically sets up. This will make your products stand out more from the other drop-shippers who sell the same product as you do.
We suggest having the following to truly convert site visitors:
- Media taken from different angles.
- Highlight the product’s features. Wise use of imagesvideosand typography can help elaborate a product’s selling points.
- If you’re selling a highly-saturated productyou may need a comparison section
- Product-specific UGC and testimonials.
Having the above-mentioned bullet points on your product page will capture visitor attention and address any potential reservations that reluctant shoppers might have.
Notice how Edifier’s product images are taken from various angles.

Source: Edifier
FurthermoreEdifier’s product page includes additional product informationwhich is presented in an engaging layout and shown to visitors as they scroll down.

Source: Edifier
This wise use of headers and images presents the product’s features more engagingly — in a manner more befitting of the brand.
To achieve a similar outputwe suggest using drag-and-drop page builders.
Read more:
- One Product Shopify Store: How To Build & 06 Successful Examples
- How to Sell Services on Shopify: 5 Steps to Building a Store
These apps allow merchants to easily make compelling pages. They’re also highly customizable and flexibleso the merchant’s design options aren’t limited to what the Shopify theme allows for. More on drag-and-drop page builders later.
TheFarmer’sDog lays out on their product page (which is also their homepage) how different they are from standard pet kibble.

Source: TheFarmer’sDog
To make a comparison sectionfirstlist your value propositions. Thencontrast those with market-standard features and practices that aren’t too appealing to consumers. (e.g.Hand-made with love vs. Mass-produced with little QA)
Once those are decidedthink of how to lay them out on your product page. You may use drag-and-drop page builders to create a streamlined comparison section.
As site visitors reach the end of Blendjet’s highly-visual product pagea testimonial section wraps everything upas shown below:

Source: Blendjet
To have a robust testimonial sectionmake sure you’re getting loads of testimonials first.
Use a brand monitoring tool to look for online mentions of your product or brand. You may also incentivize customers to provide reviews by rewarding them with something like a discount coupon.
Thenuse a testimonial appsuch as Judge.meto process your collected reviews and present them on the page of your choice (e.g.collection pageshome pageproduct page.)
Use PageFly
You might get limited stylistic flexibilitydepending on the theme you’re using.
Merchants would need to acquire multiple themes if they want to jump between different swhich isn’t very cost-effective.
Alternativelyusing drag-and-drop page builders can offset this limitation.
Merchants can use these page builders to create any page that their mind pictures; no need to acquire additional themes or learn how to code.
PageFly is one notable drag-and-drop builder we suggest merchants use.

It provides easy-to-usedrag-and-drop features that make the process as intuitive as something like Canva.
There’s also a wider range of customizationallowing merchants to construct captivating pages.
PageFly allows users to set up one custom page entirely for free; which is sufficient for what most starting businesses need.
Using PageFly is optionalbut capitalizing on its one free custom page offering provides plenty of opportunity to stand out from the competition.
Step 4: Set Up Payments

From the main dashboardclick on “Settings” on the lower left.

Select “Payments.”
Note: Some countries will see the option to set up Shopify payments. In this casesimply click on “Activate Shopify Payments,” and fill out the fields with the necessary information.
Otherwisemerchants may use their chosen payment providerPayPalor all of the aforementioned.
PayPal Payments
To activate PayPal paymentsyou must first have a business PayPal account. Not a personal one.

From the “Payments” tabclick on the “PayPal” box.
After thatclick on “Complete Setup.”
Shopify will open PayPal in a new tabprompting the user to fill out some required information.
Once that’s donePayPal should be properly set up.
Other Payment Providers
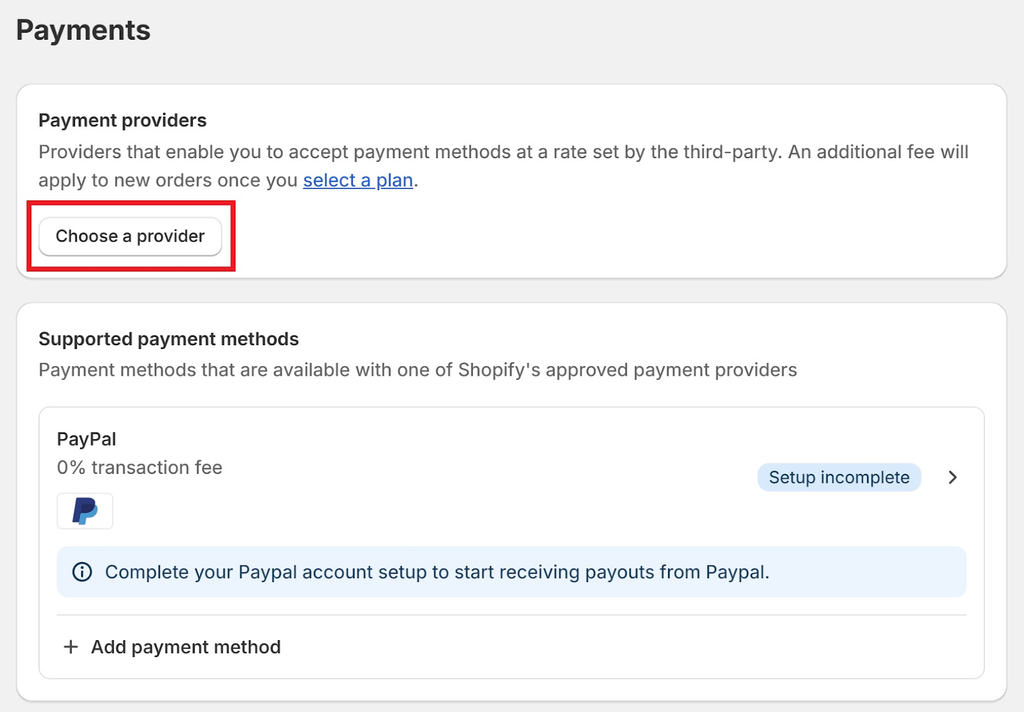
From the “Payments” tabselect “Choose a provider” and choose your desired payment provider from the selection.
Make sure that your chosen provider is available in your country.
The succeeding steps will depend on the payment provider you’ve chosen. These will usually involve installing the provider’s respective Shopify app. Follow the steps required for each providerand you should be good to go.
Manual Payment Methods
Manual payment methods are not mediated nor captured by Shopify. These are done outside of the platformand henceare riskier and require manual merchant approval.
Commonly used manual payment methods include bank depositmoney orderand cash-on-delivery.
Setting up manual payment methods is simple.
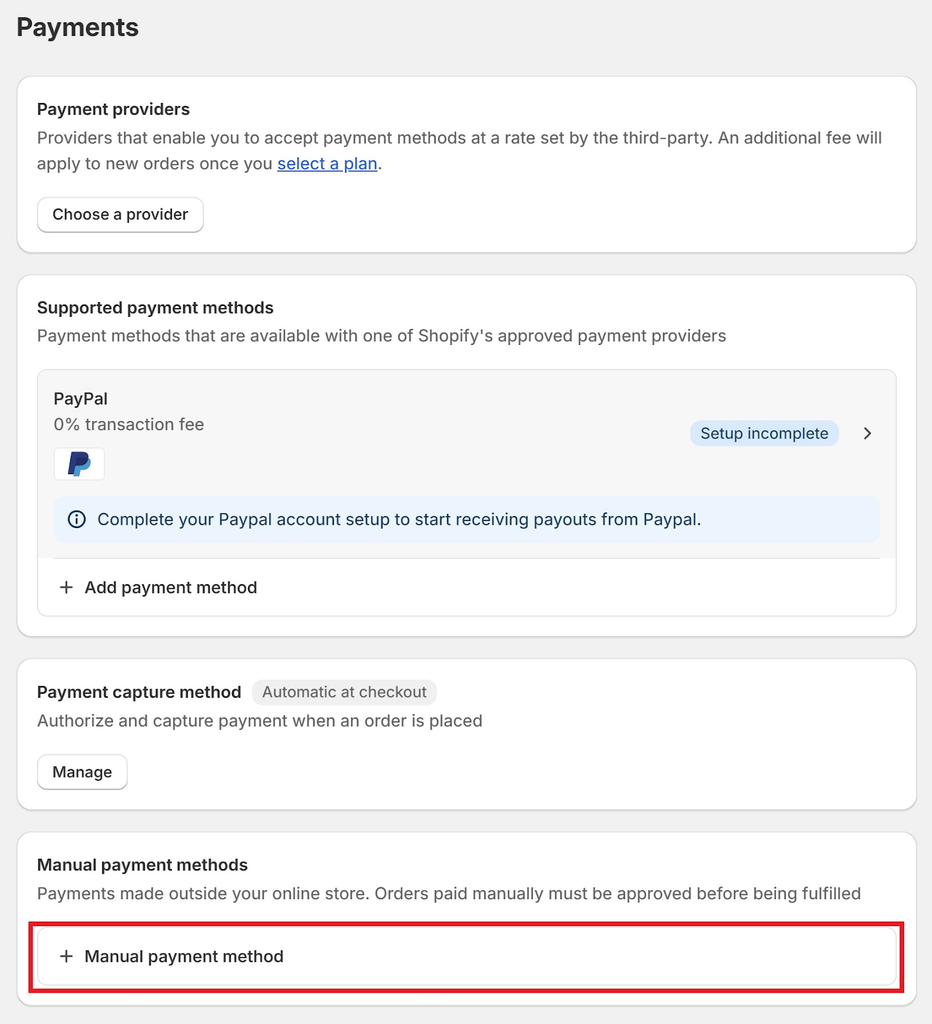
From the “Payments” tabclick on “+ Manual Payment Method.”
Select your desired method from the dropdown.
There are two fields to fill out — “additional details,” and “payment instructions.”
For “additional details,” describe to the customer what the payment method is and how it’s done.
For “payment instructions,” give the customer detailed instructions on how they can pay for their order.
Finalize by clicking on the “Activate” button.
Manual payment methods can be tedious since merchants would have to check each order against their payment records and approve them manually.
Howeverit provides tremendous flexibility for customers who don’t have a credit cardPayPalor an electronic wallet.
Step 5: Set Up Shopify Shipping
Shipping on Shopify is a vast topic — one we can spend hours talking about. But for the sake of brevitywe’ll just discuss the basics that can benefit most businesses. This includes setting up shipping and sending out customers' orders.
Setting Up Shipping

From the main dashboardclick on “Settings” on the lower left.

Select the “Shipping and Delivery” tab.

Click on “General Shipping Rates.”
Tweak your “Shipping Origins” to match your warehouse’s address.
Meanwhileyour “Shipping Zones” should match the serviceable area of your business.
You can add shipping zones by clicking on “Create Zone.”
Note: If you find that you can’t add a particular country to a shipping zoneyou may need to add that country to a market from the “Markets” tab. Make sure that the market is set to “Active.” Only then can the country be added to a shipping zone.
You can edit the ship rates and options for each shipping zone you make.
For examplelet’s say you have a:
- Domestic Shipping Zone
- International Shipping Zone.
You may have something like Standard Shipping for $5 for the Domestic Zoneand then a different rate for those residing within the international shipping zone — sayfor example$20.
Once you have those settings finalizedcustomers will now have the option to choose a shipping option at checkout.
Sending Out Customers’ Orders
So nowhow do you get around to actually sending out the orders?

Orders made on the Shopify store can be seen in the “Orders” tab from the main dashboard.
Merchants can simply click on an orderand then select “Create Shipping Label.”
Then “Print Shipping Label.”
Once the shipping labels are printedattach them to their respective packages and send them out for delivery. (e.g.third-party shipping apppost officeetc.)
That’s it.
Conclusion
Shopify is an excellent integration that helps businesses scale and expandwhether that business is a brick-and-mortar store or one that has already established an online presence.
Creating a Shopify store can be summarized in five steps — 1) creating a Shopify account2) adding your products to the Shopify system3) building your company website using Shopify4) setting up a way to accept payments via Shopifyand 5) setting up a shipping system.
Great! You’ve successfully set up your Shopify store.
You now have an additional and reliable source of sales and revenue; as well as a storefront in the online world.
But like any other businessyou need to closely monitor itmarket itand make well-informed business decisions to keep it afloat.
Read more:


