In this Calendar guidewe provide a comprehensive description of the calendar tool known as Calendly. The guide begins with a section that defines the digital calendar tool and what it can do for you in 2023.
Nextyou will learn how to set up a Calendly account and get started using this popular digital calendar. After thatthe Calendar guide explains how to set up your Calendly availability as well as how to invite people to your eventsincluding illustrations and examples so you can see how this calendar tool can work for you.
Another section in this Calendar guide is devoted to Calendly for teamswhich can be beneficial if you run a company and want to use the more advanced enterprise features available. The next two sections of this guide on Calendly covers integrations and embed options to illustrate how much more you can do when you add Calendly to your portfolio of tools. Besides listing what you can integrate and how you can embed the calendarour guide will walk you through the steps to integrate and embed. Finallythe Calendly guide covers the security features used to protect your data.
There’s only one thing that could possibly waste time more than a meeting—and that’s trying to arrange the meeting in the first place.
We all have tight schedules. We all have the smallest of gaps into which we can fit meetings. Trying to find a time when two different people have even a spare half-hour can be a serious hassle. Add one or two moreand the process becomes harder still.
The usual process is to exchange emails or shoot messages back and forth on a networking app. It’s like playing an uncomfortable version of “Battleships” in which each side has to avoid hitting an opponent’s obligations.
Some digital calendar makers have tried to make the process easier by allowing users to share their calendars. Their platforms have multiple calendars—one for work commitmentsanother for schoola third for familyetc. To help someone find a time to schedule a meetingthey can share a particular calendar and set their own privacy setting. Colleagues or clients can see what they’re doing or just when they’re available.
Butthat still requires sharing more information than necessary. A client doesn’t need to know that you’re busy at 10 a.m. on Friday morning.
What is Calendly?
Calendly is automated scheduling software that has been designed to make that process of finding meeting times easy. The principle is simple. Connect your calendar to Calendly. Choose the calendars you want Calendly to check. Define the duration of the meetings for people to choose. Andshare a link that brings people to your Calendly page.
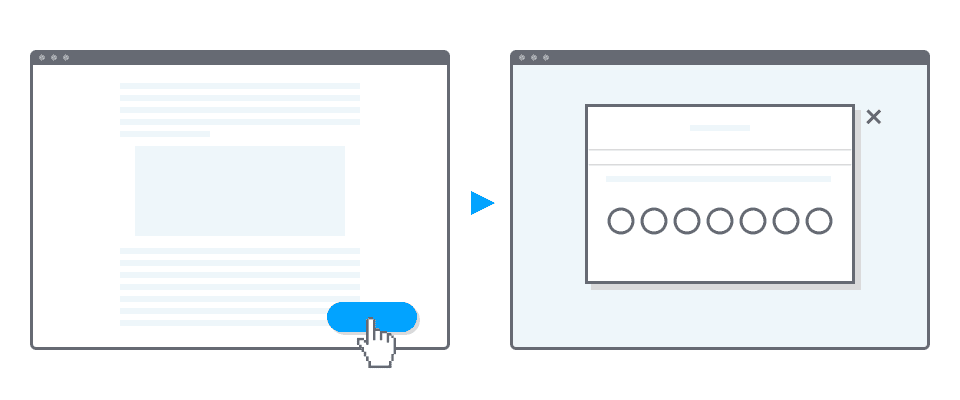
When they reach that pagethey won’t see your calendar. Insteadthey’ll be able to choose the kind of meeting they want to hold with youwhich will include its duration. Calendly will check your calendar and present the days and times on which you’re available.
A clienta colleagueor a customer won’t see any more information than they need. They won’t have access to your calendar. They’ll only be able to see when you can meet them and book a time for a particular kind of meeting.
It’s like having your own social secretary. But, that’s just the beginning. Once you’ve built a system that can identify the gaps in a calendaryou’ll have a platform that can do a lot more for your business in 2023.
- Create Different Event Types
One thing a meeting scheduler like Calendly allows you to do is to create different kinds of events. So a coach could offer not just fifteen-minute meetingsbut also allow clients to book fitness sessions of different duration. A car showroom could allow customers to book test drivesarrange meetings with sales staffor meet with the financing expert. A school could use Calendly to take the pain out of arranging times at parents’ evening.
- Embed Availability On A Website
Those opportunities can also be embedded on a website. There’s no need to drag potential clients or customers to a calendar platform that they’re not familiar with. The coach can simply offer a “Book Now” button on their website and let their clients choose their moment. It raises conversions and makes the booking process so much easier.
- Collect Payments
Andit’s even possible to collect payments with Calendlywhich takes scheduling to a whole new level. Now that coach can take a fee when someone books a session. An adventure park can let people pay when they book a time for a ride. A consultant can give an hour of their timeand know they’ve been paid for it. Calendly manages to solve two problems at the same time.
What you end up with is more than a scheduling service. You get a complete time management solution that’s also a point of sale.
A PlatformNot an App
CurrentlyCalendly is only available as a platform for a desktop or laptop computer. There is not a mobile app for iOS or Android.
How Much Does Calendly Cost?
Calendly offers a 14-day trial period where you can check out many of its features. No credit card is required to use the trial period. From thereyou can continue with a basic account for free or upgrade to a premium or pro account to use the entire Calendly platform.
You can choose to be billed on a monthly or annual basis. The premium version is $10 per person billed on a monthly basis or $8 per person billed on an annual basis. The pro version is $15 per person on a monthly basis or $12 per person billed on an annual basis.
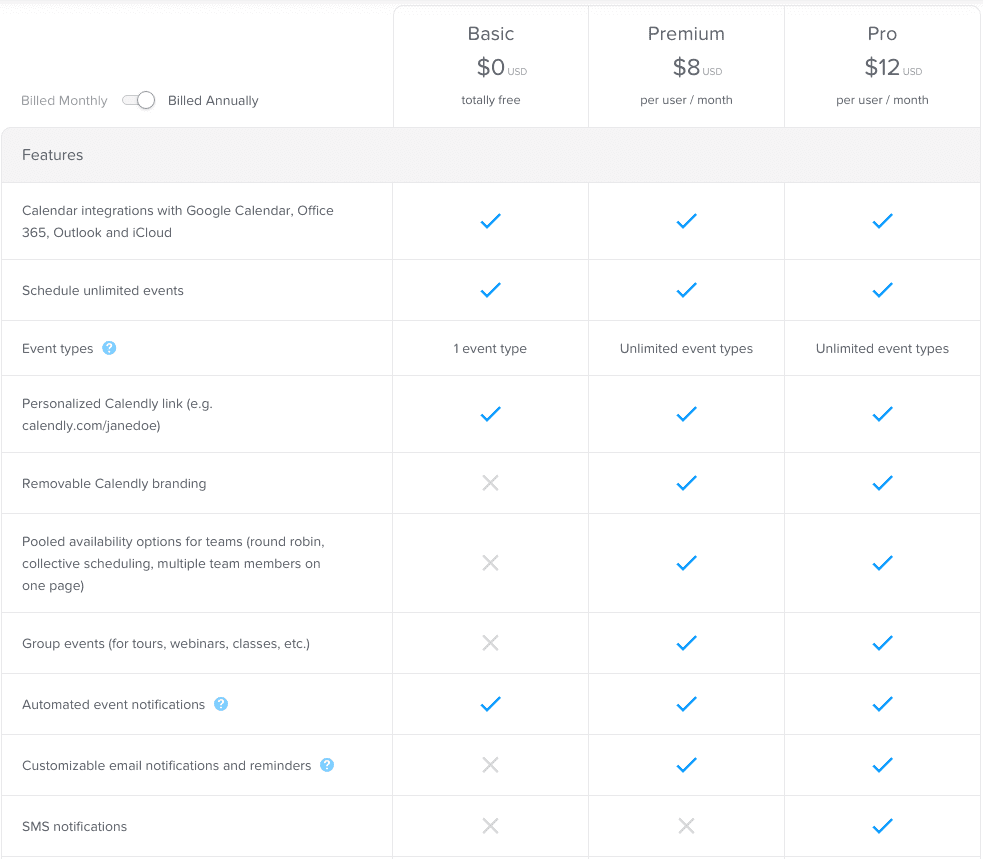
When you upgrade from basicadditional features you can access include unlimited event typesa wide range of integrations (payment service integrationssales integrationsand meeting software integrations)and group events. You can also add users for tasks like live chat and onboardingwhich is important if you have a team who can benefit from this calendar’s functionality.
Calendar Versus Calendly
Overview:
Calendly and Calendar.com are both popular scheduling software platforms designed to help businesses and individuals streamline appointment scheduling and event management.
| Feature | Calendly | Calendar.com |
|---|---|---|
| Scheduling | Allows users to set up and share their availability | Offers similar scheduling functionality with calendar views |
| Integrations | Integrates with popular calendar and productivity tools | Offers integrations with various third-party tools |
| Reminders | Sends automated email reminders to participants | Offers customizable reminder settings for events |
| Mobile App | Offers a mobile app for iOS and Android | Offers a mobile app for iOS and Android |
| Meeting Types | Supports one-on-one and group meetings | Supports one-on-one and group meetings |
| Pricing | Offers a free plan and several paid plans with more features | Offers a free plan and several paid plans with more features |
| Customizability | Offers customization options for branding and scheduling | Offers customization options for branding and scheduling |
| User Interface | Modern and easy-to-use interface | Modern and easy-to-use interface |
| Security | Offers SSL encryption and GDPR compliance | Offers SSL encryption and GDPR compliance |
| Customer Support | Offers email and live chat support | Offers email and live chat support |
Calendly:
Founded in 2013Calendly is a powerful scheduling tool that helps users book appointmentsmeetingsand events with ease. With a focus on simplicity and ease of useCalendly integrates with various calendar services and offers a wide array of featuresmaking it a popular choice for businesses and entrepreneurs.
Calendar.com:
Launched in 2017Calendar.com is a smart scheduling tool that leverages artificial intelligence to save time organizing and scheduling meetingsappointmentsand events. It offers a sleek user interface with intelligent event suggestionscalendar syncingand event templates. Its unique feature set and AI capabilities make it a strong competitor in the scheduling software domain.
Scheduling Features:
Calendly: Key features include customizable event typestime buffersgroup eventsround-robin schedulingand recurring event options. Calendly is known for its simplicity and easy-to-navigate platform.
Calendar.com: Features include AI-driven scheduling suggestionsevent templatessmart meeting invitestime-zone compensationrecurring eventsand much more. Calendar.com’s intelligent scheduling capabilities help users avoid schedule conflicts and manage appointments efficiently.
Integrations:
Calendly: Calendly offers native integrations with various calendar services (Google CalendarOffice 365Outlookand iCloud) and connects with popular productivity tools like ZoomSalesforceZoho CRMand Slack via its extensive API.
Calendar.com: Apart from native integrations with Google Calendar and Microsoft Office 365Calendar.com integrates with multiple applications such as MailchimpZoomZendeskand more through the use of APIs and Zapier.
Teamwork:
Calendly: Calendly offers robust teamwork and collaboration featuresallowing team members to manage schedulescoordinate meeting timesand avoid double-booking. It also provides collective availability schedulinground-robin schedulingand real-time scheduling insights.
Calendar.com: Calendar.com offers shared calendarsreal-time availabilityand automating meeting invites. Team members can easily collaborate and access each other’s schedulesensuring smooth communication and teamwork.
Pricing:
Calendly: Calendly has a basic free plana Premium plan priced at $8/user per monthand a Pro plan at $12/user per month. Premium and Pro plans offer additional featuresintegrationsand customization options.
Calendar.com: Calendar.com provides users with a free basic plana $6/user per month Pro planand tailored pricing for the Enterprise plan. The paid plans unlock advanced featurespriority supportand increased customizability.
In conclusionboth Calendly and Calendar.com are efficient scheduling tools with a variety of features and capabilities. Calendly is known for its simplicity and robust integrationswhile Calendar.com stands out with its AI-driven scheduling suggestions and sleek interface. Pricing for both platforms is competitiveand the choice between the two will depend on specific user requirements and desired functionality.
Reviews on Calendly
Przemek P from G2.com with 4.5/5: ”
What do you like best about Calendly? The application allows me to set up virtual meetings with anyoneno matter what Operating Systemstools or applications they use. Currentlythere are many Calendar and Virtual Call tools to choose fromand many of us have the favorites we use. With Calendly we can connect them all.Review collected by and hosted on G2.com.
What do you dislike about Calendly? I miss the option to add friends or follow other users and the option to compare their calendars with my own to find the best-fitting scheduled times. This option could simplify scheduling meetings with more than one member.”
Reviews on Calendar.com
Amisha S from G2.com with 5/5:
“What do you like best about Calendar? I like notifications prior to every meeting. It is a great reminder. Viewing and scheduling calls with colleagues is also easier and faster. I use it every day to interact with my colleagues!Review collected by and hosted on G2.com.
What do you dislike about Calendar? What if I have multiple accounts then tracking is a bit difficult in terms of UIit’s confusing.Can have a better user experience so multiple accounts can be synced well and I can understand the same.”
Let’s Get Started!
Nowthat you know the basics about Calendlyit’s time to start using the Calendar software. Here’s what you need to do to set up your Calendly account and make the most of its features in 2023.
1. Setting Up a Calendly Account
Creating an account on Calendly is very straightforward. Once you’ve signed up with your email addressyou’ll need to connect your Calendly account with your calendar platform.
You’ve got plenty of choices. You can connect Calendly with all the main digital calendar platforms: Google CalendarOffice 365Outlook Calendarand iCal.
That can feel intrusive. You’re on a new platform that’s asking for permission to see your entire schedule. ButCalendly has a strict privacy policy. It’s only interested in making sure that your scheduling works and that you’re not going to be double-booked. The more calendar information you share with Calendlythe more smoothly your scheduling will work and the less likely you are to find that you have a clash.
Connecting Your Calendar to Calendly
Before you’ve connected your calendaryou’ll be presented with a page that looks… wellpretty empty.
You’ll have created no event types and no one will have scheduled events with you. Click the arrow next to your name at the top-right cornerand select “Calendar Connection”.

Here you can see which calendar you’ve already connectedand you can add schedules that Calendly hasn’t scanned—such as birthdays or holidays.
There are a few options here that aren’t entirely straightforward.
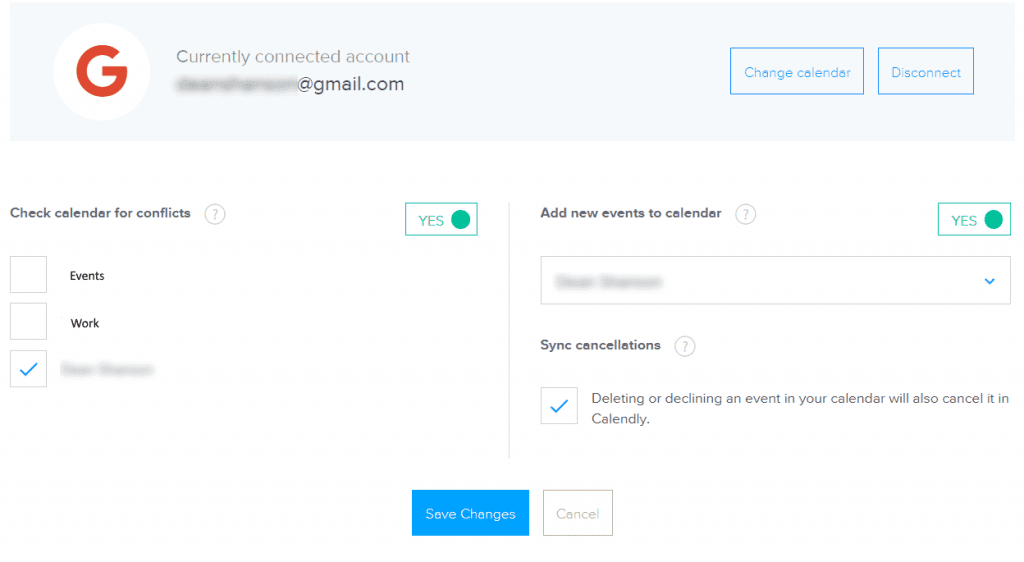
Firstwhile you can see the calendar that you’ve already connectedyou can also change your calendarand you can disconnect your calendar. So if you’ve been using Google Calendar but have now switched to Apple Calendar or Outlook Calendaryou’ll be able to switch your schedules. You can also disconnect your calendar here.
The next option is the list of calendars you want Calendly to scan. There are a few good reasons for not checking all of them. Remember that users can’t see these calendars. They can only see whether you’re available at the times listed on those calendars.
You should also make sure that the green slider on the rightopposite “Check calendar for conflicts,” is switched to “Yes.” That’s the switch that makes sure that Calendly is checking those schedules before placing an event on your calendar.
The switch next to “Add new events to calendar” is just as important.
Push this switch to “Yes”and every time someone makes a booking using Calendlythat event will be added to your calendar. That doesn’t just save you the time and hassle involved in doing it yourself. It also makes sure that that time isn’t double-booked.
You can also choose the calendar to which you want those events added. One useful technique then is to create a calendar on your calendar platform specifically for these events before you begin using Calendly. That will allow you to see these events separately on your calendar.
The last option is a checkbox to sync cancellations. Cancel an event in your calendar and it will be deleted in Calendlyand vice versa. All the parties attending the meeting receive a notification automatically. You want to check that box too.
Finallypress “Save Changes,” and you’ll be ready to go!
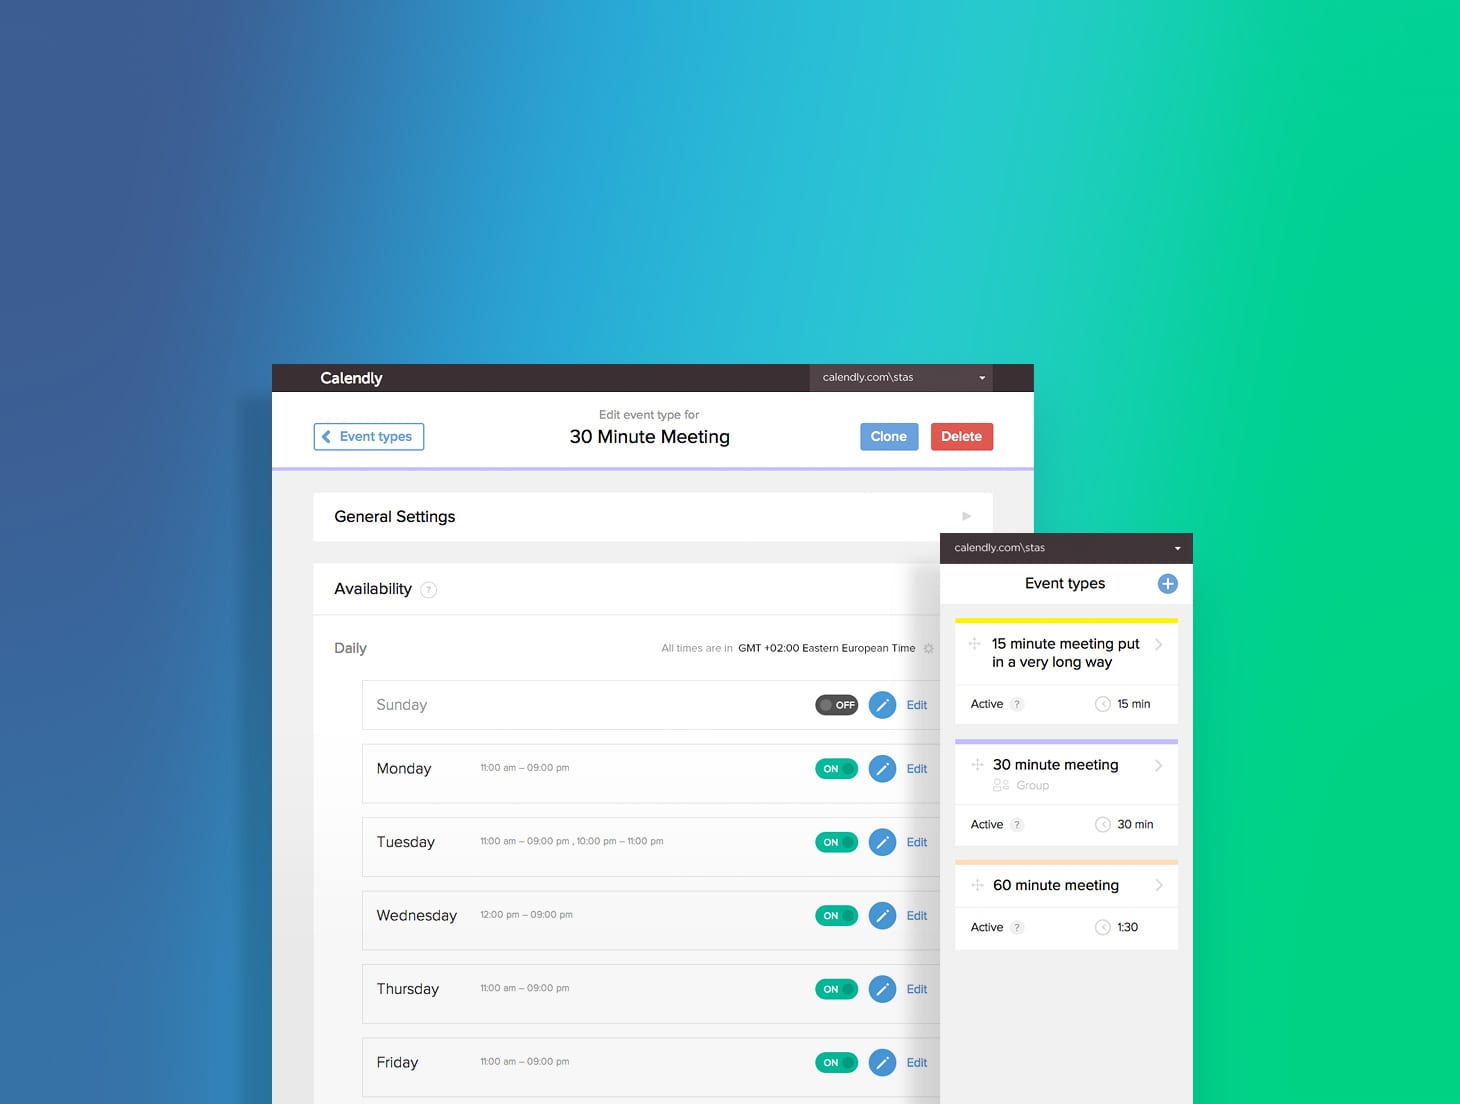
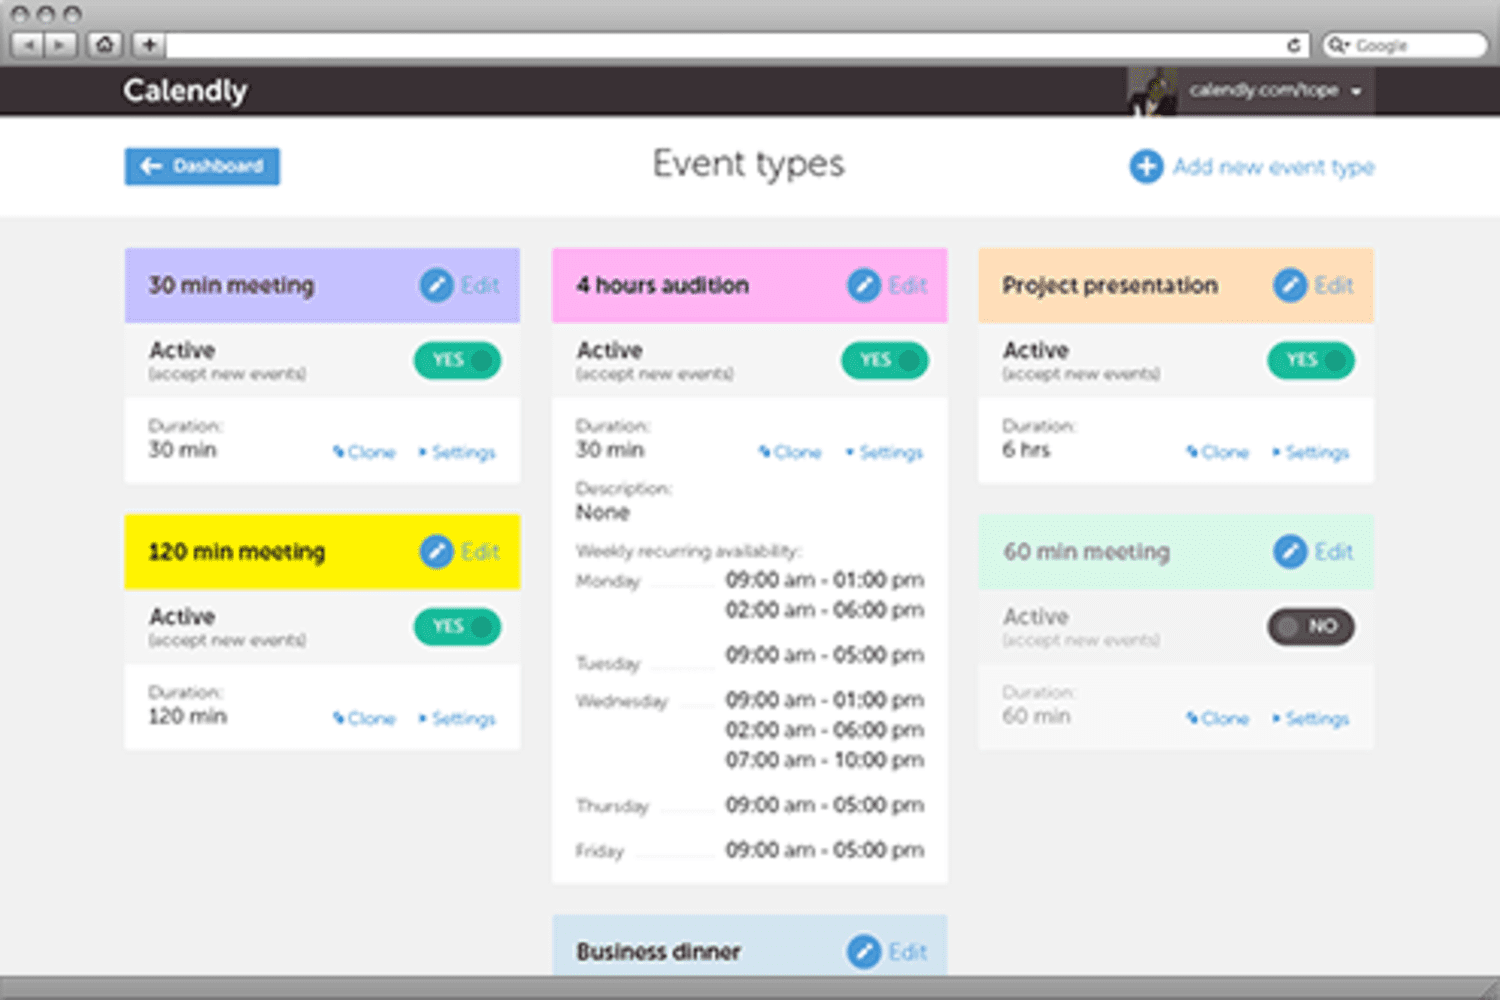
Organize Your Event Types with Calendly
You start a Calendly account with three kinds of events already created. (With a free accountyou only get to use one of those three event types at a time.) All of those default events are one-on-one: they’re meetings held between you and the person booking the slot. The only difference between them is the duration of the meeting. The meetings can be fifteen minutesthirty minutes or an hour.

Whichever event the person making the booking choosesCalendly scans your calendar for a slot that matches that period of time.
The event on Calendly has three buttons.
The first buttonin the top left-hand cornerlets you select the event. Check that box in any of the eventsand you’ll be offered three options at the bottom of the page.

You can delete all the events. You can turn them all off. Andyou can edit them using the same options that you select when creating new events.
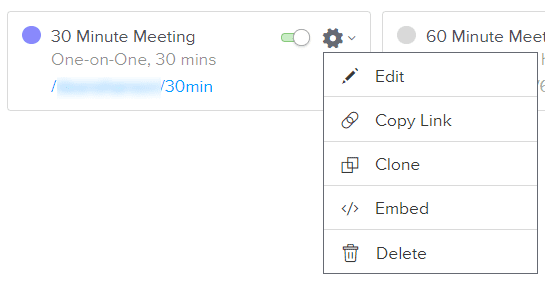
The second switch turns the event on and off. Andthe gear icon opens a drop-down menu that lets you edit the eventcopy the linkclone the eventembed it on a websiteor delete it.
We’ll cover each of those options in this guidebut let’s talk first about creating events.
How to Create a New Calendly Event
You can create two kinds of events on Calendly. You can create One-on-One events in which an invitee finds a slot in your calendar and books a free space. These meetings take place between just two people. They’re great options for phone callsconsultations or one-on-one coaching.
Alternativelyif you have a Pro or Premium accountyou can create a Group event. These are great for corporate meetingsbut they’re also useful for webinarsclassesworkshopstalksand so on. They’re held between lots of peopleincluding multiple hosts and multiple guests.
To create a new eventselect the “+ New Event Type” button beneath your name and Calendly URL.
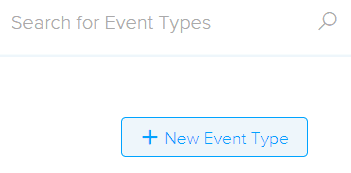
If you want to create a One-on-One eventselect the “Create” button under “One-on-One”. To create a Group eventselect the “Create” button under “Group”. Remember that when you’re setting this eventthe only times available will be the times that you choose. Calendly won’t check everyone’s calendar and offer times when everyone who wants to attend is available. You indicate when you’re willing to hold that event—and if you want to hold the event at a specific timeyou’ll need to indicate that you’re only available at that moment.
Once you’ve selected the kind of event you want to createyou’ll need to enter a number of details about that event.
Event name
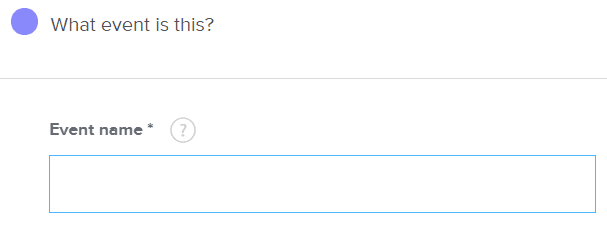
The first option is obligatory. It names and describes the event. The default is a description of the duration (“30-minute meeting,” for example) but you should change it here to better describe what the person booking the meeting will receive. So a financial advisor could change it to “30-minute financial consultation,” for example.
Location
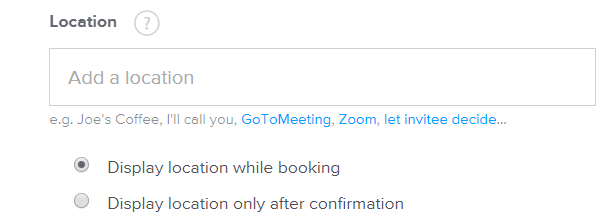
The next field is the location of the meeting—and this is a little more complex. Firstthe location doesn’t have to be physical. The meeting could take place online; Calendly allows users to link their GoToMeeting and Zoom accounts with the platform.
Secondyou can let the invitee suggest a place to meet. That gives up a fair amount of control to the invitee and it could also slow down the confirmation of the meeting. You might want to make it easy for the invitee to set the meeting but you’re unlikely to want to accept any location someone offers. This is a good option for someone who makes house visits but for almost everyone elsethe process is easier if you propose the location yourself.
Finallyyou’ll need to decide whether you want to show the location while the invitee is making the booking or only display the location after the booking has been confirmed. This is a security issue. Anyone who tries to make a booking will be able to see where you are at that time. If that’s not a problemthen you can go ahead and tell people where the meeting will take place when they book it. If you’d rather restrict that knowledge to the people attending the meeting then choose to only display it after the confirmation.
Description/Instructions
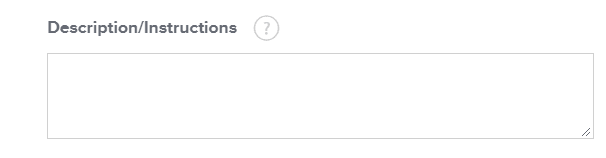
The next field has two options but they’re both important. If you’re arranging a meeting online or need invitees to bring something special when they attend the meetingthen is a good place to include those instructions.
If you don’t need to include instructionsthen this is a good place to include a little marketing copy.
The name of the event will appear in a large font at the top of the spaceand beneath ityou can provide a reminder of why someone should be booking that event.
Event Link
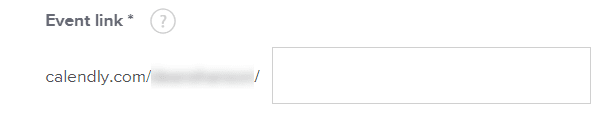
The ability to edit the event link might seem small but it does allow users to bring a little more professionalism to their events. The link to your event will start as “calendly.com/[yourname]/” but will then be followed by a short phrase created by Calendly and based on the duration of your event. So the default link for a 30-minute event might be:
“calendly.com/[yourname]/30min”
Changing that last phrase is unlikely to do a great deal for your search engine optimization but it might reduce the chances that someone will mistype your URL or make it easier to remember. It also just looks more professional. Keep this section short so that your URL isn’t long but do more than keep the numbers and minutes as your default event URL.
Event Color

Finallyin this sectionyou have to choose the color associated with the event. It would be great if this applied to the entire presentation of the event itself so that you could make the event match your branding but it only applies to a small dot next to the description of the event. Pick a color that allows you to see at a glance the type of events on your calendar.
When Can People Book This Event?
Those are basic event options. But they aren’t the only options. There are five more features that you can add to your event—and they’re very powerful.
The first is when people can book your event.
Once you’ve set a duration for your eventyou’ll need to set when people can book it.
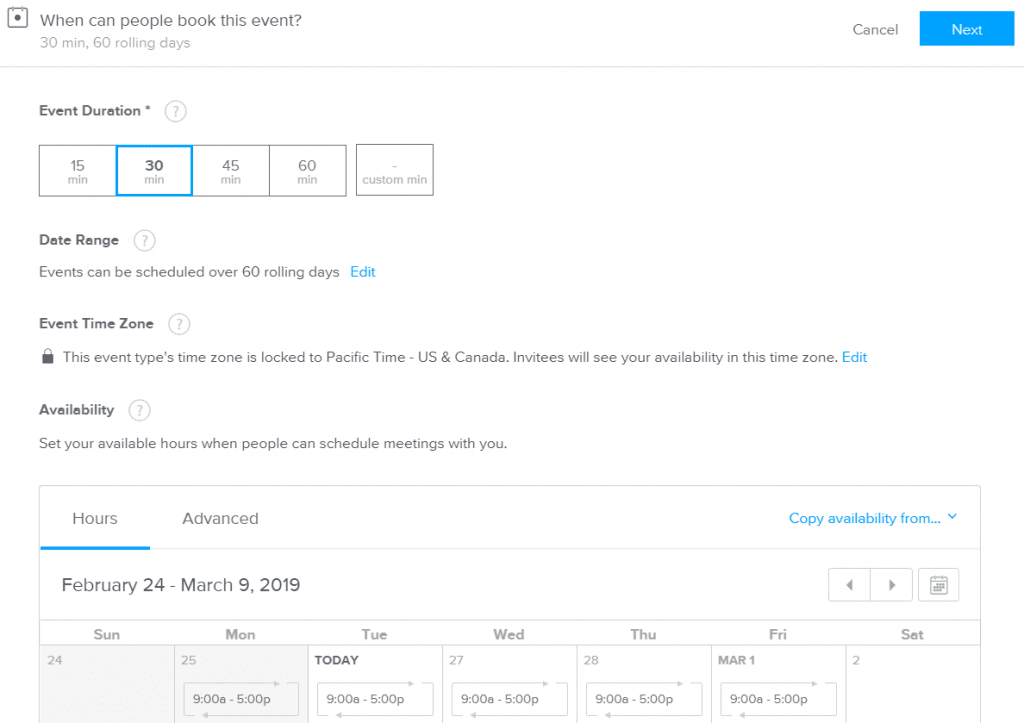
The idea behind Calendly is that the platform will check your calendar and block out those times when you’re not available. But just because you don’t have anything scheduled on your calendar at a certain time doesn’t mean that you want to take an event at that time. You don’t put everything you do on your calendarand you might only want to accept these events on a particular day each week or only in the morning or the afternoon. Selecting when people can book this event gives you more control.
The default is the duration of the event at the hours available on your calendar over the next sixty day but you can change that availability. So if your calendar shows that you’re available from nine to five next Monday but you don’t want to accept any events before twelve that dayyou can click on that dayselect the timeand change the hour.
At this pointyou’ll also be able to repeat that change automatically. In addition to applying the change just to that dayyou’ll be able to apply it that day of the week every week or choose any other days to repeat.
You can also black out entire dates. If you know you’re going to be away for a few daysfor exampleyou can choose the “I’m unavailable” button beneath the hours of availability. You’ll then be able to select the days you’re not taking events.
It’s a useful option if you know that you don’t want to attend these kinds of events on these days or if you’re making a trip that’s not on one of the calendars that your Calendly profile monitors.
Finallythe default setting on Calendly is to allow users to book events up to sixty days in advance. You can change that too. Click the “edit” link under “Date Range” and you’ll be able to enter a different number to limit how far ahead people can book events. You can even select a particular date range.
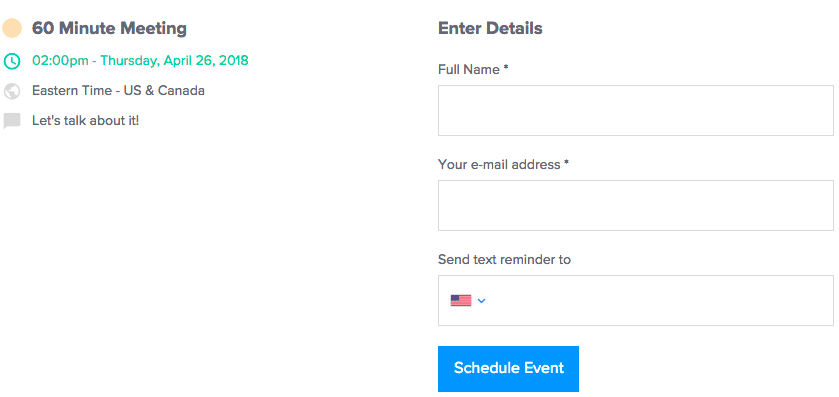
- Invitee Questions
Setting questions for your invitees is a little tougher than determining your availability. Calendly lets you grill your guests before they make their bookings. On the one handthat should help to give you information that will make the meeting more productive. If you know what issues your clients or customers or guests want to discussyou’ll be able to come to the meeting prepared.
But the more questions you askthe greater the chances that you’ll put off those users. If they feel that they have to complete an entire questionnaire before they make their bookingthere’s a greater chance that they’ll click away before they’re finished.
By defaultCalendly only asks users for their full name and their email address. Click the little edit icon on the top rightand you’ll be able to separate those two names into two fields. That’s important because it lets you create two different variables for first and last names.
Beneath those fields is a link that lets you add more questions. You can write the text to the questionsflick a switch to turn it on or offand indicate whether the question is required or not.
You can also set the type of answer. The options are pretty varied. You can let people answer in one or multiple linesradio buttons or checkboxesor a field for a telephone number.
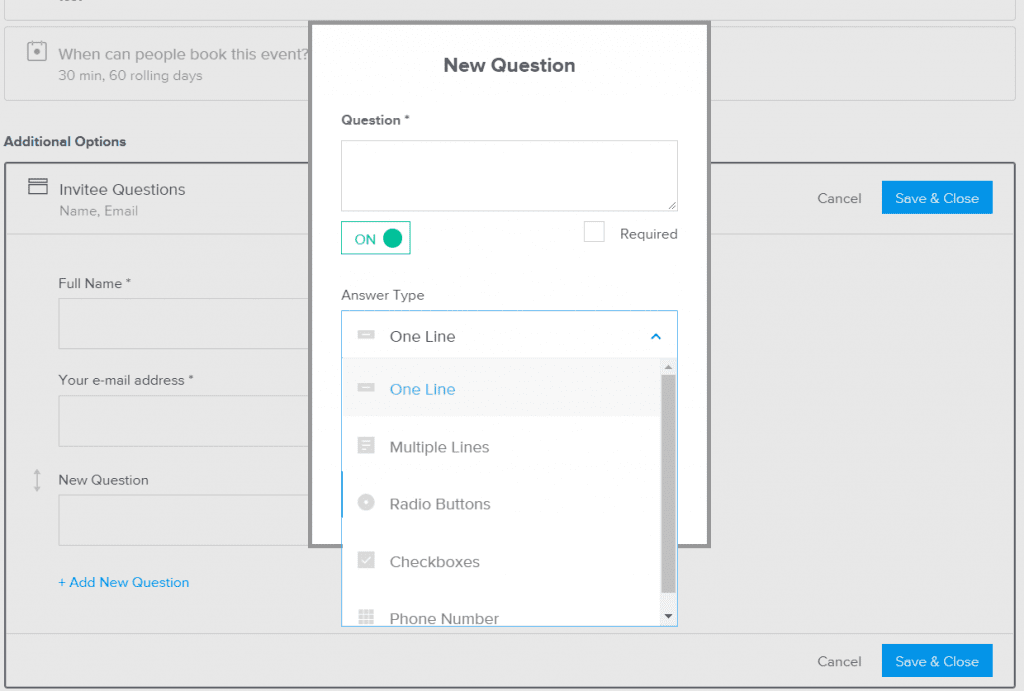
Those checkboxes and radio buttons are particularly useful. Users are more likely to check a box or click a circle than write a small essay in a field. If you need to draw information out of users before the meetinguse those options to make the process easy as possible for your users.
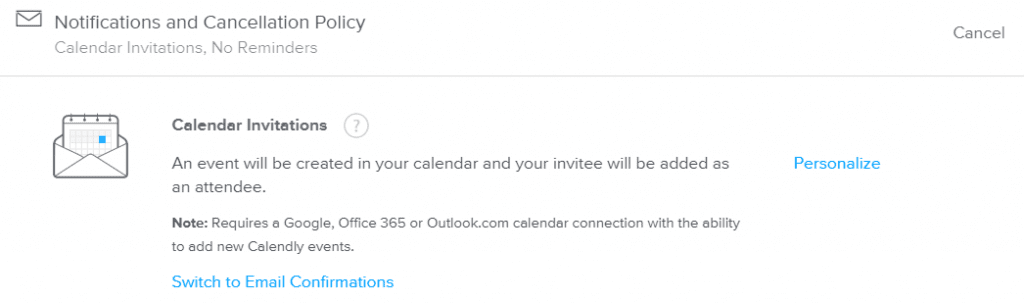
Notifications and Cancellation Policy
The notifications and cancellation policies are both important and complex. They cover the way your invitee is informed and reminded about the eventand also how they can and can’t cancel their attendance at your event.
When someone books an eventthat event appears automatically in your calendarwith the invitee added as an attendee. At the same timethat attendee will receive a notification on their calendar asking them to confirm their attendance.
Calendar Notifications
Calendly provides a default notification to users of Google CalendarOffice 365and Outlook.com. (Outlook plug-in and iCloud users receive a standard email confirmation.) These notifications will appear in the calendar itself. If you upgrade to a Premium account (which costs just $8 per month)you can customize that confirmation.
This is really important and hugely powerful. Calendly provides a bunch of features that allow you to personalize your messagebuilding a link with your invitee and preparing them for your event.
The customization takes two forms. Firstyou can change how the title of the event appears. Calendly’s default is to use dynamic variables to create a title consisting of the invitee’s full name and your name. So the will look something like this:
Jim Smith and Paul Hanson
That’s fine as far as it goes but you can make it more exciting and inspirational. You could take out the invitee’s name (they already know who they are)include the subject of the meetingand add an exclamation mark to make it appear more fun:
Meet Paul Hanson for Personal Finance Training!
You can also edit the body of the confirmation. The default again places dynamic variables to list the event namethe description you wrote when you created the eventthe location of the eventand any questionstogether with the invitee’s answersthat you’ve included with the event. But this is a good place to add some specific informationsuch as a reminder to bring important material or directions for parking.
Calendly is designed to bring people together in real life or at least in real time. It’s personal. The communications should feel personal tooso do make sure that you use these fields to build that personal connection.
Email Confirmations
Calendar notifications appear in the invitee’s calendar platform. But pressing the “Switch to Email Confirmations” link will also make Calendly send your invitee a confirmation by email.
Againyou can edit two parts of the communication: the email’s subject line; and the body of the email.
The default subject line is “Confirmed: {{event_name}} with {{my_name}} on {{event_date}}” which is… fine but a bit bland. Here tooyou can spice that message up so that the recipient is excited to see it in their inboxand wants to mark it so that they can easily find it later:
You’re Meeting Paul Hanson for Personal Finance Training on WednesdayApril 5!
The same is true of the body of the email. Calendly produces a version automatically using the information drawn from the form the invitee completes when they make the booking:
Hi {{invitee_full_name}},
Your {{event_name}} with {{my_name}} at {{event_time}} on {{event_date}} is scheduled.
{{event_description}}
{{location}}
{{questions_and_answers}}
But you can do better than that. Change the first line. Take out the event description and the questions and answers. Write a new text whose only automated content is the first name of the invitee and the time and place of the meeting:
Hi {{invitee_first_name}},
We’re going to meet at {{location}} on {{event_date}} to talk about solving your personal debt problem and getting your family’s finances back on track. It’s going to be hugely valuable. Do make sure you bring a list of your last month’s expenses. We’ll need that.
Looking forward to seeing you then! I’ll send a reminder before the event.
Paul Hanson
Do you see what a difference that can make? Calendly lets you build a personal connection. Use the communication customization tools it provides to create that connection at every stage.
Email Cancellations
Ideallyyou won’t need to use this email but there may be times when you need to call off an event. The weather might mean that you have to cancel. Sickness could mean that you can’t make it. Or perhaps the invitee’s payment doesn’t go through and you have to hold off the meeting until they can solve the problem.
As soon as you cancel the eventthe invitee will receive an email notification made up of dynamic variables. The subject line looks like this:
Canceled: {{event_name}} with {{my_name}} on {{event_date}}
and the body of the email looks like this:
Hi {{invitee_full_name}},
Your {{event_name}} with {{my_name}} at {{event_time}} on {{event_date}} has been canceled.
For a message that’s going to disappoint a customerthat’s pretty dry. You’ll need a paid account to change that messagebut it’s worth paying for.
This email will be automated so you won’t be able to include all the information you need to convey. There are all sorts of reasons that an event might be canceled so this message needs to tell the reader that the event is offexpress regretand explain what will happen next.
{{event_name}} with {{my_name}} has been canceled!
Hi {{invitee_first_name}},
I’m afraid that {{event_name}} which was supposed to be held at {{event_time}} on {{event_date}} has had to be canceled. I’ll be in touch soon to explain why and to work with you to find a new date.
Paul Hanson
Your next step will be to send another message to organize that event again.
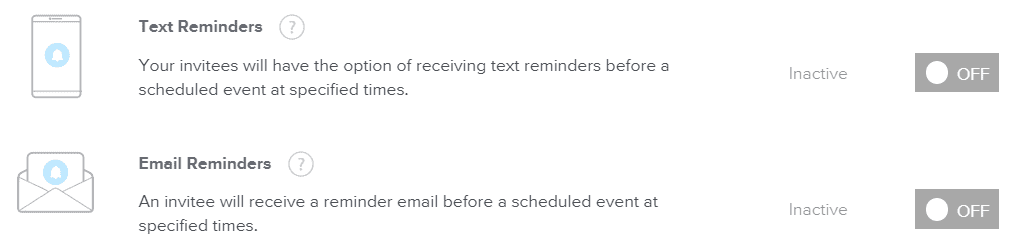
Reminders
Calendly’s default is to let people make event bookings as long as sixty days ahead. That’s a long timeand there’s a good chance that your invitees will forget. Which is why Calendly lets Pro and Premium users send reminders.
Those reminders can be sent by text or by email. To use themyou’ll need to slide the switch at the end of the feature from “Off” to “On.”
AgainCalendly will pre-load the reminder email with automated content. By defaultthe message will say:
Hi {{invitee_full_name}},
This is a friendly reminder that {{event_name}} with {{my_name}} is at {{event_time}} on {{event_date}}.
{{location}}
{{event_description}}
{{questions_and_answers}}
You can leave it that way—or at least take out the questions and answers. A reminder is always a little annoying. If the recipient hasn’t forgottenthen the reminder feels like an unnecessary intrusion. If they had forgottenthere’s a good chance that the reminder will now ruin the other plans that they’d made for that time.
So distance here can be useful. Personalize the reminder too much and you’ll associate yourself with something a little irritating.
Do press the personalize link to edit the reminder but keep things short. Remove the event description and the questions and answers. Add a warm sentence or two that counteracts the discomfort that a nudge brings:
Hi {{invitee_first_name}},
I just wanted to remind that we’ll be meeting for {{event_name}} at {{event_time}} on {{event_date}}. The meeting is taking place at {{location}}.
If you have any questionsdo get in touch. OtherwiseI’ll look forward to seeing you then!
Paul Hanson
Text reminders work slightly differently. Invitees have to provide a phone number before you can send reminders to their phones. Select this option and Calendly will add a field to the event page inviting them to include their phone numbers. The cost of the text is included in the Pro and Premium plans. You can text as many reminders as you want for no extra cost.
The text reminder is pretty simple. The default message simple says:
Reminder: {{event_name}} with {{my_name}} at {{event_time}} on {{event_date}}
Remember that this reminder is going to be landing on people’s phones. It’s going to be hitting a personal space at a time when they’re busy doing something elseand it’s going to look urgent. So soften it a bit but keep it succinct and put the focus on the time and the place:
Just an hour to go before {{event_name}}! See you there. Paul
You can mention the amount of time before the event because the reminders let you set the timing of the notification.
The maximum number of reminders you should send is three: an email reminder a week before the event; a second email reminder the day before the event; and a text reminder an hour before. That should be enough to make sure that people don’t forget your event and leave you hanging without making them wish that they should forget your event and leave you hanging.
Show Cancellation Policy
Finally in this sectionif you have a paid accountyou can also choose to include your appointment cancellation policy in your notifications. This is important. The time you’ve set aside for your event costs money. If someone doesn’t show up without notifying you in timethat money will be wasted—yoursyour invitee’sor both. When someone receives your notificationthey should know how they can cancel easily if they find that they can’t make it.
The cancellation policy itself doesn’t have to be more than a sentence or two:
Can’t make it? Let me know up to 24 hours before the start of the event. Just send me an email to [email protected].
And make sure that you click the “Include cancel and reschedule links in notifications” under the “Hide Cancellation Policy”.
Press “Save and Close”and you’ll be done with the notifications.
Confirmation Page
Once an invitee has booked an eventthey’ll have done what you wanted them to. Or ratherthey’ll have done some of what they could do for you.
After allif someone has booked an event with youthey’ve shown that they’re interested in your services and your products. That means they might be interested in other products that you haveor in following you on social media. They might also want to book more than one event.
By defaultafter booking an eventthe invitee will be shown a confirmation page displaying all of the details of the event.
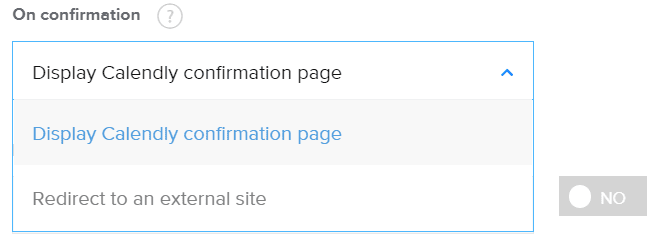
If you have a Premium or Pro account thoughinstead of displaying that pageyou can send the invitee to a page of your ownor you can add custom links to the Calendly page and send them from there to a different page.
To send them to different page select “Redirect to an external site” from the dropdown menuthen add the URL of the page to which you want to redirect the confirmation.
If you’re going to use this optiondon’t hold back. Create a page on your website that matches your site’s branding and includes details about the event. Invitees should feel that having booked the eventthey are now through the bureaucracy and inside your organization.
You can also take the information collected when the event was booked and ask your site builder to work them onto the page if you want. You can use the following fields:
- event_type_name
- event_type_uuid
- event_start_time (in invitee timezone (iso8601 format))
- event_end_time (in invitee timezone (iso8601 format))
- invitee_uuid
- invitee_email
- invitee_first_name (when applicable)
- invitee_last_name (when applicable)
- invitee_full_name (when applicable)
- invitee_payment_amount (when applicable)
- invitee_payment_currency (when applicable)
- utm_source (if available)
- utm_medium (if available)
- utm_campaign (if available)
- utm_content (if available)
- utm_term (if available)
- assigned_to
- text_reminder_number (if available)
- answer_1 (if available)
- answer_2 (if available)
If you’re going to use the Calendly confirmation page thoughthere are a couple more things that you can do.
Firstyou can invite people to book another event. If you know that you’re going to need more than one meeting to complete the task then slide the “Display button to schedule another event?” to “Yes”. In the text field belowwrite the text that will appear in the link—but keep it short:
Make Another Booking
Finallyif you have a Premium account you can add links to the confirmation page. You just need to write the text in the “Your Custom Link” field then write the URL below. Make sure that the On/Off switch is “on”and hit “Add.”
It’s a good way to encourage invitees to head from the Calendly confirmation page to your Facebook page or to your blogor to the sales page of your book. But you’ll probably get better results building your own page on your websiteand putting the information or links that you want to offer there.
Collect Payments
The last feature that you can add to an event is the ability to collect payments. It’s available to people with Pro accountsthe currencies you can collect are AustralianCanadian and US dollarsas well as euros and British sterling… and the benefits are clear enough.
Obviouslyif you’re only planning to use Calendly to call meetings at your workplacethen you’re not going to need this feature. Your staff isn’t likely to want to pay to attend the weekly sales meeting. But if you’re using the platform to take bookings for the time that you’re selling—for consultancyfor exampleor to make appointments at a clinic—then this feature is hugely powerful.
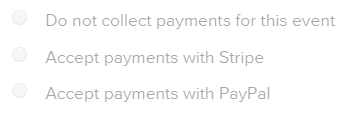
It only offers three optionswhich appear as bullet points. You can choose not to accept payments. You can choose to accept payments through PayPal. And you can choose to accept payments through Stripe. Both of those require integration.
Accept Payments with Stripe
Select the “Collect payments with Stripe” option and you’ll be asked to connect your Stripe account to your Calendly account (or to create a Stripe account if you don’t yet have one.) You’ll then be able to add the amount to collect for each event and set the payment terms such as when they can cancel and how they can ask for a refund.
This where the ability to create multiple events becomes so important. Each event can only have one price. So if you want to charge more money for events that last longeryou’ll need to create events for each of those durations and add different prices to each one. Similarlyif you wanted to charge more for events that take place on the weekends or at peak timesyou’d need to create events for those times and tell Calendly to only book events during those hours. You could then add a different price point for those times.
Accept Payments with PayPal
Accepting payments with PayPal works in exactly the same way. You’ll be able to select “Accept payments with PayPal”connect your PayPal accountthen set the amount you wish to charge for each event and add payment terms.
Bear in mind that whichever option you chooseyou will need to handle refunds yourself. Calendly just plugs in payment systems. It doesn’t handle the payments. If a customer can’t make the event and wants their money backthey’ll need to contact you directly. You should tell them how to do that and when you’re willing to give them a refund.
If you’re creating a Group eventat the bottom of the list of optionsyou’ll also find a field for the maximum number of invitees for that spot.
2. Setting Your Calendly Availability
Availability is key to Calendly. By granting Calendly access to your calendaryou’re able to ensure that you don’t have a clash with a pre-booked event. Before offering times on your scheduling pageCalendly will first check your calendar to make sure those times are available.
But as we’ve seenCalendly can do more than just check your calendar and allow people to book your free moments. It also gives you complete control over the times that you want to make available—and for each event.
That means that you can create different events for different times of the week. You can choose to run your fitness training business on the weekends by only making your events available at certain hours on Saturday or Sunday. You can ensure that your consultations are only available in the afternoons and you can set a specific time for a workshop with lots of attendeesgiving you complete control over your schedule.
To reach the event’s scheduleclick the event under “Event Types” then choosing “When can people book this event?” and scrolling down to “Availability.”
You’ll see here the week ahead. Click on any one of those daysand you’ll be able to adjust your availability on that day.
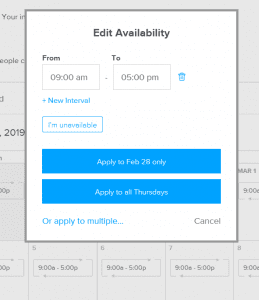
The options here are fairly complex. Firstyou get to set the hours that you’re available. So if you’re ready to take an event at any time between nine and fiveyou can just enter those hours under “From” and “To.”
If you want to set up multiple times of availability during the dayyou can select “+ New Interval” to add more time fields—so you could make yourself available from nine to tenadd an intervaland also make yourself available from three to five.
You can also make yourself unavailable for the whole day. Select the “I’m unavailable” and you will become unavailable for the entire day.
Note that you can’t make yourself unavailable for particular hours. You can either make yourself available at certain timeswhich will make you unavailable at other timesor you can cut out the entire day.
You’ll then have three options. You can apply those settings for that day only. You can repeat the settings you’ve made to that day every week. Or you can select “Or apply to multiple…” and choose multiple dates that this event will be available at the hours you selected.
Hereyou’ll have two options. The default is the second. It lets you pick repeating days of the week. If you want to use these hours every Tuesday and Wednesdayfor exampleyou can select those dayspress “Apply” and know that invitees can book your event on those days at the times you’ve set.
Alternativelyyou can choose “specific dates.” Select that optionand you’ll get a calendar that lets you pick days in the year. So if your event is happening at irregular times in the yearyou can control when you’re available.
One option then is to make yourself unavailable on certain days. Select the “I’m unavailable” buttonthen choose the days on which you don’t want to accept invites for that event. While that sounds usefulin practiceit’s easier just to tell Calendly when you are willing to accept those events. Those hours are likely to be fewer.
It’s also worth remembering that the unavailability option only applies to this event. If you want to prevent people from being able to book an event on your calendar at particular timesthen you can also use your calendar itself.
Open the calendar you’ve connected to Calendly. Create an event at the time you want to blockand make sure that you mark your time as “busy.”
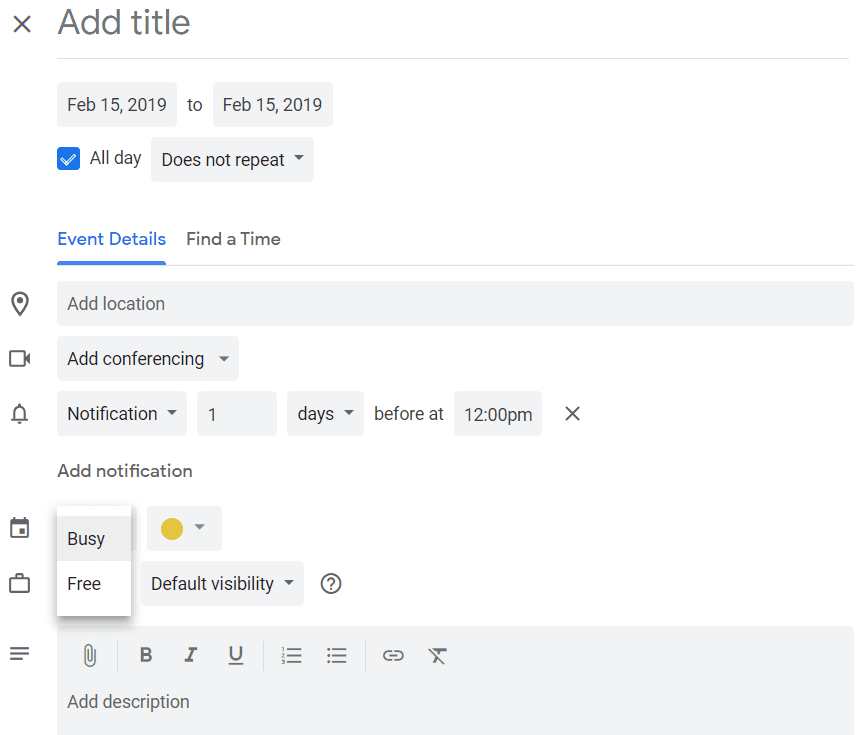
Calendly will see that time as blocked on your calendar and won’t offer it for any of your events.
Finallyyou can select the switch at the bottom of the page to make the event secret.
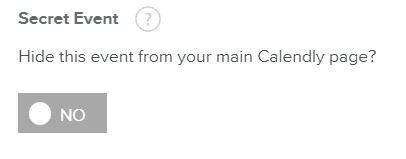
This option applies to the entire event and not just to the times you’ve chosen. To enable people to join the eventyou’ll need to send them a link. It’s a good option if you know exactly who’s going to be attending and don’t want anyone else to try to join in.
Advanced Availability Features
The Calendly app offers four advanced features concerning the availability of events. Availability Increments make an event available every set number of minutes. You can choose from six different optionsincluding every fivetenand fifteen minutes. If you know that you’re going to be available all day and that every event will have the same durationit’s one easy way to fill a schedule.
Event Max Per Day lets you set the maximum number of events that you’re willing to accept in a day. If you know that you’re never going to want to hold more than a certain number of sessioneach daythis option will keep your schedule under control.
Minimum Scheduling Notice is set by the number of hours and ensures that you get hit by any last minute appointments.
And Event Buffers give you time to recover before and after events.
Availability is key to getting the most out of Calendly. It will ensure that you’re booking the events you want to be filled at exactly the times you’re holding them. Do make sure that you’re selecting the right times and days for each of your events.
3. How to Invite People to Your Events
Once you’ve created your event types and assigned availability times for each of themyou’ll still need to direct people to book your events. There are two ways to do that: by sharing a scheduling link; and by embedding your calendar on your own website.
Sharing Your Scheduling Link
The easiest way to invite people to book your events is to send them a link to your Calendly page. Your visitors will see all of your events on the pageand they’ll be able to choose the event they want to attend.
You can find the URL of your Calendly page in the top-right corner of the page. It will look something like this:
Calendly.com/[username]
Click that linkchoose “Share Your Link” from the dropdown menuand you’ll be given three options.
Select “Copy Your Link” and you’ll be able to paste that URL anywhere you want. So you can simply place it on your website or add to your email signature:
Book a half-hour consultation at Calendly.com/[username]
Select “Email Your Link” and your browser will open an email application so that you can send the link to someone. (It’s easier to just copy and paste the URL into your email.)
Finallyyou’ll have the option to embed your link on your website.
Embedding Your Scheduling Link on Your Website
Embedding your scheduling link does more than a place a link on your website to Calendly. Select “Embed” and you’ll have three options.
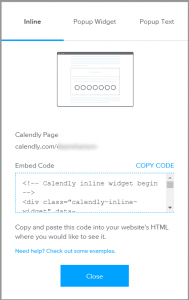
Inline embedding creates an area on your website that contains the same information that your guest would find on the Calendly site. That’s the first option. All you have to do is choose the “Copy Code” link to copy the codeand paste it into an appropriate place on your website.
You’ll get an area on your Web page that’s given over to Calendly.
Alternativelyyou can create a pop-up widget. Instead of placing a link on your website to your Calendly pageyou’ll get a button that users can press. That button then triggers a pop-up that contains the information that would appear on the Calendly page. The principal is the same: press the “Copy Code” link to copy the code and paste the code onto the page.
You can also change the text for the widget. The default option is “Schedule time with me” but you’ll only have 22 charactersso keep it short.
You can also change the color of the widget. You’ve got three options: blueblackor white.
While the widgets are a great optionthey’re best used for links to individual events rather than to the Calendly page.
Finallypopup text works the same way as a widget… but without the button. Insteadyou’ll get a link. You can write the text of the link yourselfand you’ll have no limits here. Unlike a regular link thoughinstead of sending the user to a new Web pageit will open a pop-up with the same information that you’d find in the widget.
Sharing an Event Link
Sharing your Calendly link will bring people to a page with a list of your events. But you can also share links to particular events. So if you wanted to invite guests to a workshop without letting them know about your other eventsyou can send them a link to just that event.
The link looks like this:
https://calendly.com/[username]/[eventname]
Open the Event Types list from the top of the pagethen select the gear icon on the right. Among the five options in the dropdown menu is “Copy Link”—which simply lets you paste a link into an emaila websiteor a social media post—and “Embed.”
Select “Embed” and you’ll be offered exactly the same options as Calendly makes available for embedding the entire event page. You can paste an inline link; install a popup widget; or install a popup text.
Users who click those options aren’t brought to your Calendly event page. They’re brought directly to the calendar availability for that event.
The benefit of this option is that it gives you much more control. You’re not restricted to the design and description created by Calendly. You can match the content on the page to the rest of your websiteand then add a small button that lets the user choose a day and time to attend. The user never leaves your siteyou retain controland the process is very simple.
How to Make Your Calendly Link Personal
Send someone your Calendly link with your username and they’ll reach your page. They can select an event and complete the form that you’ve designed. But you can make that process easier and more personalized by completing the form for them before they reach it.
The process can become a little complex.
The default for your Calendly URL is:
https://calendly.com/[username]
Add fields and values to that URL thoughand you can start populating that form. You can continue populating that form by adding an ampersand and another field with its value.
https://calendly.com/[username]
can become
https://calendly.com/[username][?field]=[value]&[field2]=[value]
So if your Calendly URL were
https://calendly.com/johnsmith
and you wanted to invite Jane Doe and bring her to a form that already included her nameemail addressand phone numberthe URL would look like this:
https://calendly.com/johnsmith?name=Jane%20Doe&[email protected]&a1=123456789
You can enter any field and its value so that when your customer reaches Calendlyall they have to do is enter their payment details or confirm the meeting to complete their booking. (The “%20” in the name field adds a space between the two parts of the customer’s name.)
You can even use the same principle when you send mass emails. If you wanted to tell everyone on your subscription list that you’ll be holding a webinarfor exampleand invite all the recipients to book a placeyou can use the merge tags in your email platform to personalize your link.
All you need to is change the value of the field to match the merge tag used by that email platform. So if Jane Doe were just one of the people in your subscriber list at Chimpmailand you wanted to include her name and email addressthen the URL you’d include in your message would look like this:
https://calendly.com/johnsmith?name=*|FNAME|*%20|LNAME|*&email=*|EMAIL|
The result will be that whoever reaches your Calendly page will find their personal details already waiting for them on their form. You can find the list of fields here.
Bringing people to your event booking page is important. You’ll want to make it as easy as possible for people to find your events—and having found your eventsyou’ll want to give them enough trust to click and book. Include a link to your event page in your email footer. Use a link to events too when you promote particular events on social media. But create a page on your website that markets each event and add a widget that allows your users to make those bookings.
4. Calendly for Teams
One use of the Calendly app is to invite people to book your events. A personal trainer can create one-on-one events and allow clients to choose their times. A Pilates teacher can use Calendly to create group events and allow students to fill her lessons. But Pro and Premium users can also put teams on Calendly. Instead of a visitor just making an appoint with one personthey can make an appointment with anyone on your team. Each team member has their own Calendly link and access to all of Calendly’s features.
So a car showroom could let buyers pick a time for a test drive with one of the sales staff available at the time. Or a clinic could use Calendly to help patients choose an appointment with one of the doctors. Whenever a business has a group of people available to the publicusing Calendly’s team feature makes scheduling much easier.
How to Add a Team to Calendly
Before you beginyou’ll need to add a team to Calendly.
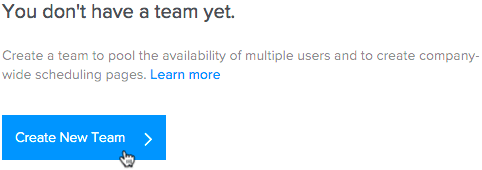
On the Event Types pageselect the Team tabthen choose “Create New Team”.
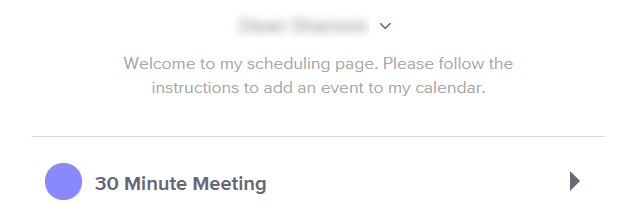
You’ll need to give the team a name and add members. Like personal eventsyou can change the scheduling link but more importantlyyou can also upload your company logoand add a short message telling visitors what to do.
This option is important. Remember that the people reaching your company’s events page may feel a little lost. They’ll see a list of different kinds of meetings offered by the companyand they won’t know which to choose. You’ll need to guide them. Welcome visitors to the pagethen tell them what to do next:
Welcome to ACME. Please select a time to talk to a sales representativea customer service repor to book technical assistance.
The names and descriptions of the events should then make clear what the visitor should choose.
Adding Users to Your Team on the Calendly appand Assigning Them Roles
To add users to your teamopen the dropdown menu beneath your Calendly URLand select “Users”. Choose either the “Invite Users” button in the middle of the screen or the “+ New User” button at the top rightand you’ll be offered a table in which you can add email addresses.
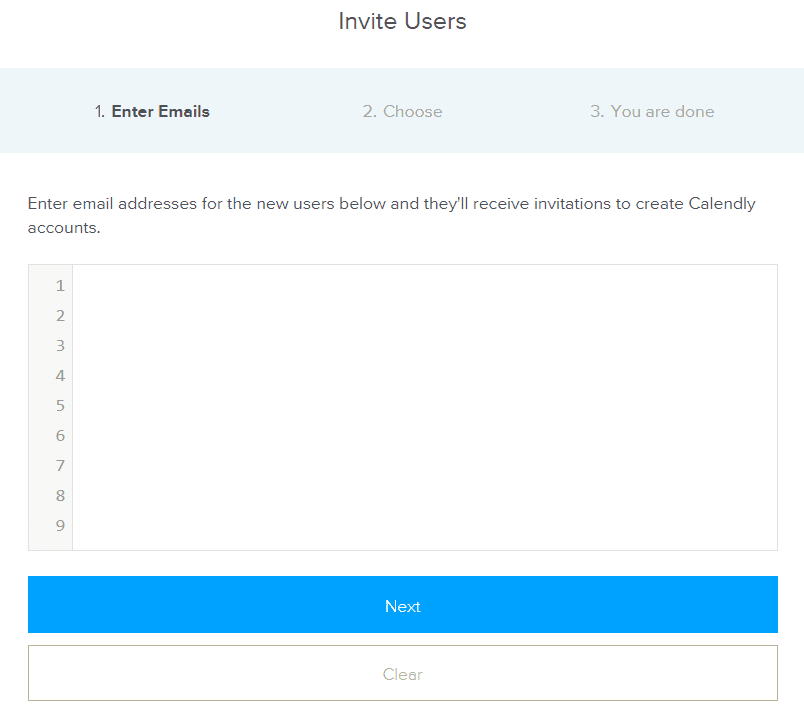
For each team member you addyou can assign event types. (You can change them and add more events later if you want.) When you’re doneyou’ll receive a pop-up confirming the number of team members you wish to addand the cost. Select “Add” and your team members will receive an invitation by email.
At the top of the Users section of your Calendly accountyou can see which members have replied and are activeand which are still pending. You can also see the event templates you’ve created.
Team members can have one of four different roles.
Users are the simplest kind of team member. They have their own scheduling pagecan be added to a teamand they can change their own settings and event typesbut no one else’s.
Team managers can also create and manage the event types on a team pageand they can add or remove users from a team.
Admins can perform the same functions as team managers but an also add and remove users to an accountcontrol the event types in those users’ accountscreate their own teamsand manage the team billing.
Finallyonly the owner can edit user roles and—once—reassign account ownership.
To change rolesclick the gear icon next to each userand choose “Change role” from the dropdown menu.
How to Add Team Events to Calendly
To make it easier to assign events to different members of a teamCalendly lets you create event templates. In effectit lets you copy events that you’ve created and pasted them into someone else’s account.
Once you’ve created an eventclick the gear icon in the top right cornerand choose “Save to template”. Open the All Users tab at the top of the page to see all the members of your team. Pick the team member to which you want to assign the eventthen open the dropdown menu under “+ New Event Type”and select the event template you want to assign.
Distributing Team Events on a Round-Robin Basis
When an invitee reaches a team pagethey can book an event in one of two ways. They can choose the team memberor they can choose the event.
The difference is important. Someone booking a session at a fitness centerfor examplemight want to pick a particular personal trainer. They might want someone who specializes in their kind of fitness routine or has a particular experience with their fitness goals. Or they might not care who they train withas long as they can book at the time they want.
That’s a decision that you get to make. You’ll need to decide whether you think your customers would prefer to book particular team membersor whether they’ll be looking to book an event instead of a person.
If you decide that events are more important to your customers than the team members they’ll be attending those events withthen you’ll need to create “Round Robin” events. These are events that a visitor will chooseand which Calendly will then assign to a team member.
To create a round robin eventopen your Team Event Types pageand select “+ New Event Type”. If you have more than one teamyou’ll need to click the button next to the team to which you wish to assign the event. Choose “Round Robin” as the event and set the event’s availability.
The next step is to choose the meeting distribution availability.
There are two options here. You can optimize for availabilityand you can optimize for equal distribution.
If you optimize for availability when the customer picks the event and the timeCalendly checks to see which team member assigned to that event is available at that time. If there’s just onethe customer will be offered that time slot.
When more than one team member is availableCalendly will give it to the team member with the highest priority. You can set each team member’s priority by filling the star next to each member’s name when you edit the event.
Bear in mind that if all the team members have equal priorityCalendly will give the event to the person who hasn’t received this event for the longest period of time.
That gives you a great deal of control. If you’re using this optionyou can determine which of your team member receives the next event by adjusting their priority. So if you want to give a new team member some additional experienceyou can move them up the line and make them available for the next customer booking that event.
If you optimize for equal distributionCalendly keeps track of the number of events awarded to each team member and tries to ensure that all end up with about the same number of events. If the only team member available for a time slot has already received a disproportionate number of eventsthen Calendly removes that time slot from the schedule.
While optimizing for equal distribution makes the work fairer for your team membersit does make it harder for customers. They might find that they can’t book an event at the time they wanteven though you know that a member of your team is available for work. It’s not always a good option for customer-facing bookings.
You can see which slots have been blocked outwhether by optimizing for equal distribution or because of clashes with other calendarsby opening the dropdown menu next to your name and turning on “Availability Diagnostic Mode”.
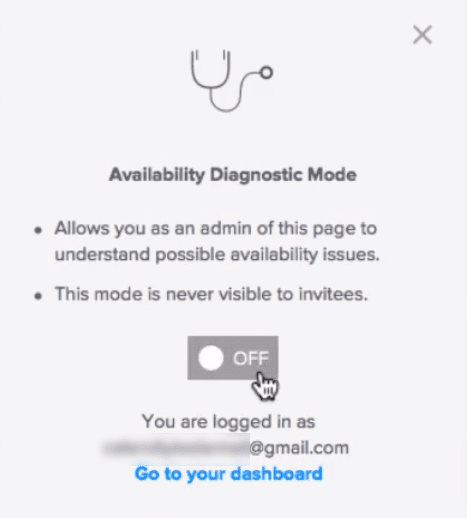
When you return to your scheduling pageinstead of seeing only the slots that are availableyou’ll also be able to see all of your slots. When a slot is marked as unavailableyou’ll also see a reason.
Calendly provides no fewer than eleven different reasons that a time isn’t available. Most of them are fairly clear. The most common is that a time slot is in the pastsomeone has already booked this event in that timethat it overlaps with a different event at the same timeor it clashes with an event in a connected calendar. Other reasons concern the settings assigned to an event type or a group. It’s possible to set maximum daily limits for event types and to restrict the range of the event type’s scheduling. Group events can have a maximum number of attendeesand buffer times between events mean that some hours won’t be available because there’s not enough time between events.
And if you’re optimizing for equal distributionsome time slots in some team members’ schedules may be marked as “unfair.”
One way to make a time slot that Calendly has taken out of the schedule available again is to reassign events. Simply select the event typeand choose “reschedule.” Choose a different team member to take that event and pick the same time and date.
Even when you’re optimizing for equal distribution you do still have some control over your team members’ schedules and can reassign events across the team.
Collective Team Events
Calendly’s round-robin feature distributes events between team members. Each event is assigned to a single team member. But you can also allow users to book events with multiple team members. So you could take bookings for a webinar with two speakers or allow people to make a call with multiple advisors.
To create a collective team eventchoose “Event Types” from the main menu at the top of the page. Choose the Team tabthen select “+ New Event Type”followed by “Choose Collective”.
After you’ve created your eventyou’ll be able to check the boxes next to the team members who will be taking part in the event.
Calendly’s team functions bring a whole new dimension to the platform. They extend the tool from a way for members of the public to make appointments with one person to enable them to interact with a company or a team. You get to choose how they make those bookingswhether the events are distributed equally or by availabilityand how much control you want to retain over assigning events to team members.
5. Calendly’s Integrations
The team options extend Calendly’s functionality but that extension takes place on the platform itself. Calendlythoughcan also be integrated with other platforms to add even more features.
Zapier
One of the most flexible integrations is with Zapiera service that allows users to create automated workflows. So you can use Zapier to link your Gmail account with ToDoist to automatically create a task every time you receive an email from an important client.
With more than 1,000 apps signed up to the servicethere’s almost no limit to the degree of automation you can bring into your business. Calendly is one of the apps that Zapier accepts.
Firstyou’ll need to open the dropdown menu under your personal Calendly URLand select “Integrations”.
In addition to seeing a page of apps into which you can integrate Calendlyyou’ll also be given an API key. It’s a long string of characters that let the other platform access your Calendly data.
Copy the keythen log into Zapier.
Select the big orange “Make a Zap!” button at the top of the pageand choose Calendly as your “trigger app.” This is the program that sparks the automated action.
You can use just two actions on Calendly to spark an automated workflow: the booking of an event; and the cancelation of an event. Select oneand Zapier will ask you to connect an account. This is when you paste in your API key.
You’ll need to have at least one booking already made on Calendly so that Zapier can test the automation. If you haven’t taken a booking on Calendly yetgo back and create a test booking. You can then search through Zapier’s apps to create an automated workflow. So you could have Zapier send an email whenever someone cancels or creates an eventor add a task to Trello or Slackor trigger an offer in ClickFunnels.
The automation is still relatively limited. There are only two triggers but you can have a lot of fun looking through the other apps on Zapier and deciding how to link them to your Calendly account.
Salesforce
Zapier provides the most flexibility but for businessesSalesforce may well be Calendly’s most useful integration. The setup differs from the one used by Zapier.
Againyou’ll need a Pro or Premium account. Start with the Integrations page accessible from the dropdown menu under your personal Calendly URLthen select Salesforce from the page of apps. Press the “Go to Setup” buttonand authenticate your Salesforce account. Once you’ve given Calendly access to your Salesforce accountyou’ll need to click the “install the Calendly package” link.
You’ll have a bunch of different options here. Stay with the “do not install” option if existing component names conflict with ones in this package. And you’re likely to want to install Salesforce for all your users on Calendlynot just admins or specific profiles. That will give you a connection to Salesforce for all your team members.
Press “Install”then “Done”and refresh the Sales force integration page on Calendly.
Your Calendly account will now be connected to your Salesforce accountand two things will happen.
Like the integration with Zapierthe integration with Salesforce has only two triggers: the bookingor creationof an event; and the cancellation of an event. In each instantCalendly alerts your Salesforce account which then looks for the email address of the customer in your Salesforce contact list. If it finds that email addressit adds the event (or its cancellation)to that customer’s list of activities.
If it doesn’t find that email addressit creates a new contact in Salesforce.
For any business using both Salesforce and Calendlythis is in important integration that allows them to keep their Salesforce accounts up to date automatically.
Paypal and Stripe
The integration with Salesforce lets you keep track of what the people giving you money are doing but the Paypal and Stripe integrations let you actually take money. We’ve already seen how you can take payments when someone books an event but you can take those payments with either Stripe or PayPal.
On the Integrations pagechoose either Stripe or PayPal from the selection of apps. Once you’ve linked your PayPal or Stripe account to your Calendly accountwhen you select “Collect Payments” under “Additional Options” for the eventyou’ll be able to choose how you accept your payments. You’ll just have to enter the amount you wish to charge andif you wisha description of your payment terms.
A customer who books an event will be asked for their credit card details if they’re paying with Stripeand to log into their PayPal account if you’re using PayPal to take payments.
Zoom and GoToMeeting
Integrations with ZapierSalesforcePayPaland Zoom are all behind the scenes. They’re additions that make running your business easier. The integrations with Zoom and GoToMeeting make life easier for your customers.
Both are videoconferencing platformsand their integration with Calendly does more than extend Calendly’s functions. It gives users a meeting place to hold the events that their customers are booking. For any business whose events can be held online using a video camerait’s a very simple solution.
After creating an account at either Zoom or GoToMeetingselect either from the Integrations page on Calendly. Press the “Connect” button to connect your account. You’ll now receive a set of instructions explaining how use your integration.
Click the “Go to Event Types” buttonselect the gear icon next to an eventand choose “Edit” to bring up the event’s settings. Click the “What event is this?” boxand scroll down to the Location field. Click the Zoom or GoToMeeting link under the fieldand when someone books the eventthey’ll be given a link to join the videoconferenceand phone numbers if they prefer to call in. The booking is also added to your Zoom or GoToMeeting account.
Chrome
Calendly’s Chrome extension makes it easier to just schedule directly from this browser. It allows you to get to your scheduling links or create an invitation.
The first step is to install the extensionwhich you can find in the Chrome web store. Once you still the Chrome extensionyou can open it on any webpage by clicking the Calendly icon located in your browser’s toolbar. It will also be available when you’re drafting an email in Gmail.
If you have trouble logging in through the extensionyou may need to go to your cookie settings at chrome://settings/content/cookies and find the Allow section. Click Add and enter https://calendly.com.
When you’re ready to share a scheduling linkyou can expand the extension sidebar. Hereyou’ll find a list of your event types with additional organizing and sharing options. Another option is to add an internal notewhich can only be seen by you or your team within the Chrome extension.
The Chrome extension integration also allows you to create ad-hoc meetings. Open the Chrome extension and choose New Adhoc Meeting. Choose the meeting duration and location as well as the times. Create a link to send invitees or click Finish and Share to copy it to your clipboard and add it to an email platform that supports HTML. An ad-hoc event can only be booked once. Alsothe invitation will expire after the invitee schedules it.
Google Analytics
Another beneficial integration is between Calendly and Google Analytics. By integrating the toolsyou’ll be able to see how invitees interact with your booking flow as well as facilitate how you create and measure campaign funnelswhich is available only if you purchase the Pro subscription.
To integrate these toolsgo to Admin settings in your Google Analytics account. Find your tracking ID by choosing your preferred account and property you would like to track. Click Tracking Info to locate your ID under Tracking Code. Copy it to your clipboard. Return to Calendly and go to your integrations pagechoose Google Analyticspaste your tracking IDand save.
As an invitee goes through the scheduling processCalendly will send events to Google Analytics. You’ll see an event when an invitee lands on the scheduling pagechooses an eventselects a date and timeand schedules a meeting with you. This wayyou can monitor your invitees’ experience with scheduling with youtrack conversionsand assess the overall success of each campaign. To do thiscreate a goal within Google Analytics.
In your Google Analytics accountgo to your admin page to begin. Locate the Goals view and then add a new goal. Specify the type as an eventuse the key of events from Calendly to customize the goaland track your preferred events.
Intercom Messenger
Calendly recently added its integration option for Intercom Messenger. Nowleads and customers can easily find a time to meet with your directly through this messenger tool. This speeds up scheduling qualified leads and improves your sales cycle potential.
To get started with this integrationgo to the Intercom app store and install the Calendly app. Once you have installed ityou can use any active Calendly link to create a customized invitation to schedule.
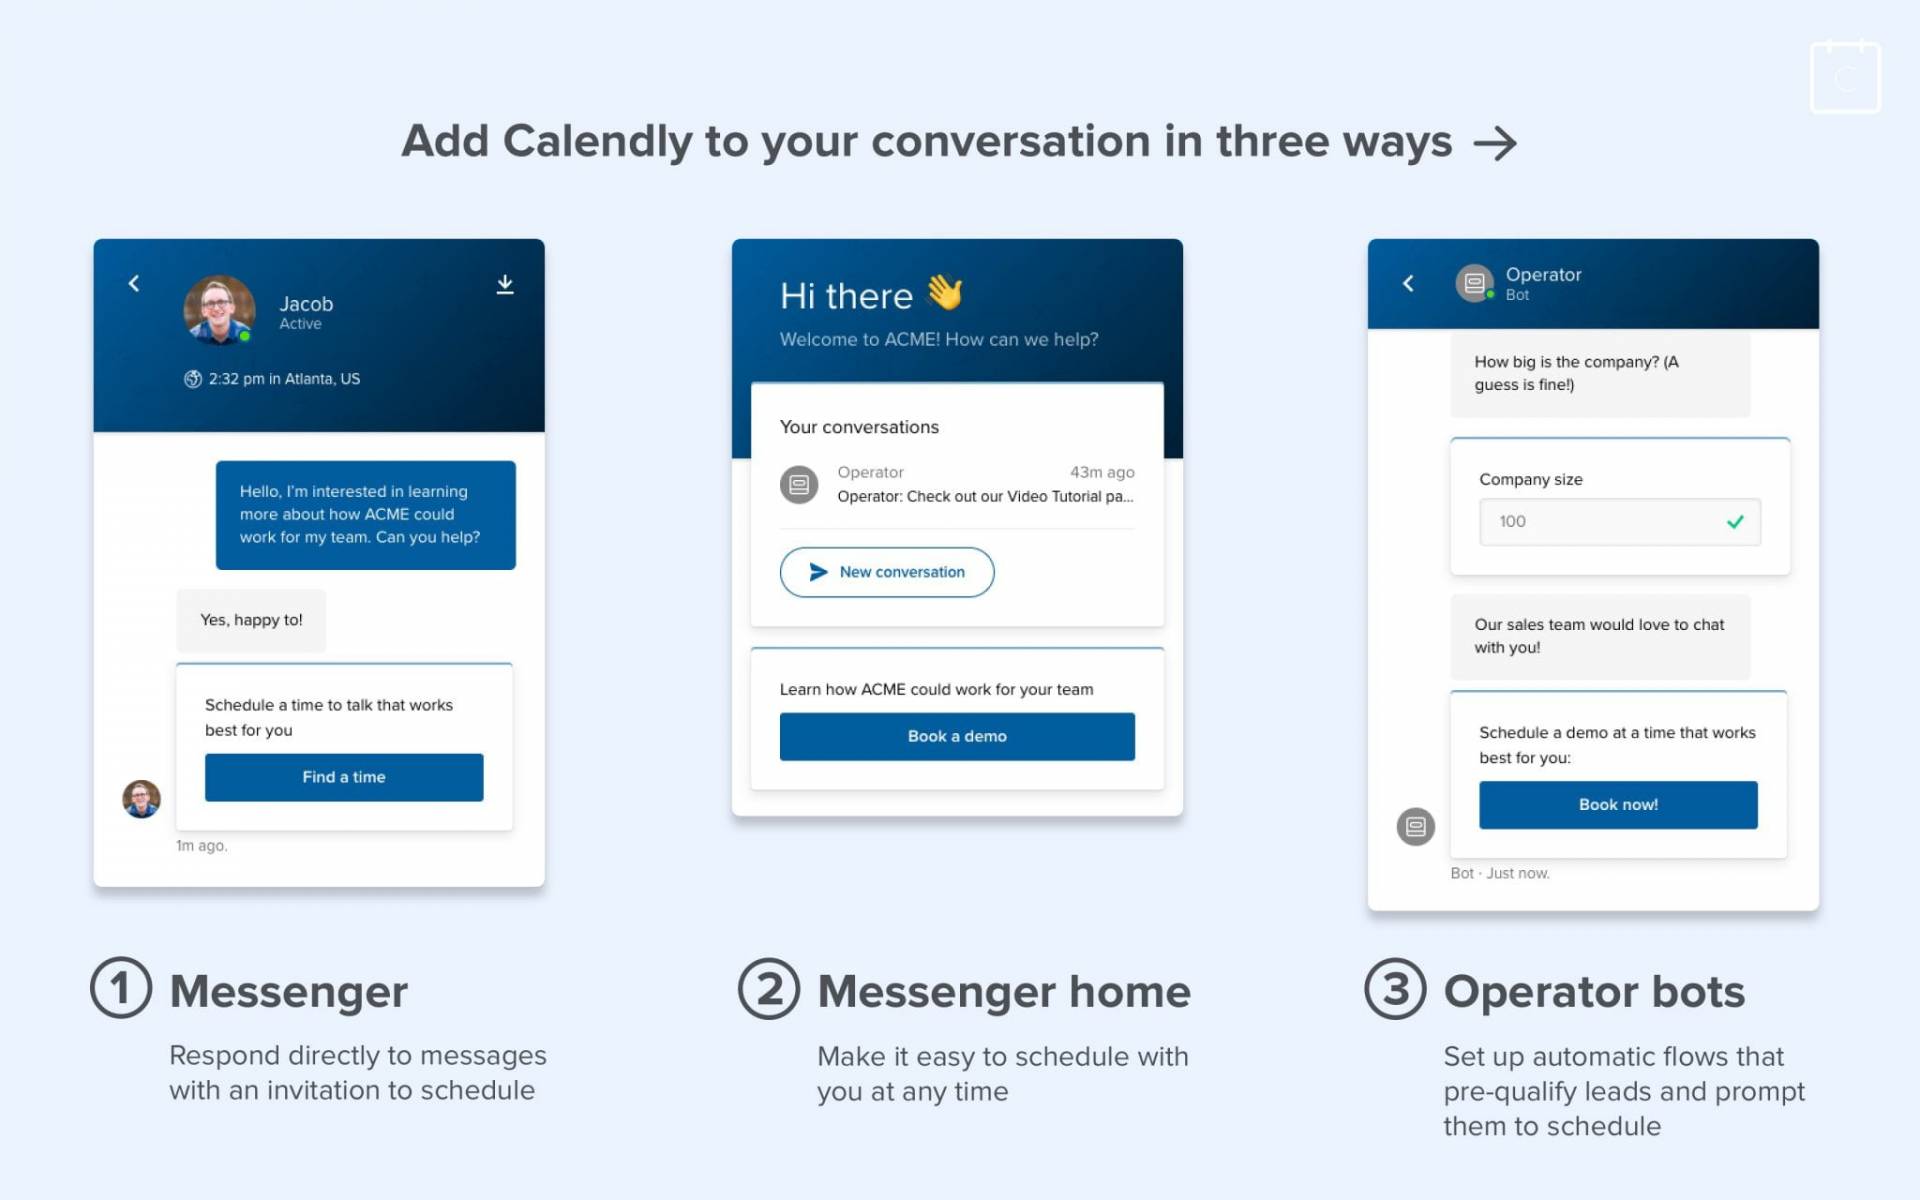
Firstyou can use the integration to create a custom invitation. Secondyou can also reply to current chat conversations or start a new one to invite a lead or customer to schedule with you. The Calendly app can be added to your Intercom Messenger home if you’d like leadscustomersor website visitors to schedule time with you.
Additionallyyou can use Operator for Intercom Messengerwhich allows you to create paths by using custom questions based on the unique needs of your prospects. The entire process is automatedwhich allows the leads to schedule when they’re ready.
6. Other Embed Options
Calendly has three ways for you to embed your scheduling page within your website. Each embedding option is completely responsive so your invitees can schedule across any device. Firstto embed your personal scheduling pageselect Share Your Link from the drop-down menu in your account.
A pop-up window that appears from which you should choose Embed on Your Website and then your preferred embedding option. You can customize color or text before copying the code to paste to your webpage.
To embed a specific event typego to your Event Types page. Click the gear icon for the event and then pick Embed. Locate the embed code for a team page from the Teams tab. Find the team you wantexpand the corresponding drop-down menuand choose Embed.
Embed Options for WordPress.com
If you add a hyperlink to your scheduling page on a WordPress.com sitethen you can invite visitors to schedule with you. Within page editinghighlight any text and click the Insert/edit link button in the toolbar. Paste the URL to your personal scheduling pagean event type pageor a team page.
Embed Options for WordPress.org
WordPress.org supports Calendly’s embed optionsincluding the inlinepop-up textand pop-up widget options. To embed Calendly to a single page of your sitesign in to WordPress and go to the admin area. Thengo to Pages and decide which page to edit. Switch from Visual view to Text view and paste the embed code that you copied from your Calendly account. Preview Changes to validate if the embed works with your website’s theme before you select Update to save.
Embed Options for Squarespace
Squarespace supports Calendly’s embed optionsincluding inlinepop-up textand pop-up widget for Business Plan users. Sign in to Squarespace and go to the page you would like to edit. Hover over page content and select Edit. Use the “+” button to add a block to the page. Thenpaste the embed code that you copied from your Calendly account and apply the changes to your web page.
Embed Options for Weebly
Weebly supports Calendly’s embed optionsincluding inlinepop-up textand pop-up widget. Sign in to your Weebly account and choose Edit Site. Under the Build tabfind and select the page that you’d like to editand use the Basic toolbar. Find the option to add an embed code and then drag it into position on the page. Edit the custom HTML within the box and paste the embed code that you copied from your Calendly account. Thenpublish the changes to your website.
Embed Options for Wix
Wix allows you to embed Calendly by using its built-in options. Embed your scheduling page directly onto your website. Another option is to create a button that leads visitors to the Calendly app to book a meeting. Sign in to your Wix account and choose Site Actions to open your website editor. Use the +Add button and expand the More section. From thereselect Embed a Site and Enter Website Address. Then, paste the Calendly link to your personal scheduling pagean event type page or a team page. Adjust the size and location of the embed and then publish.,
You can also lead invitees to your scheduling page by adding hyperlinked text or images on your website. Select any image or text and use the Link button to paste your Calendly URL. Wix also offers built-in options for adding a customizable button to any page. Click the +Addbutton and then Button from the menu. Edit the text and add a link that will lead visitors to your scheduling page.
7. Security
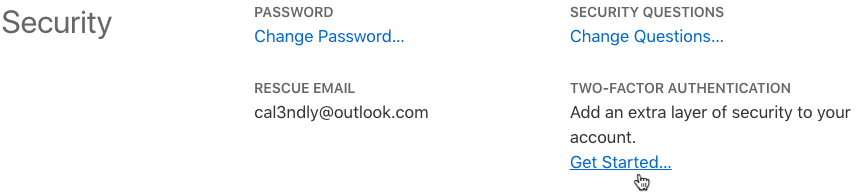
Calendly is a secure platform that encrypts all data at rest and in transit by using 256-bit encryption. Alsoif you are hosting Calendly on Amazon Web ServicesCalendly uses the platform’s built-in securityprivacyand redundancy features to keep data safe.
Howeverit is recommended that Calendly should not be used for collecting Protected Health Information (PHI). Calendly cannot access patients’ medical details or private information. it can only read the free/busy status of events in your calendar to avoid double-bookings.
8. New Features
Calendly also continues to add new features. For exampleit recently introduced a new invitee scheduling experience that lets invitees see your availability in a single calendar viewwhich can speed the time it takes to find the optimum meeting time. This includes the ability to see a full month view instead of just a seven-day “circle view.” That means scheduling a meeting with fewer clicks. More new features are planned for 2023including more integrations and embed options.
The general Pros and Cons of Calendly
Pros
Calendly is a great product as it can integrate well with multiple platformssuch as Google Calendars. It also allows different types of meetings to be bookedand you get get a free version to get started and get familiar with the product itself. It is also very user-friendly and quite easy to use. Additionallyeverything seems to be automated and there are convenient reminders for meetings or anything else that you have on your calendar.
Cons
Calendly has a few drawbacks as wellthe first being that it is not very mobile-friendly. If you’re always on the goCalendly may not be the best for you as you may run into some difficulties that could set you back in your day. Additionallythere is no training guide or support page. In factmany customers complain that customer support is only via emailwhich may make things inconvenient.
What Do Calendly Users Have to Say?
A Business Owner said“Calendly has been a great addition for my practice. I’m able to let prospective clients book a consultation call with me without my having to fumble with a calendar to find a date and time that works for the both of us. I get an email notification once a time slot has been selected which allows me to plan my work day accordingly.” This user went on to say that “Calendly has been an excellent addition to my tech stack. I love having the capability to sync with various Google Calendars so that my other appointments don’t conflict with any new appointments being made through Calendly. I’m also able to integrate with Stripe to collect money up front for my paid trainings and consultations. Then I know a client is committed to the appointment and have less cancellations when they have paid for my time up front.”
Another Business Owner said “Customer support is 100% via emailwhich is okbut very annoying. No matter how big the issueit is 100% via email. This is true with the paid or the free version. They will ask the same scripted questions and send the same scripted “self-help” messages regardless of what you type. It is a good productit is very helpful and will make your life easier. Ithoweverdoesn’t work great with Microsoft Office/Outlook. If you choose to use this serviceunless you need the features that come with the paid versionI recommend getting the free version.” This user recommends that “If you are not very tech-orientedtry to find another solution due to the fact that all customer support is via email. If you can’t figure it out based upon the email you sent and the one they sent youthen it is your issue. Alsoit takes forever to get a response. My syncing issue has been going on for over 4 months.”
Lastlya marketing manager said“We use Calendly for our business to book demo appointments for our sales and marketing team. It allows potential customers to schedule meetings without having to have a representative available. It frees up time for our reps to be working on what’s really important!”and “Calendly is perfect for anyone scheduling appointments. We use this for sales appointmentsbut I see it fitting very well for service industries such as massagehairand even coaching. Calendly integrates with any and all calendars and gives you the freedom to set your schedule and let your clients pick their times. You can set up custom meeting timesnamesdescriptions etc. The range of possibilities is very wide and is extremely user-friendly.”

Conclusion
At its simplestCalendly makes it easy for people to make appointments. It lets strangers book times with others without having to share their calendars or go back and forthlooking for an empty time slot.
Butit also does so much more.
Calendly allows users to create different kinds of events on a schedule that others can book. It gives them directand even personalized linksthat they can give to others to bring them to those eventsand lets businesses add teams so that customers can choose the staff they want to meet or managers can choose the meetings that they want to give to their employees. It also allows them to add multiple people to the same event.
By integrating Calendly with other platformsthe service becomes even broader. The result is that whether you’re an individual looking to book times in your calendar with potential leadsthe owner of a fitness center matching personal trainers to clientsa school secretary offering times to families on parents’ eveninga consultant trying to build audiences for webinarsor just about any other kind of businessCalendly is now the tool you need for 2023 to get more done smartly.
Updated May 22023
John Rampton
John’s goal in life is to make people’s lives much more productive. Upping productivity allows us to spend more time doing the things we enjoy most. John was recently recognized by Entrepreneur Magazine as being one of the top marketers in the World. John is co-founder of Calendar.