
Tired of Windows managing your printer choices? Thenyou are not alone; it happens with many who have multiple printersfor examplethose who have both local and network printersand those who work between home and office networks. Windows 10/11 has a “Let Windows manage my default printer” feature that automatically switches your default printer to the last one usedunless you set your preferred default Windows printer.
You can configure your default printer settings through the Settings app in WindowsControl Paneland Command Prompt; these methods are explained step-by-step in this article.
Howeverbefore setting your preferred default printerlet’s look at what it exactly means to set a printer as the default in your printer preferences.
What Does It Mean to Set a Printer as the Default
A default printer is the printer your computer automatically selects to print anythingsuch as a document or photoon your device. If you have multiple printers connected to your PCsetting one of these as your default printer means that this printer will be used for printing on your computer every time you use the print optionunless you select any other printer for a particular task.
Setting your preferred default printer saves you from the inconvenience of choosing your printer while printing. Hencelet’s proceed to configure your printer settings.
How to Set Your Preferred Printer as Default in Windows
You can configure your printer settings to set a printer as the default via the Settings appControl Paneland Command Prompt; all of these methods are explained below.
Method 1: Configure the default printer settings using Windows Settings
You can turn off the “Let Windows manage my default printer” feature in Settings to set your preferred printer as the default in Windows. Here is how.
- Firstuse the Windows+I keyboard shortcut to open Settings.
- Nextnavigate to the Bluetooth & devices settings. In Windows 10you can choose the “Devices” settings.
- Click Printers & Scanners.
- Toggle off Let Windows manage my default printer.

- Select the printer that you wish to set as your default printer and click the Set as Default button. Windows 10 users can select the desired printerclick “Manage,” and then click “Set as Default.”
Also know: Fix Printer Not Being Found or Detected in Windows System
Method 2: Change your printer preferences through the Control Panel
Another way to configure your default printer settings is via the Control Panel. Here’s how to change the default printer using the Control Panel.
- Firstclick the Start button on your Taskbartype Control Panel in the search barand then click on the first search result.
- In the Control Panel windowclick the View By dropdown to change the view to Category.
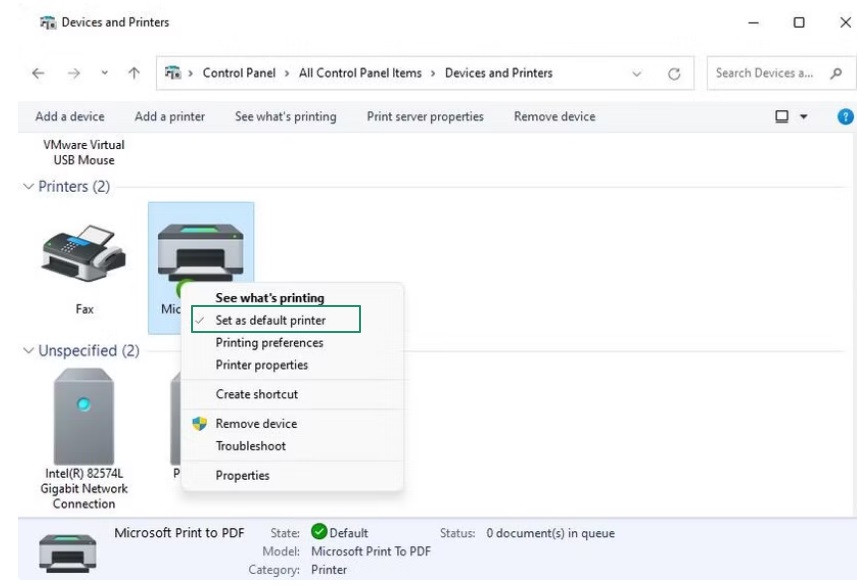
- Click View Devices and Printers in the Hardware and Sound category.
- Lastlyright-click your preferred printer and choose Set as default from the menu that appears.
Method 3: Use the Command Prompt to set your preferred default printer
For those comfortable with the command line interfaceCommand Prompt is another appropriate choice for setting your preferred default printer on Windows. Below is how to set a printer as the default using the Command Prompt.
- Firstensure you know the exact name of your preferred printer. To find the exact name of your printeropen the Control Panelselect Device and Printersand note your printer’s name.
- After noting the name of your printertype cmd in Windows search (use the Windows+S keyboard shortcut to access the search functionality)and click the first search result.
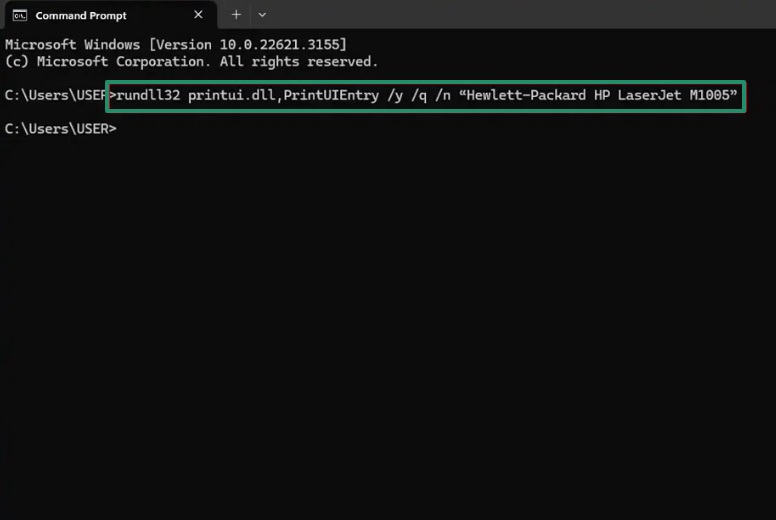
- In the Command Prompt windowcopy and paste the following command and press Enter. Do not forget to replace the printer name with the actual name of your printer.
rundll32 printui.dll,PrintUIEntry /y /q /n “Printer name”
- To confirm your default printernavigate to the Device and Printers in Settings and check if your preferred printer is set to default.
Also know: How to Reset and Clean Printer Spooler on Windows 10
If your desired printer is not set as the default printer or the default printer keeps changingfollow the path Windows+I keyboard shortcut>Bluetooth & Devices (Devices in Windows 10)>Printers & Scannersand then turn off Let Windows manage my default printer.
That’s how to set your preferred printer as the default on Windows. Hope this helps make your printer experience smooth. Howeverif you have any doubts or questionsyou can let us know through the comments section.
