Before you beginmake sure you’ve signed up for an account. You can find detailed instructions here.
Creating an agent
Start the creation process
After logging inclick “Create agent” to start the process.
You can also duplicate an existing agent from the home page by clicking the three dots information icon next to a profile.
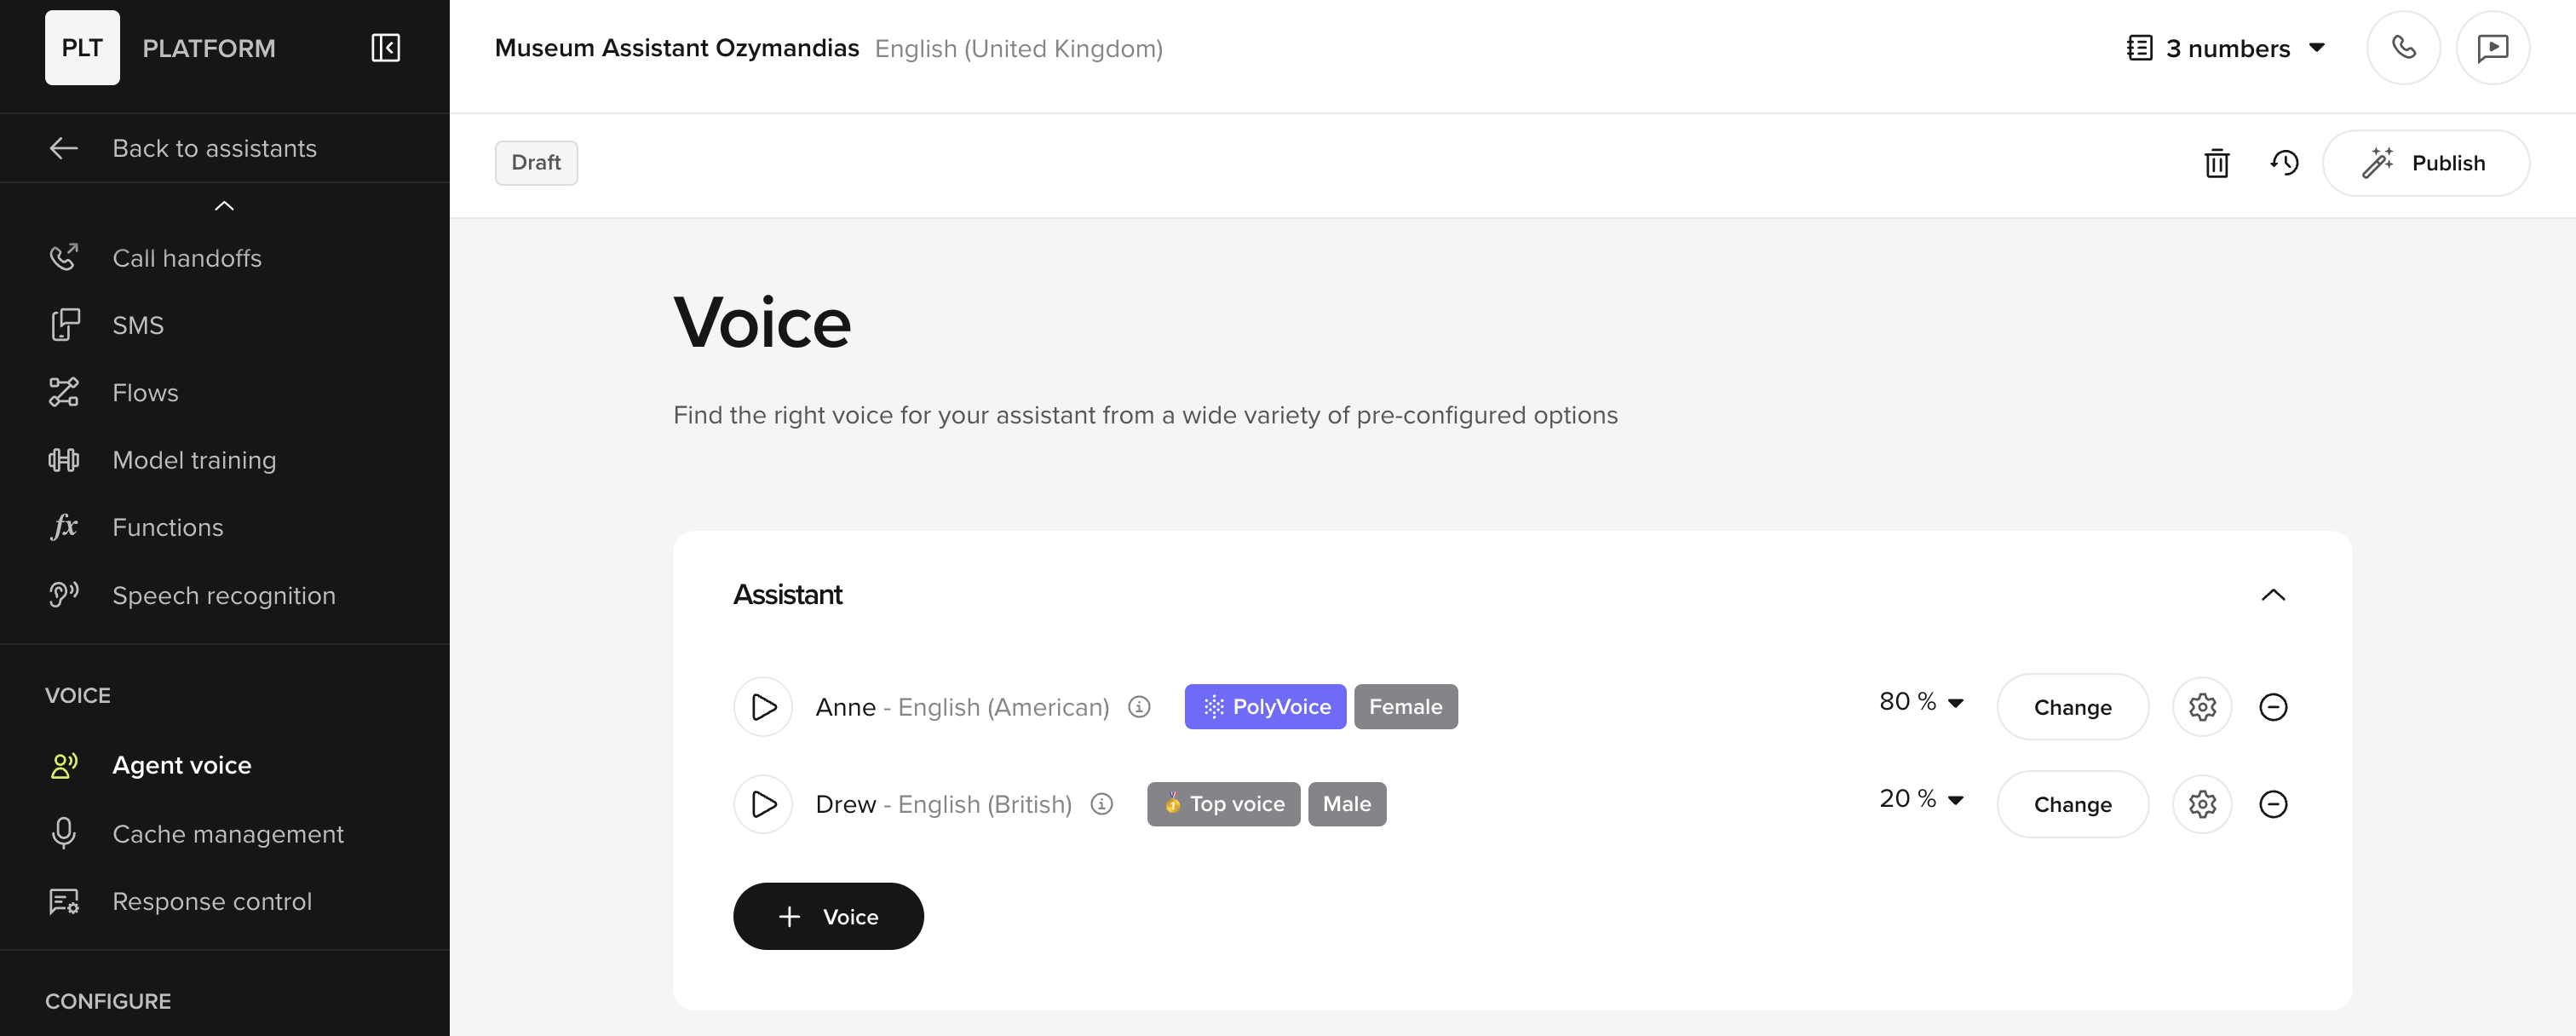
(copy). You can also export and import existing agents from .bin files.Set a nameresponse languagevoiceand greeting line
Full page: VoiceAgent settingsCreate a new agent by entering an agent nameresponse languagevoiceand the welcome greeting.You can also set a project ID herewhich will determine your URL.After completing these stepsclick “Next”.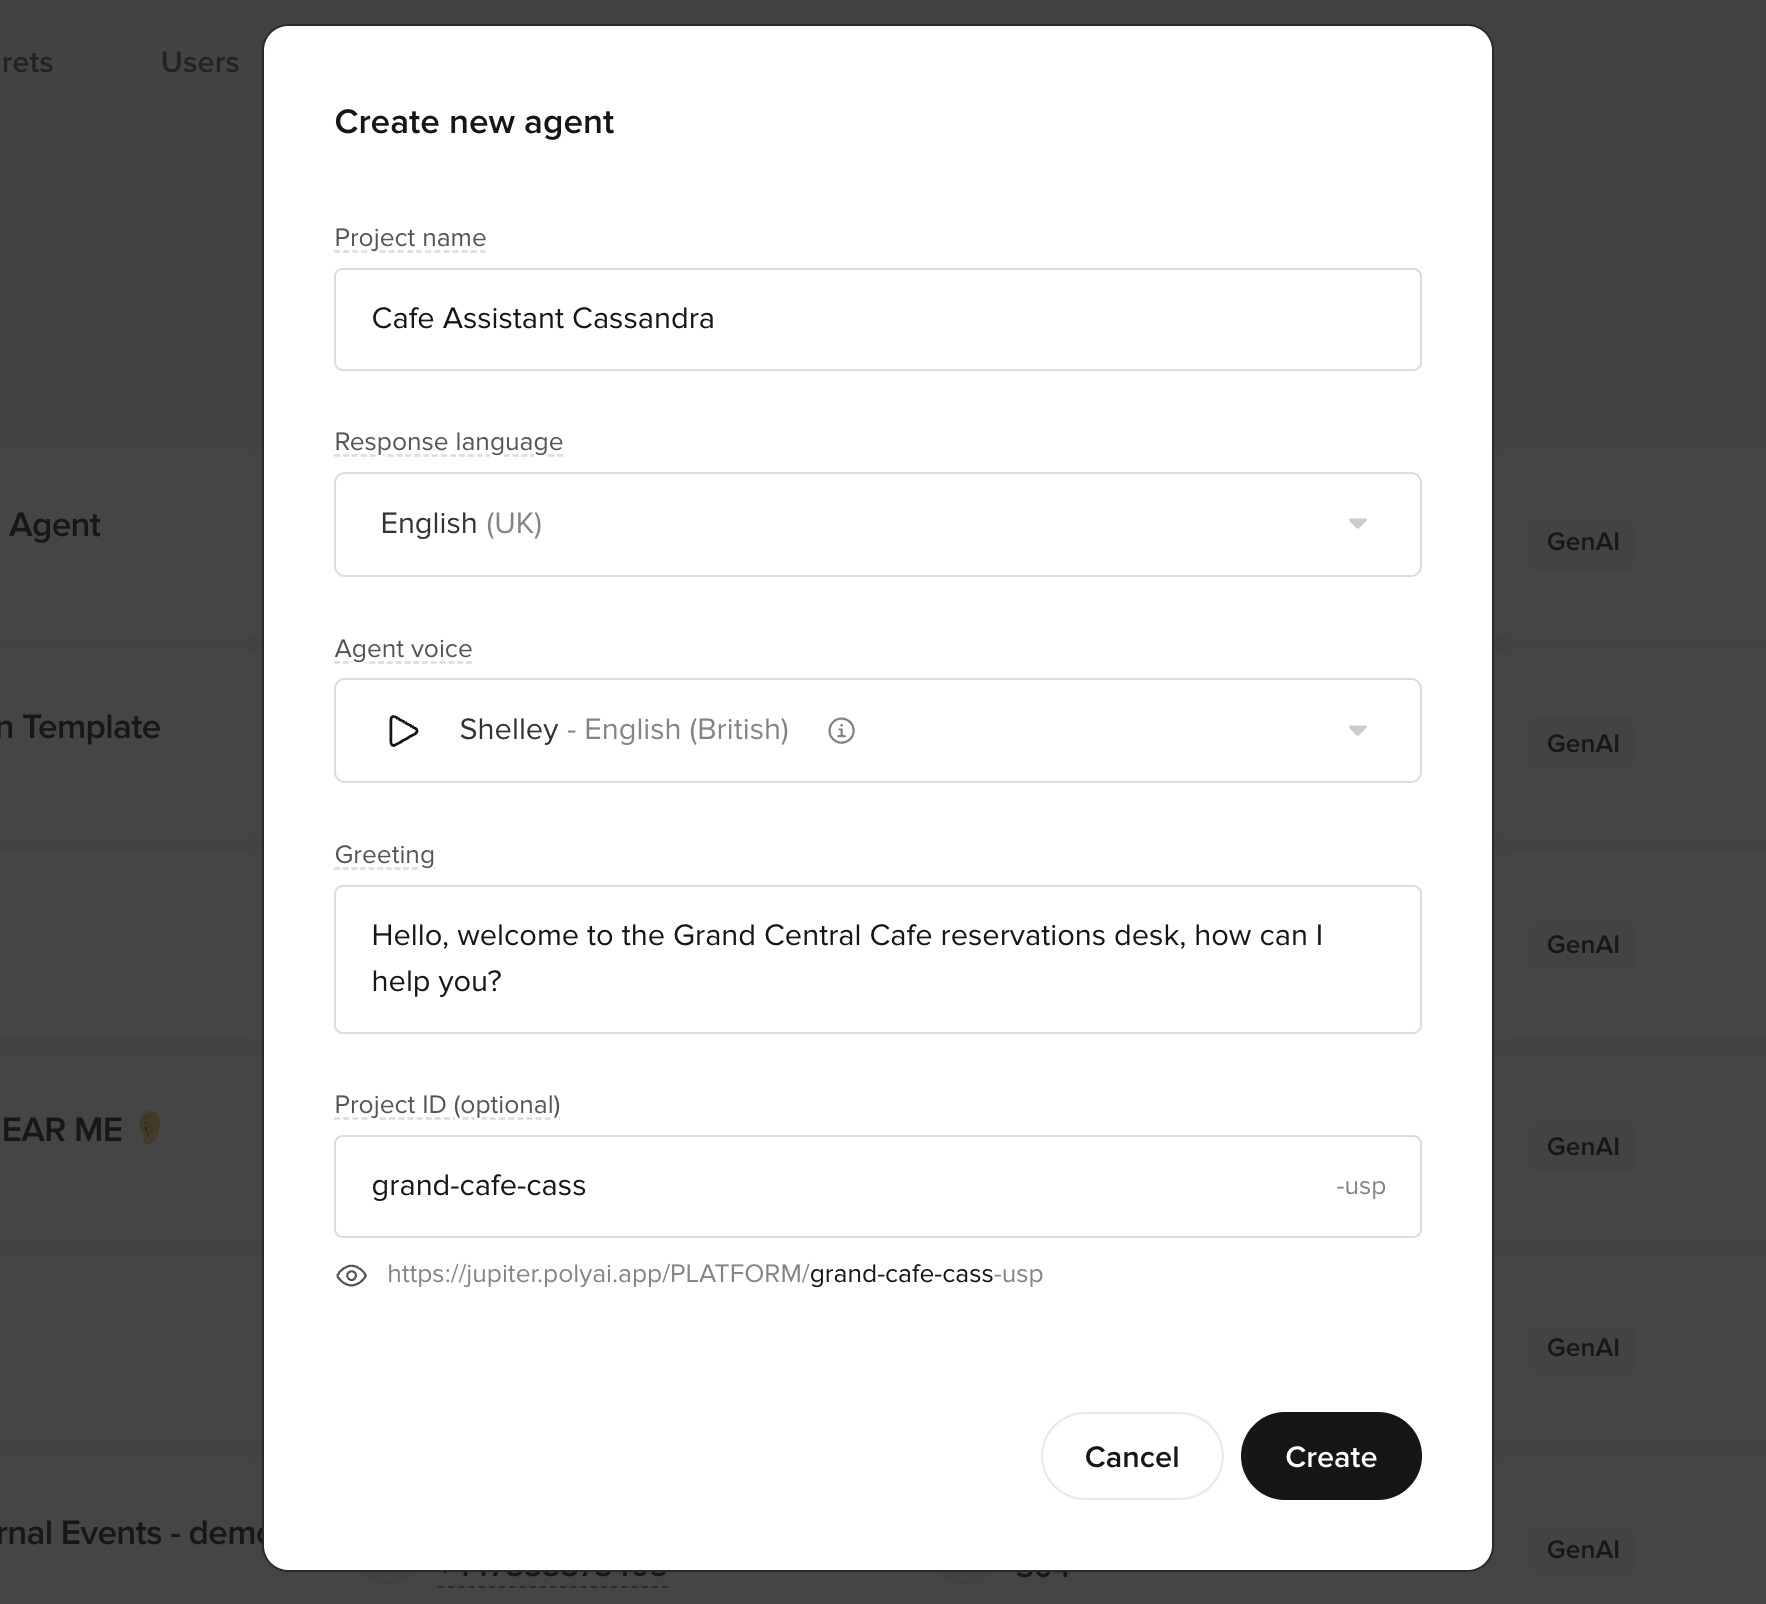
Entering Agent Studio and the knowledge base
Once you have created your agentyou will see is a blank knowledge base. Other functionality and settings are available on the left-side navigation bar.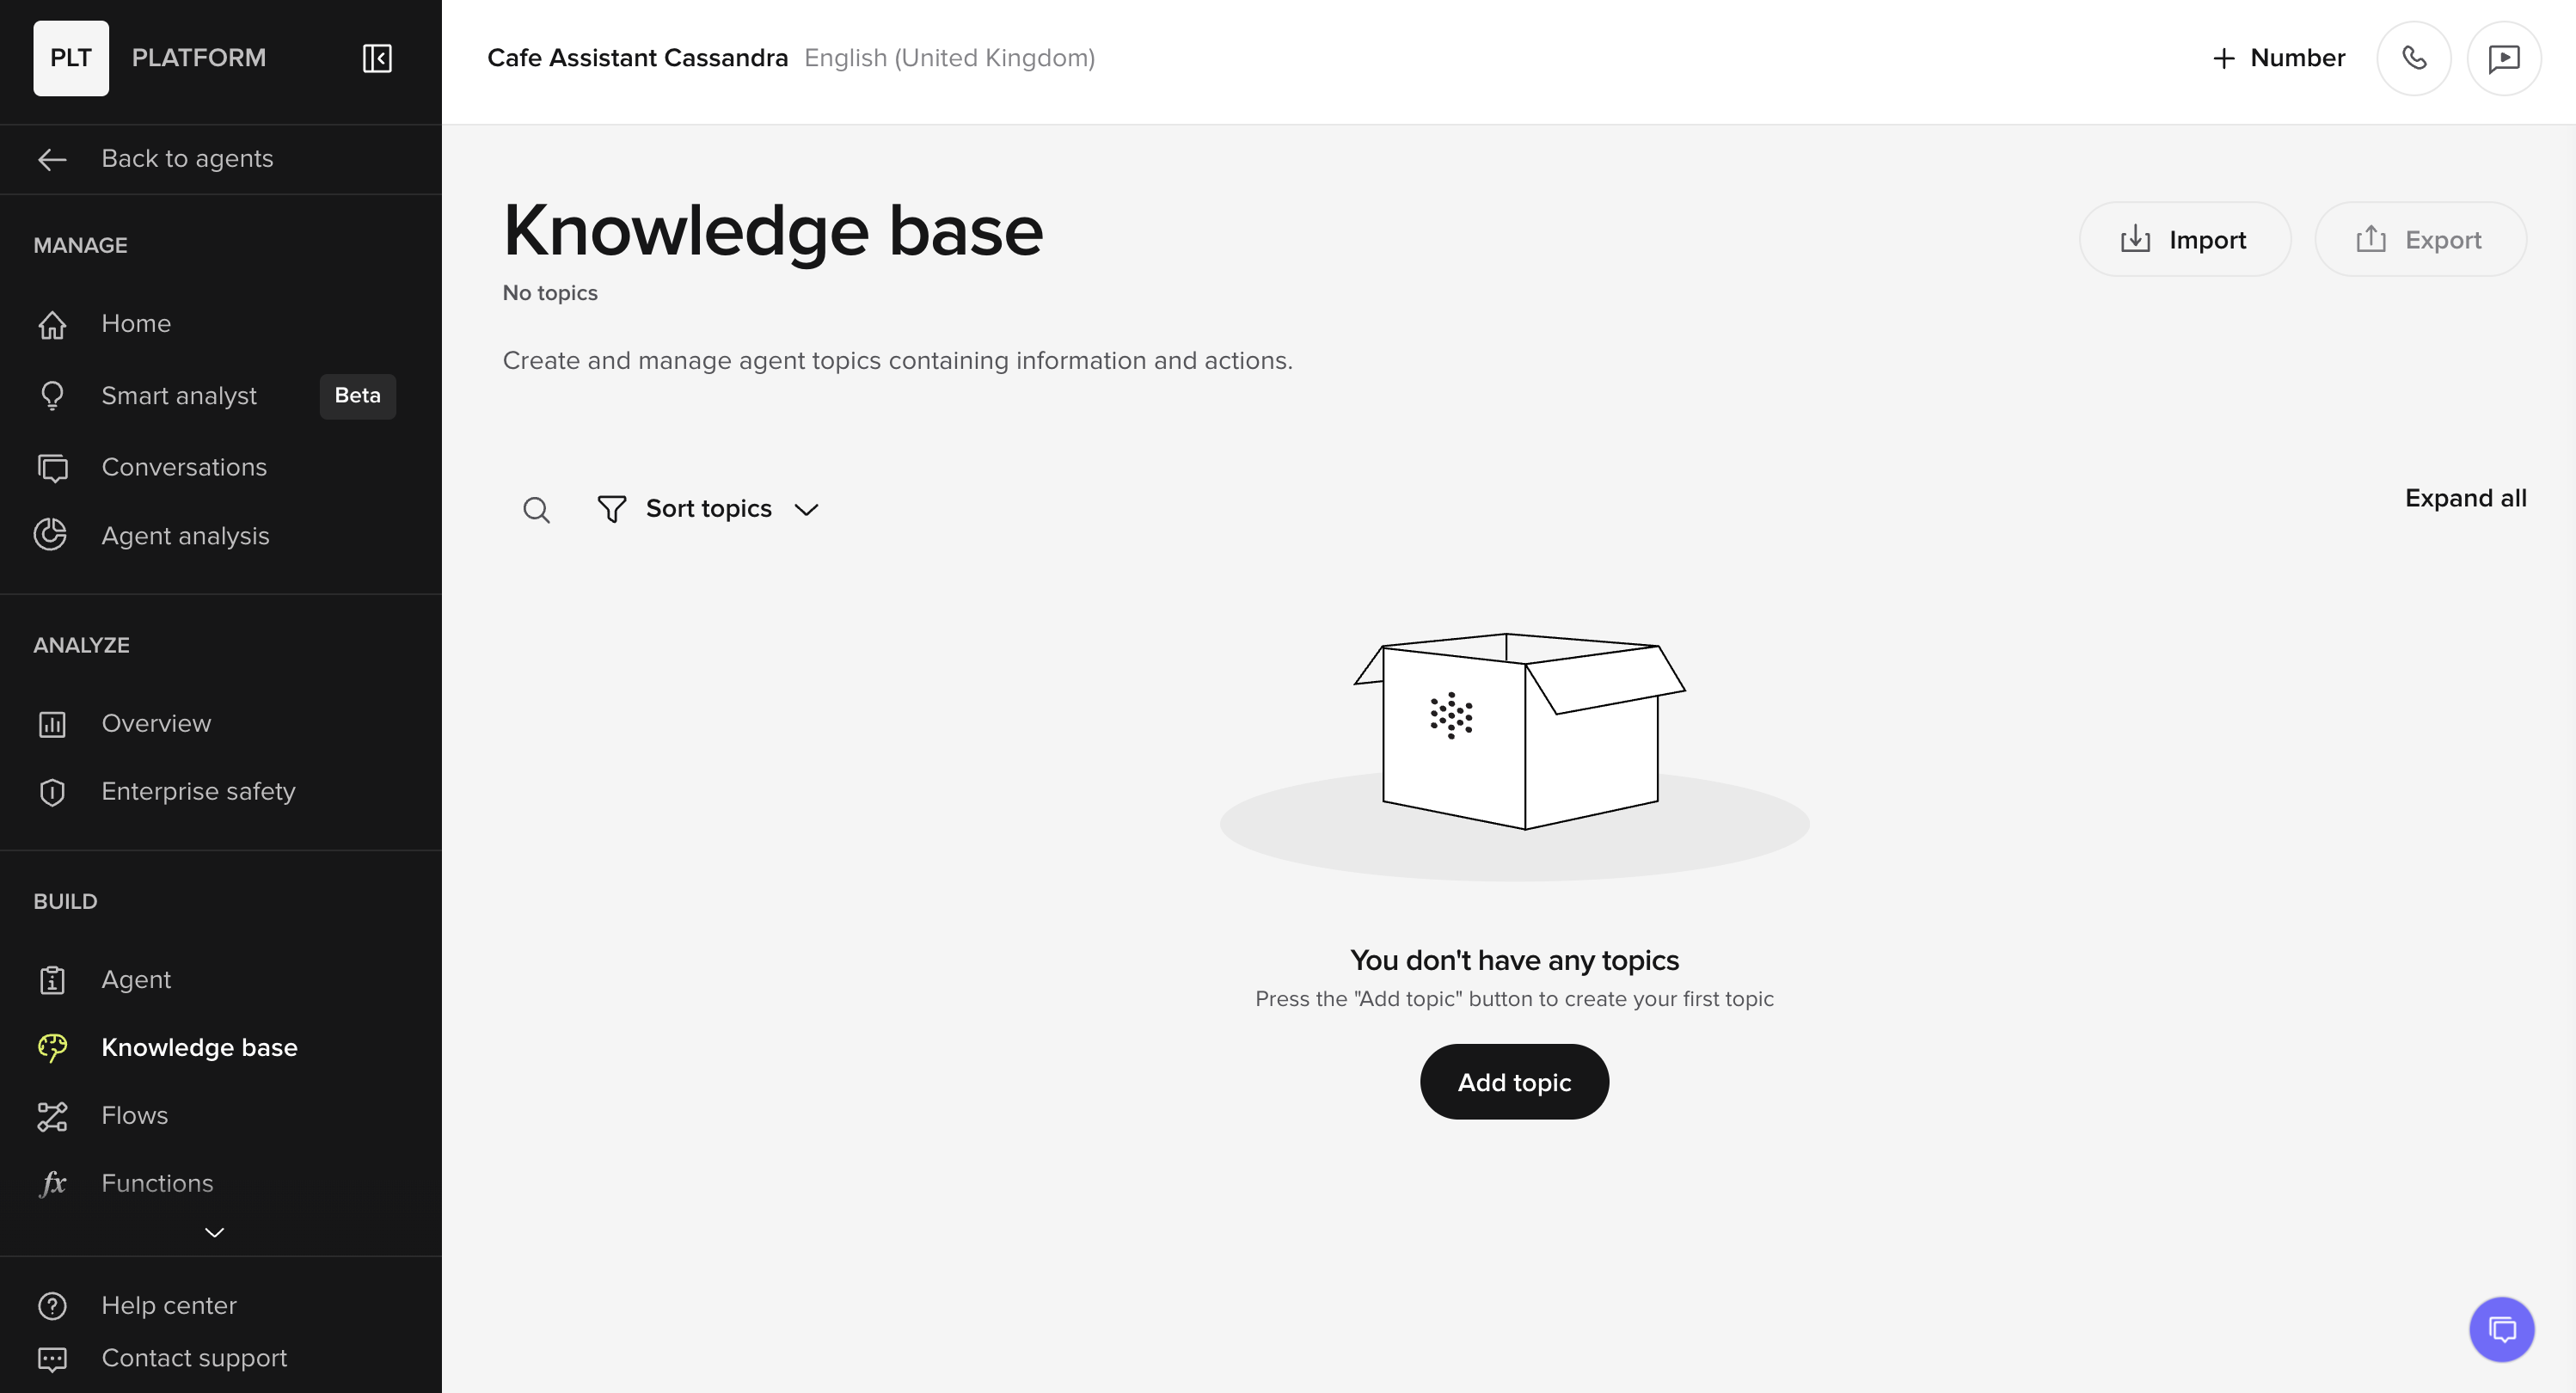
Add a knowledge base item
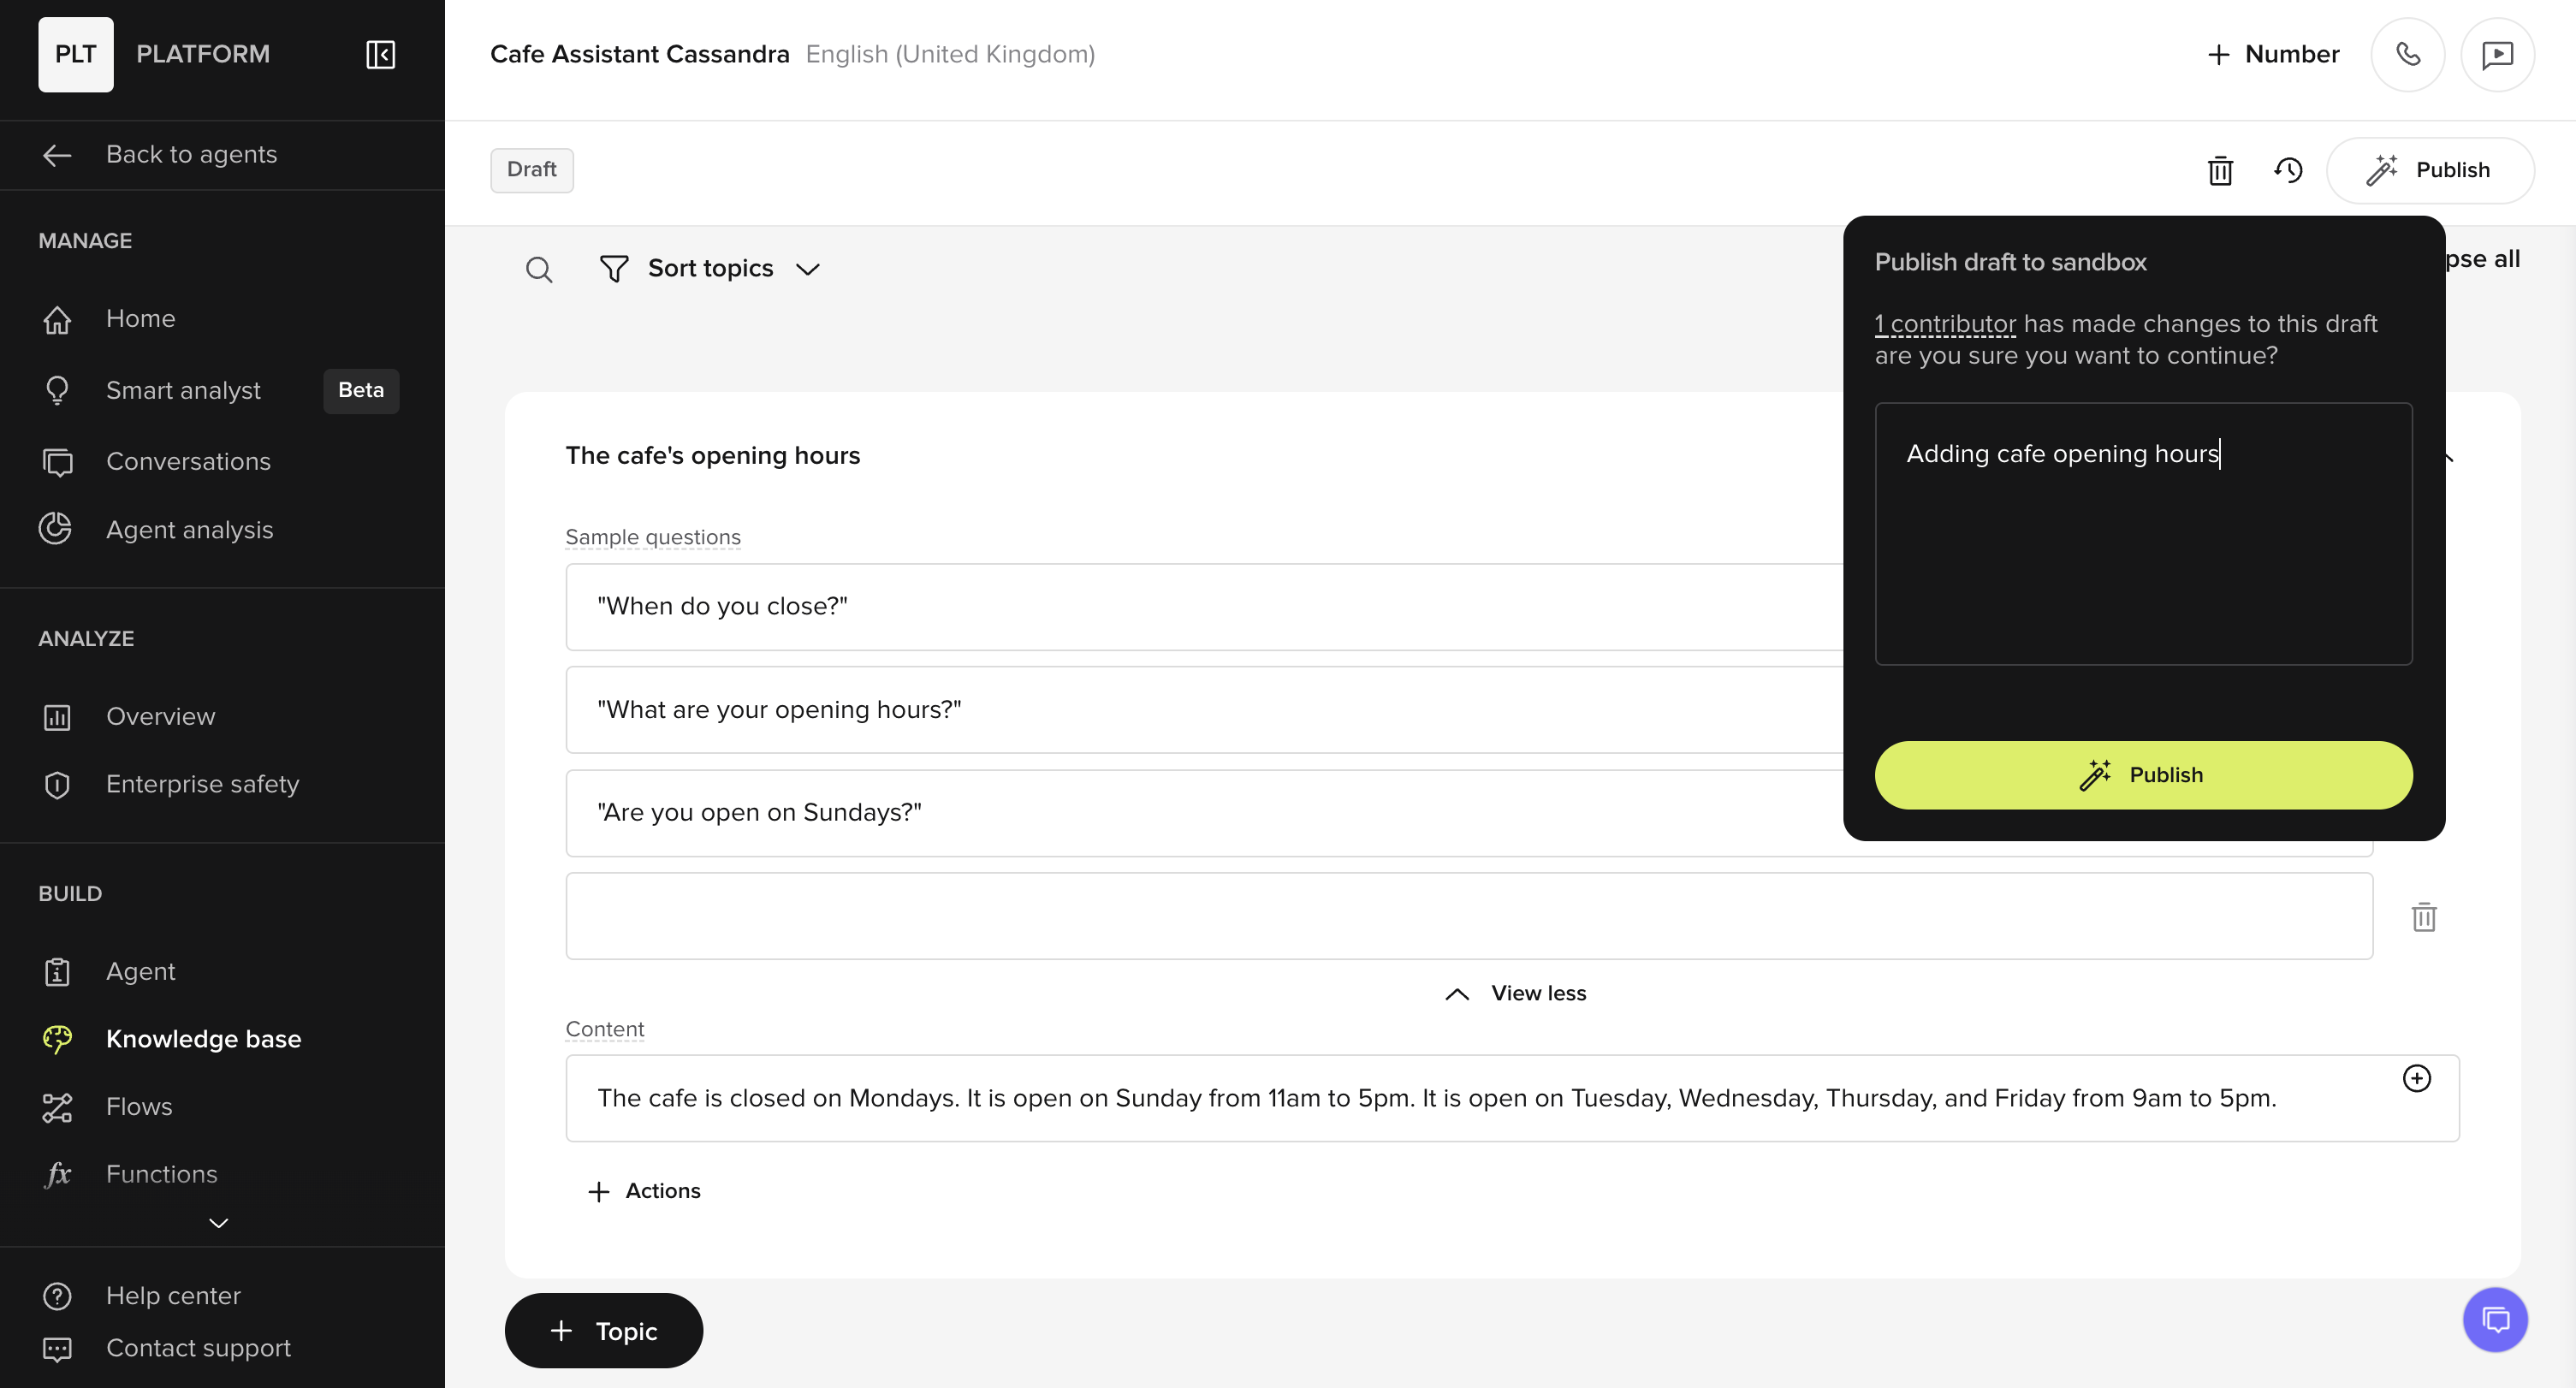
- A topic title (for example“The café’s opening hours”)
- A set of sample questions that users might ask (e.g.“When do you close?”)
- The answer content your agent should return (e.g.“The café is closed on Mondays…”).
Change your language model
Go to Settings → Model to select which LLM will power your agent. The default is GPT-4o Minibut others like Claude 3.5 Haiku or PolyAI’s Raven are also available depending on use case.Full page: Model Selection
[Voice agents only] Select a number for telephony integration
Full page: Telephony IntegrationYou may buy a number or connect an existing number for your agent. You can also skip this step and return later.
[Webchat agents only] Design your chat widget
Full page: WebchatUse the Webchat Customize tab to set how the widget will look on your site.
You can update the: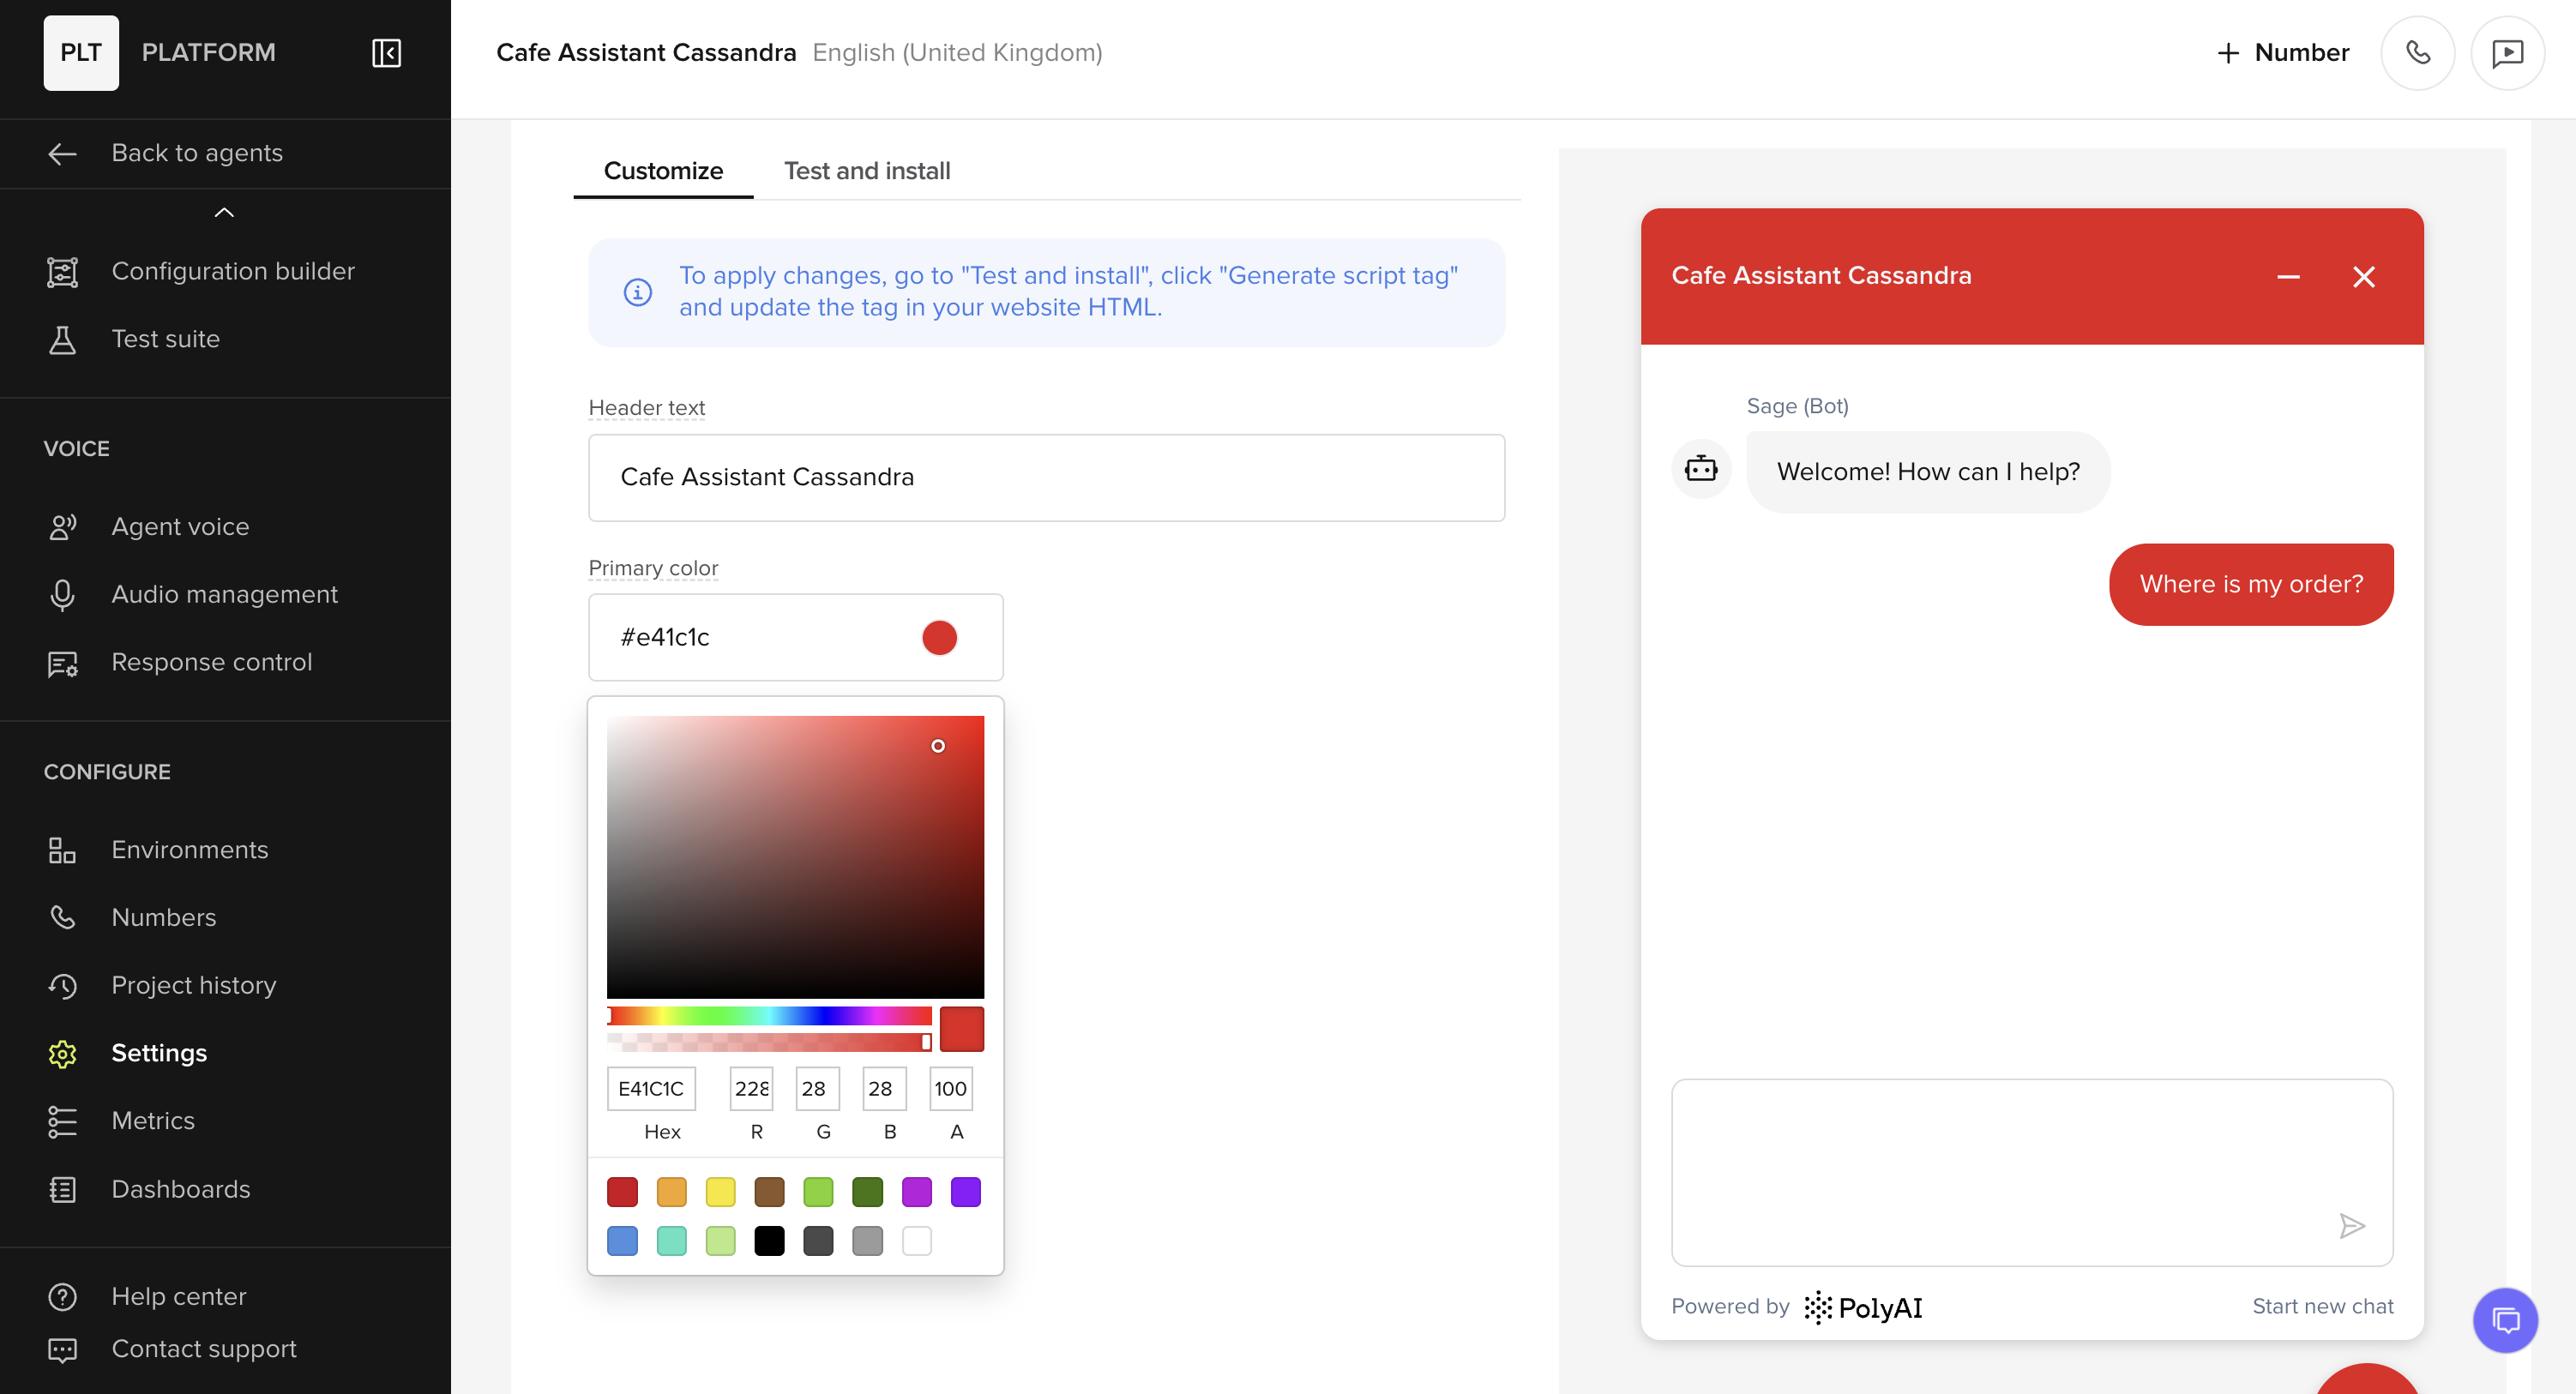
- Header text – the title shown in the chat window (e.g. “Cafe Assistant Cassandra”).
- Primary color – controls the header background and action elements like buttons. Enter a hex code or use the color picker.
After changing syou must redeploy the widget under Test and install → Generate script tag so updates appear on your site.
[Advanced] Integrate functions into your knowledge base
Full page: FunctionsWhat they do: Functions allow you to add dynamicprogrammable behavior to your agentand allow you to handle external API callsretrieve specific dataand use that data to make decisions based on real-time context.Example use case: An agent retrieving shipping information for a customer query about an order.
[Advanced] Add a flow to your project
Full page: FlowsWhat they do: Flows are designed for managing multi-step conversationslike booking a table at a restaurantresetting a passwordor collecting feedback.Example use case: A customer reservation flow for a restaurantwith steps to ask for the datetimeand number of people before confirming the bookingas well as handling any problems that might arise along the way.
Test your agent (web-chatbrowser callor phone)
Full page: Agent ChatYou can test your agent without deploying by:
- Using the web chat interface
- Making an in-browser voice call using the phone icon
- Calling from a connected number
Publish your agent
Full page: Environments & versionsOnce you have completed setup:
- Publish your agent to the Sandbox for internal testing.
- Promote to Pre-release for user testing and QA.
- Finallypromote it to Live to once it production-ready.
How does my agent work?
Full page: Processing order Once your agent is setuphere is how it will process calls:- Caller speaks: The agent receives the caller’s input as an audio stream.
- ASR Service: Transcribes the audio into text.
- LLM Service: Interprets the request and determines an appropriate response.
- TTS Service: Converts the response back into speech and delivers it to the caller.
You can set a custom disclaimer message to precede the call using an alternate voice.