
Artificial intelligence is here to change everything. We have long suspected the huge power it will have in our personal and professional livesand more and more tools are using its potential to offer a better service to their users.
And that is precisely what Microsoft has done with its newly released editing toolMicrosoft Designer. A very powerful design solution that is sure to become a real alternative to Canva Plusit is also one of the first Microsoft tools to incorporate Copilotan AI assistant that allows you to design all kinds of things in the blink of an eye.
So let's cut to the chase and see how you can start using Microsoft Designer today to create professional designs with no design knowledge at all.
- What is Microsoft Designer?
- How much does Microsoft Designer cost?
- Getting Started with Microsoft Designer
- Discovering the editing panel
- Downloading your designs
- Sharing the designs online
What is Microsoft Designer?
As mentioned at the beginningMicrosoft Designer is a powerful tool that offers a wide range of design features to help users create visual content through artificial intelligence.
It is available within the Microsoft Office suitebut you can access it directly using this link here. The tool is free to use for nowand it provides a user-friendly interface and a large number of different tools for creating visual designssuch as brochuresposterspresentationsand more.
Whether you're a studentprofessionalor business ownerMicrosoft Designer can enhance your design projects in just two clicks.
How much does Microsoft Designer cost?
Microsoft Designer is currently available for free to everyone. Howeverit is expected that in the futureas new features are addedsome of them will be limited to Microsoft 365 paid plans.
In any caseright now and in the medium termwe can enjoy all the benefits and AI power of Microsoft Designer at no cost.
Getting Started with Microsoft Designer
To access Microsoft Designer and start using the toolyou will have to log in first to your Microsoft accountof course. If you don't have an accountyou will need to create one from scratch. Don't worrythoughit's freeand you can do it in just a couple of minutes. You will land on the Microsoft Designer start page when you have done so.
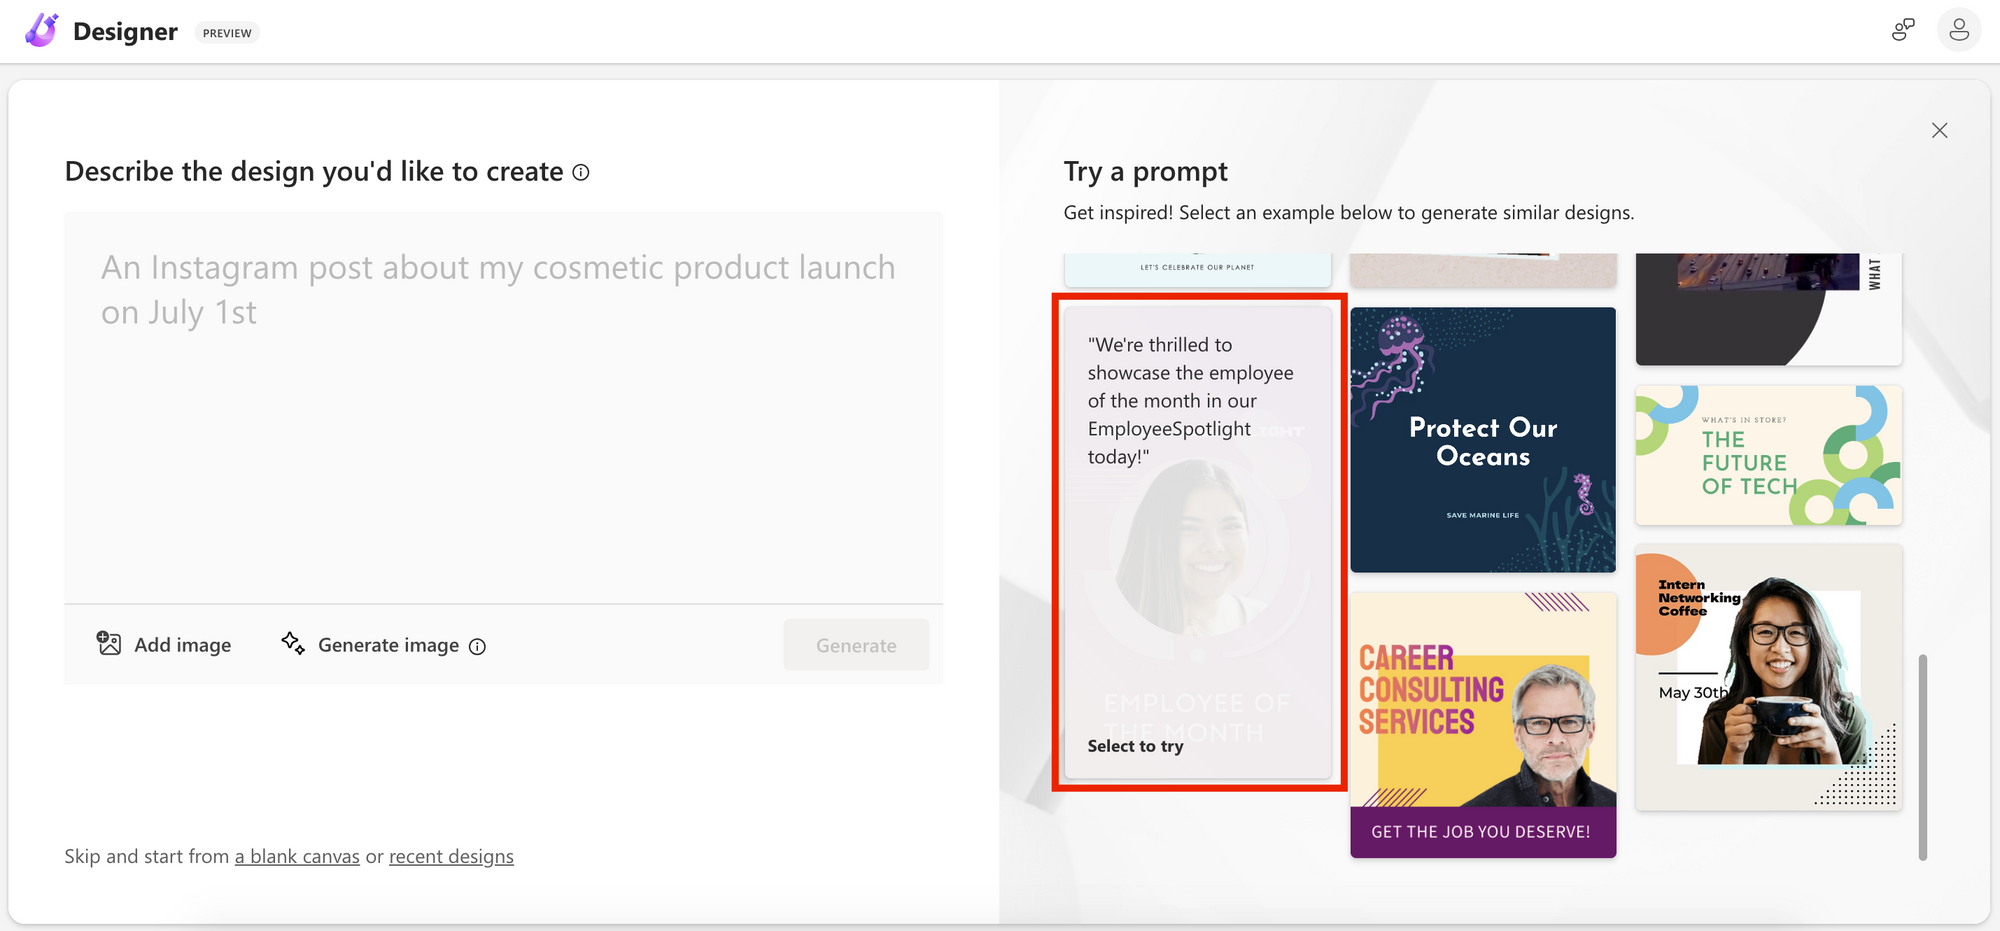
One of the first things that may surprise you is that you don't have the typical blank canvas like in other editing platformswhere you have to come up with a design on your own.
Insteadwhat you find is a space to your left that invites you to describe the type of design you want to create. So you can use it to type in any idea you have in your headand the artificial intelligence will create several design proposals based on the concept you have chosen.
Let's look at an example. Let's say I want to create several posts on Instagram to promote the sales I'm going to do in my business during the summer.
All I have to do is ask the tool for ideas and it will design different proposals that I can explore and edit as I wish:

When you add the description of your ideayou can also upload your own images or ask the tool to generate new images through AI.
Although if you are uninspired or just not sure what you want to createdifferent default templates will appear on the homepage before you type anything at all.
But that's not all! If you hover your mouse over each assetit will show the text that has been used to create each of these sample designs you're browsing through.
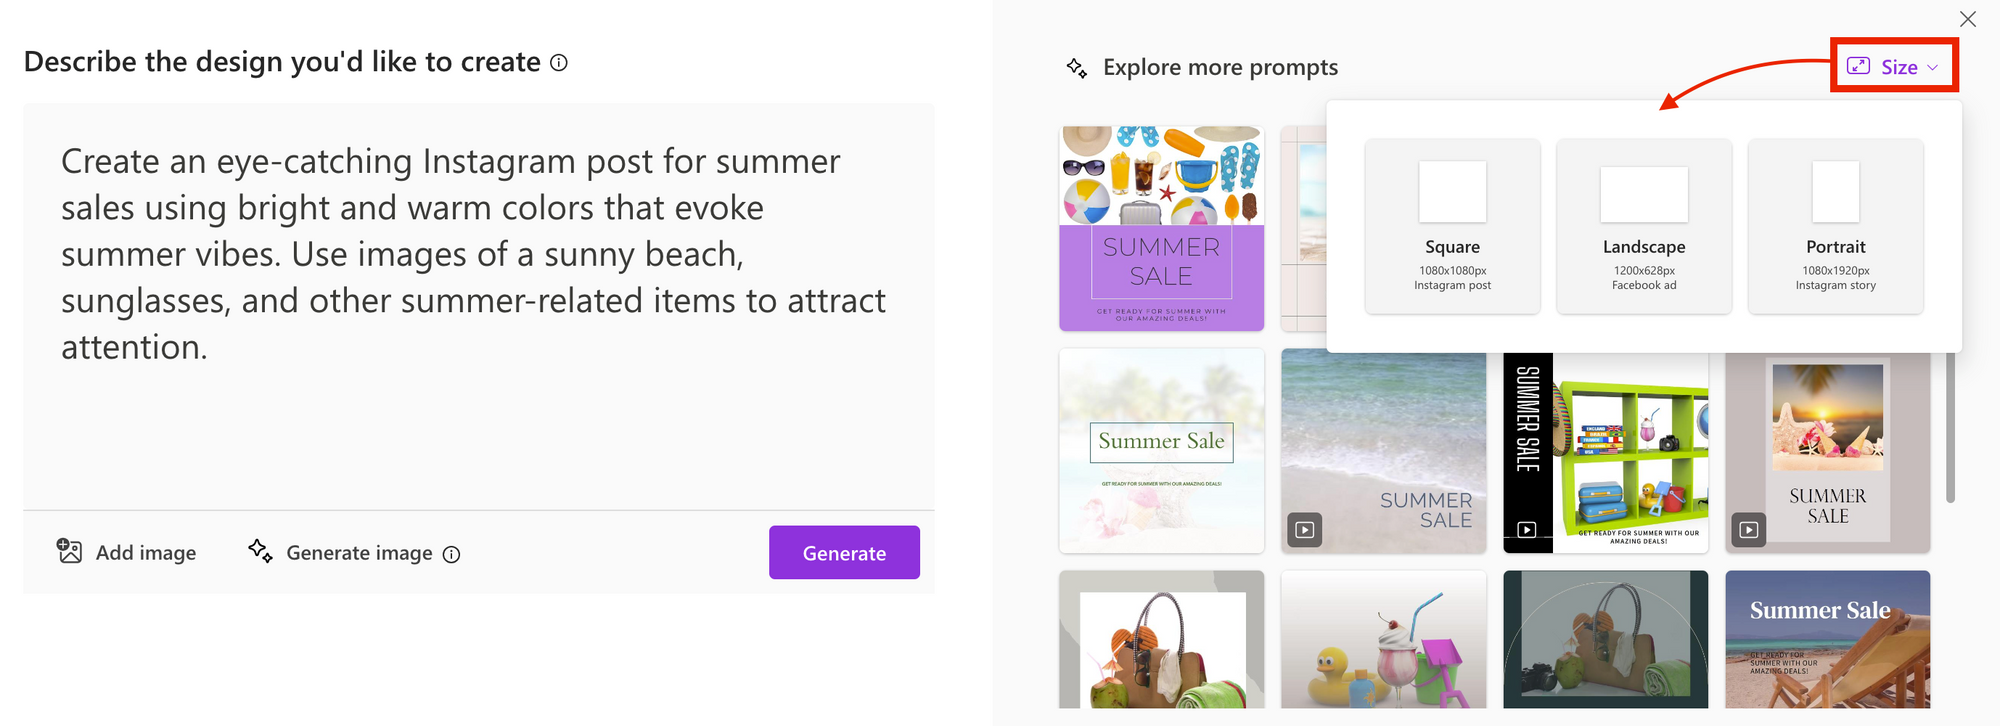
Back to our summer sales designif for whatever reason we don't like any of the Microsoft Designer templateswe can click on "generate" again and 15 new designs will be created automatically right before your eyes.
At the top of the designsyou will see an option to choose the size of the asset. When you do sonew designs will be re-created to fit only the size you have chosen for your masterpiece.
Discovering the editing panel
This brings us to the design interface. If you are a Canva useryou will find it very easy to switch to Microsoft Designeras the editing panel works similarly.
Since we have selected a designwe can start modifying its elements directly hereso we don't have to start our post from scratchwhich will save us a lot of time and headaches. But before we start modifying our designlet's take a quick look at the sections of this editing panel.
The first thing we see on our right is a column with several ideas based on our postin case we are not sure or want to continue exploring more options. If there is one that convinces us morewe simply have to click on itand it will replace our first choice.
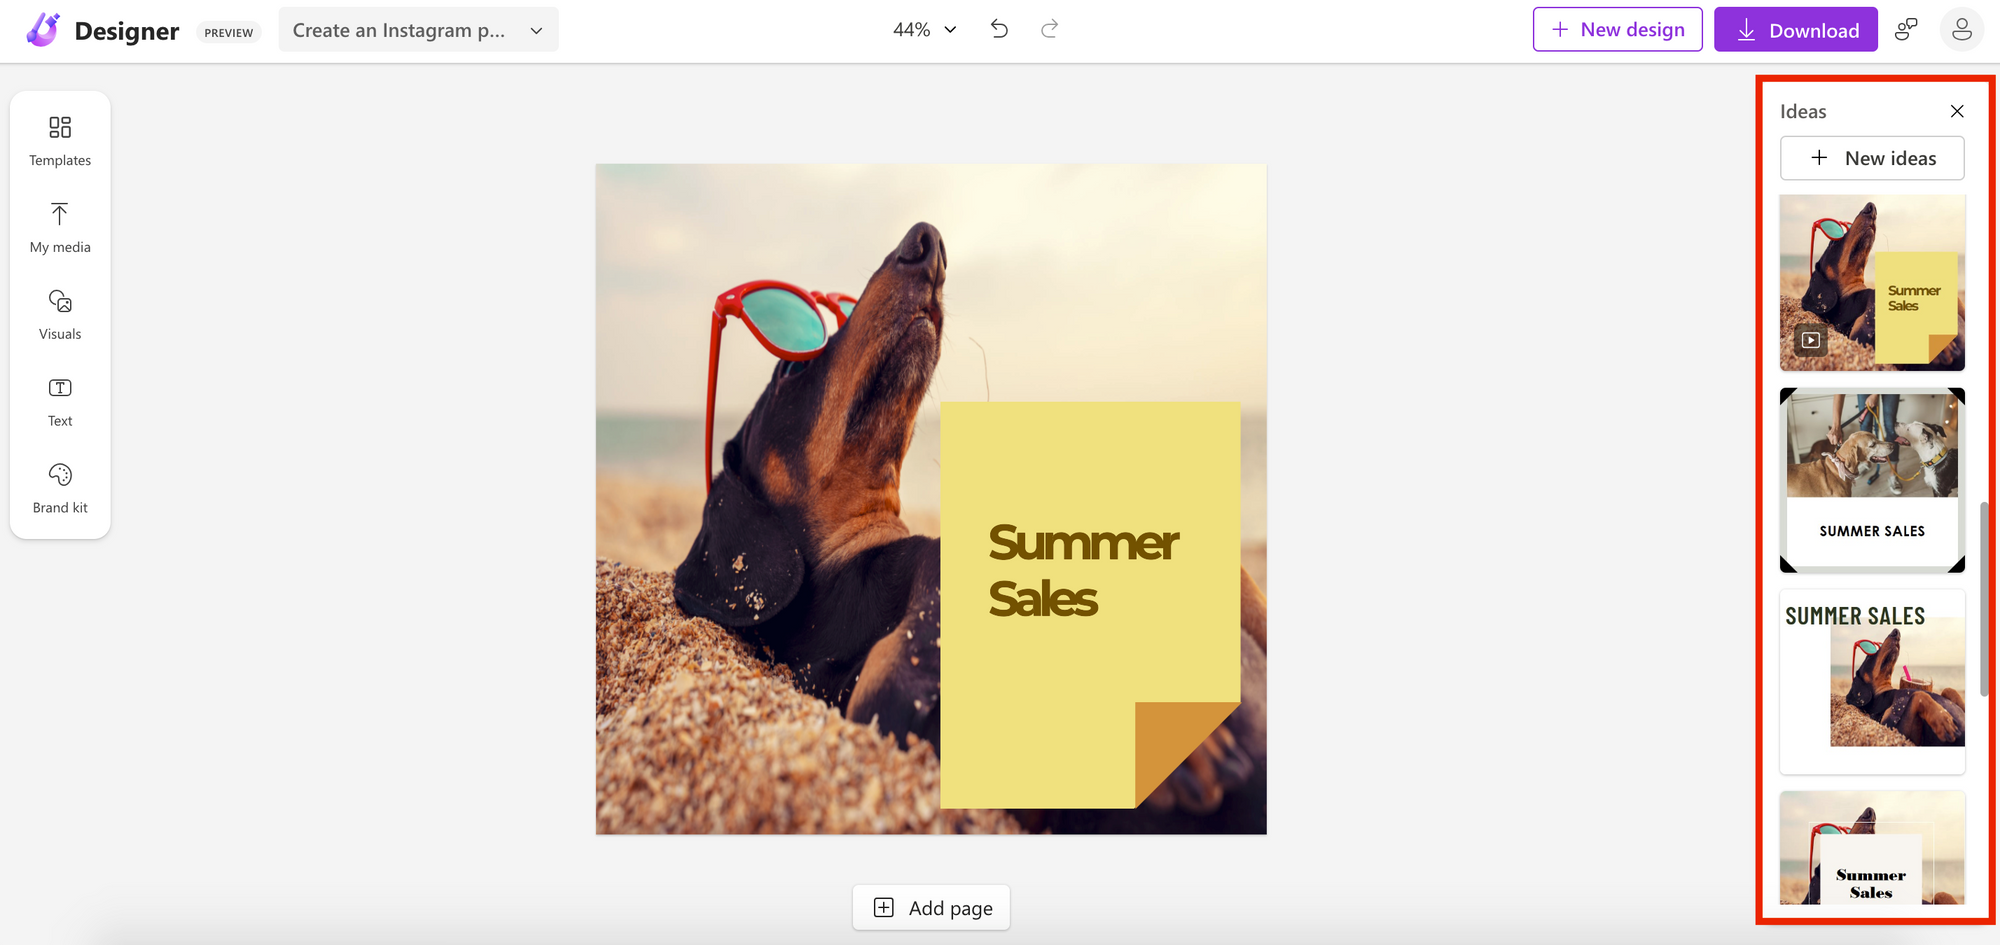
If you don't want to see more ideasyou can click on the Xand the column will disappear to give you more space while you edit your design.
I'm happy with my post for nowso let's continue exploring the editing panel.
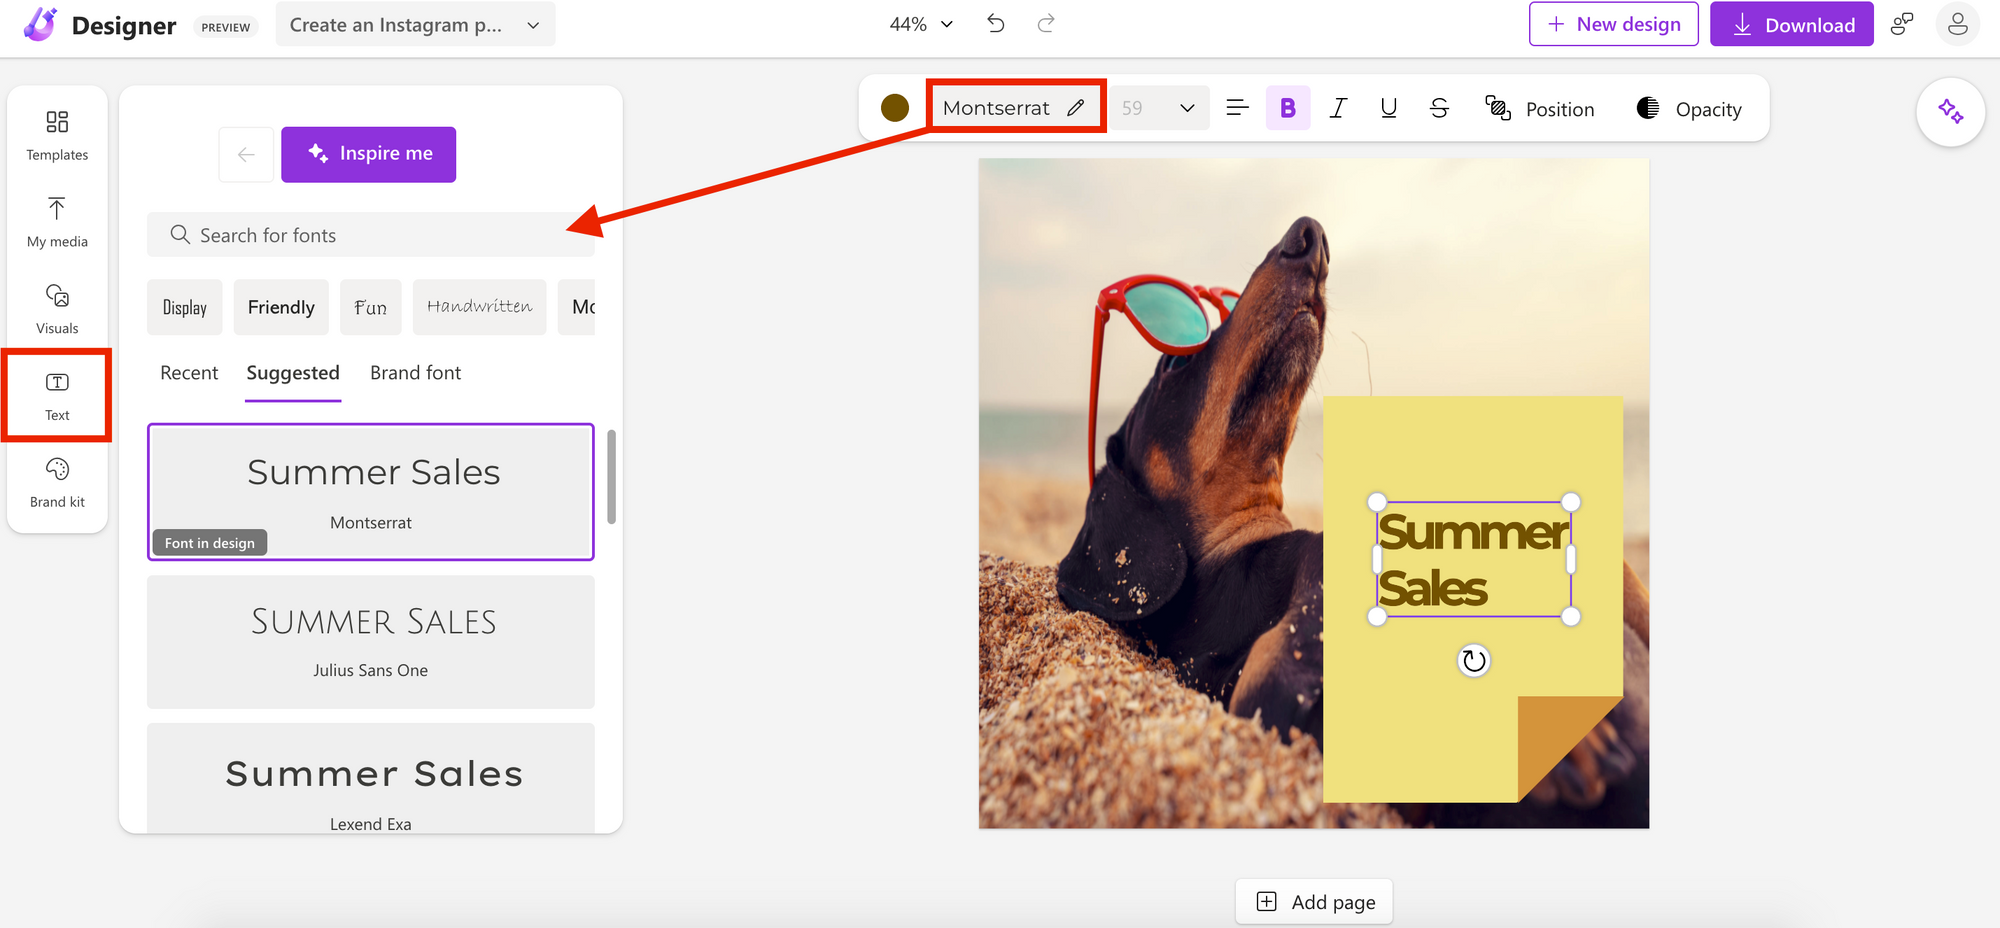
As with other editing toolsall design elements can be selected and modified easily by clicking on them. For exampleif I want to move or modify the text of my summer postI can do it by just selecting it with the cursor and dragging it to where I wantwhich makes it much easier for me to modify my design:
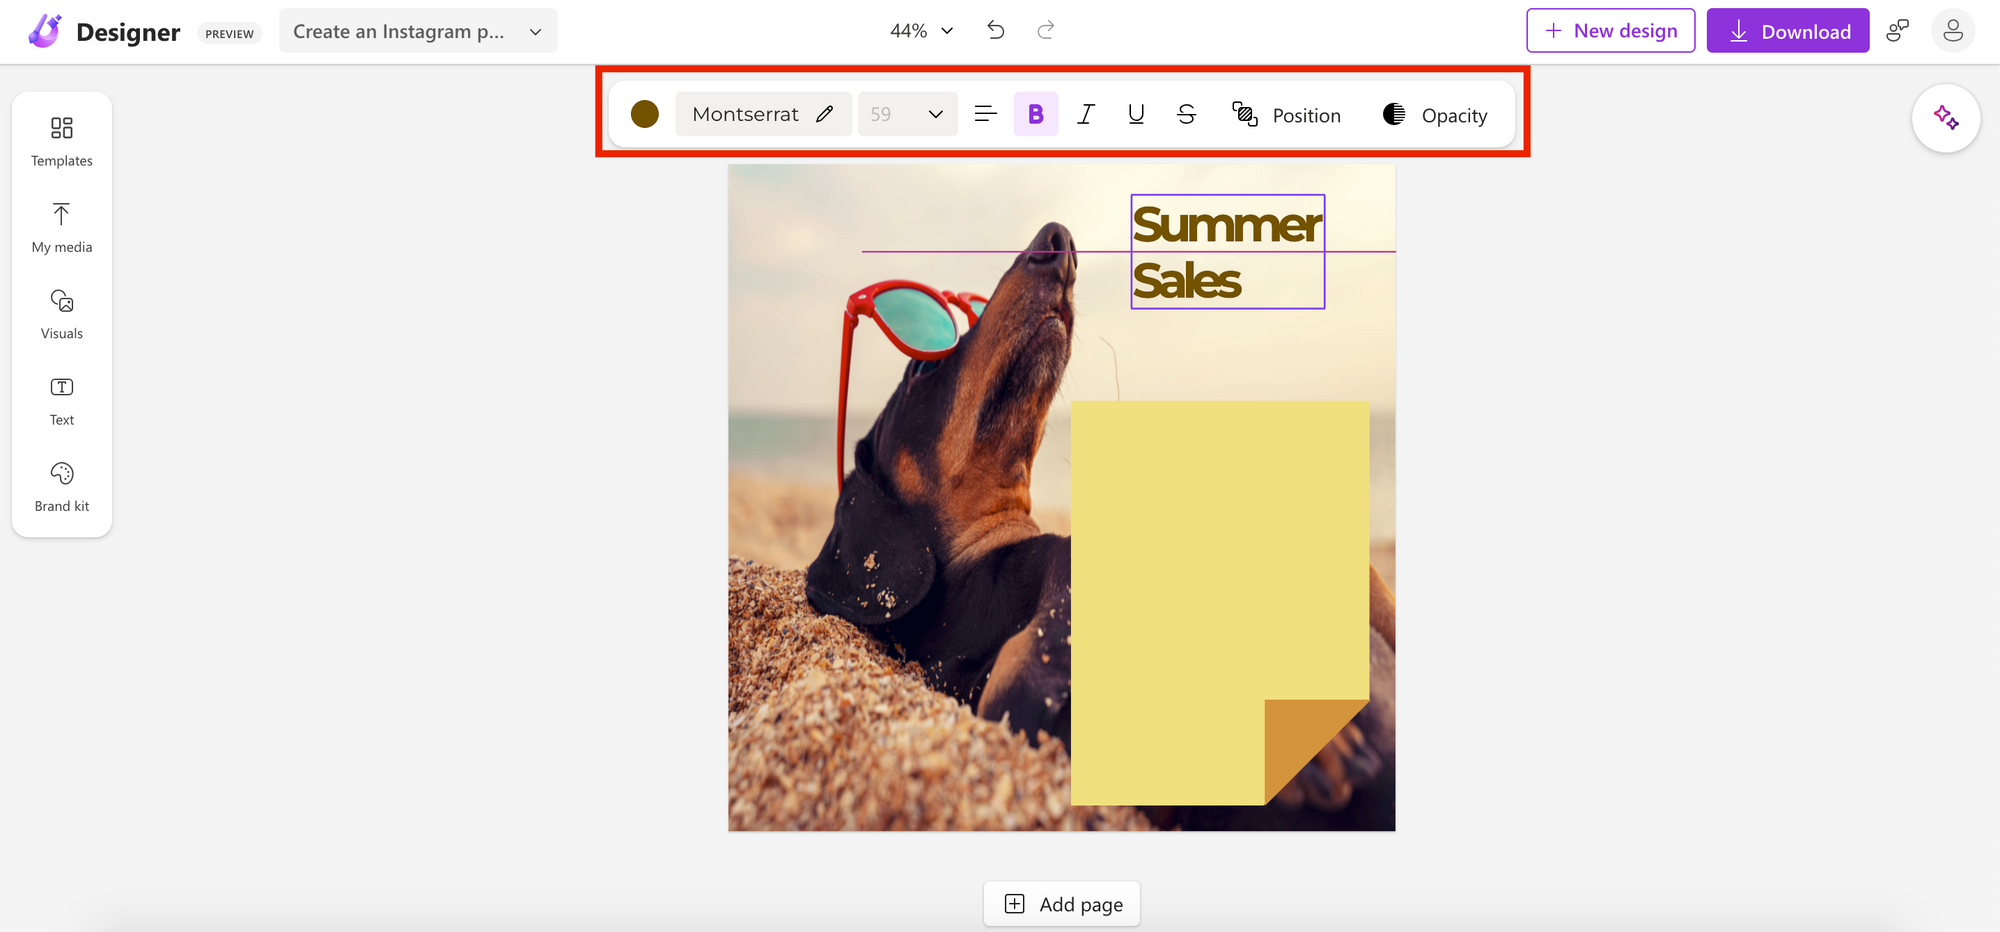
Alsowhen I do sosome guidelines will appear to help me make sure my text is centeredas well as a set of extra tools to fully customize the text in question.
Through this top barI will be able to change the fontsizecolor and other aspects of the textto align them 100% with the design guidelines of my project. If I need to add new texts to my postI can do it whenever I want from the Text section on the left.
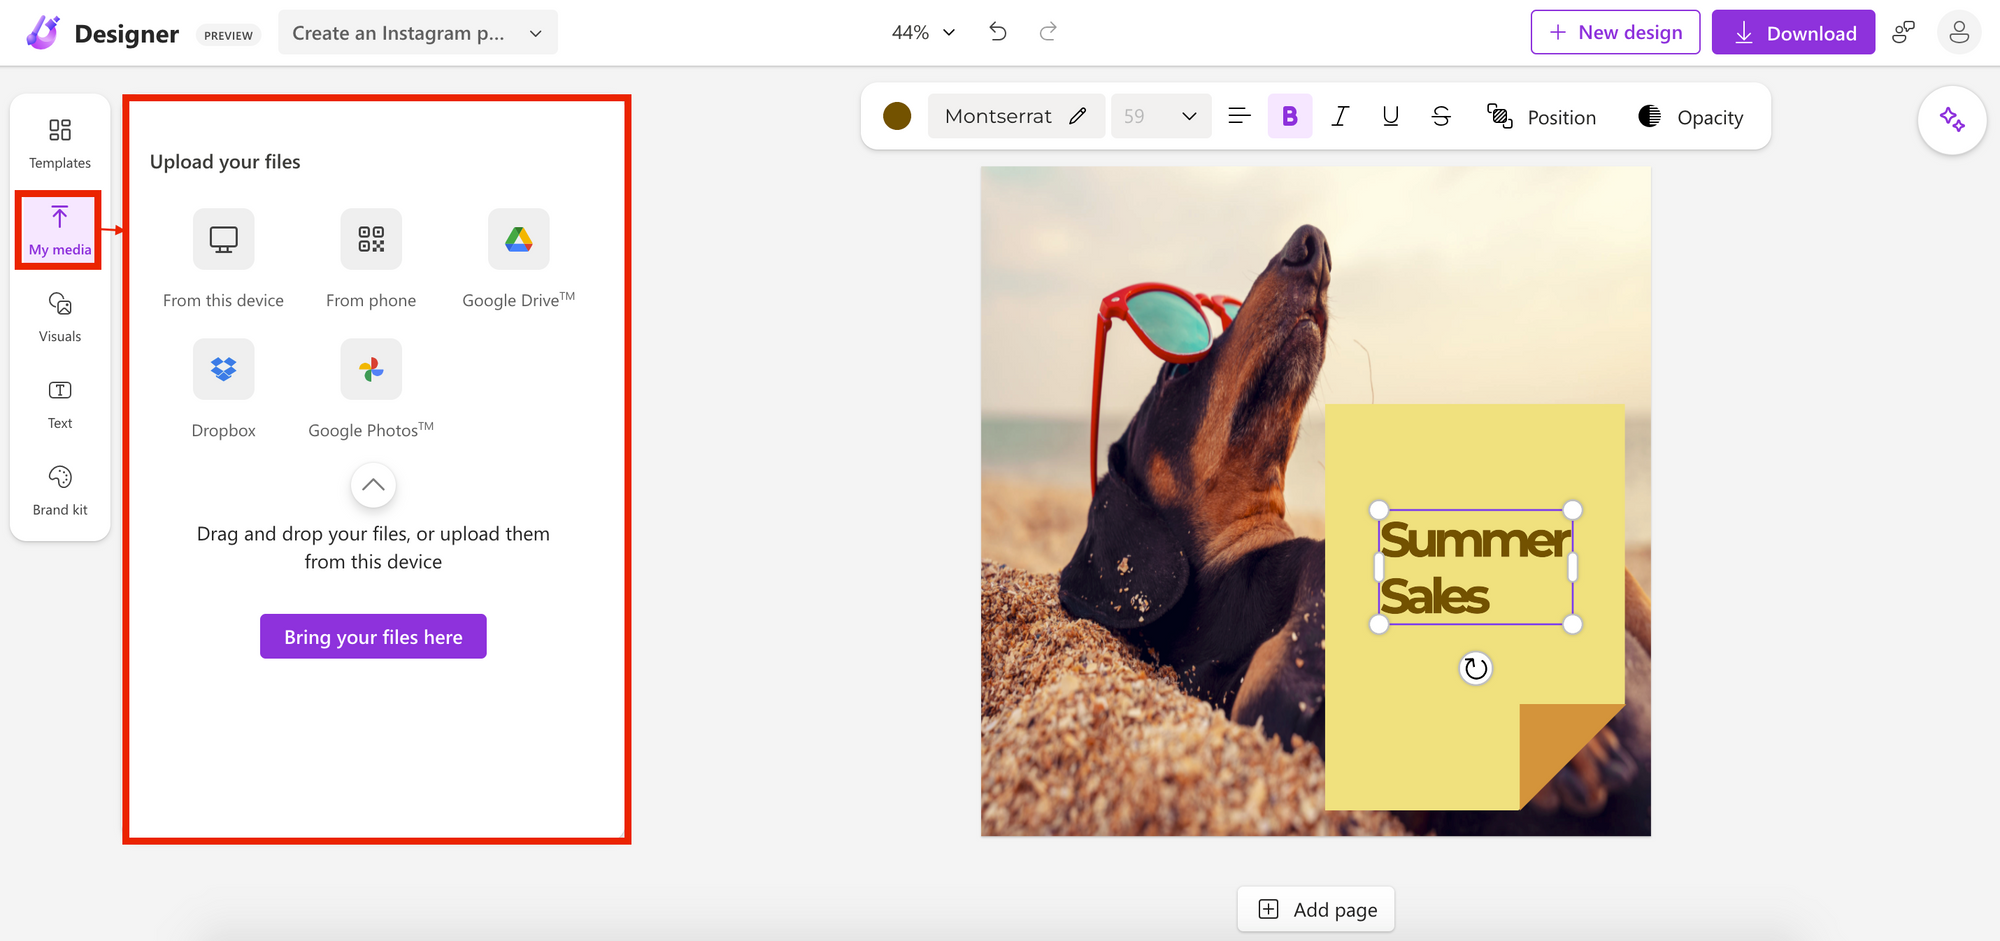
But that's not allof course. If we want to add extra elements to our designsuch as a logowe can do it through the My media section.
This functionality will allow us to upload elements from our computerfrom the phone and through other sources where we have saved the files we want to use.
I'm going to upload the Heyzine logoof course. As you will see in the screenshot belowevery time you upload an imageMicrosoft Designer will allow you to add editsadjustments and effectsin case you need them. You can see them
on the left side of the screen:
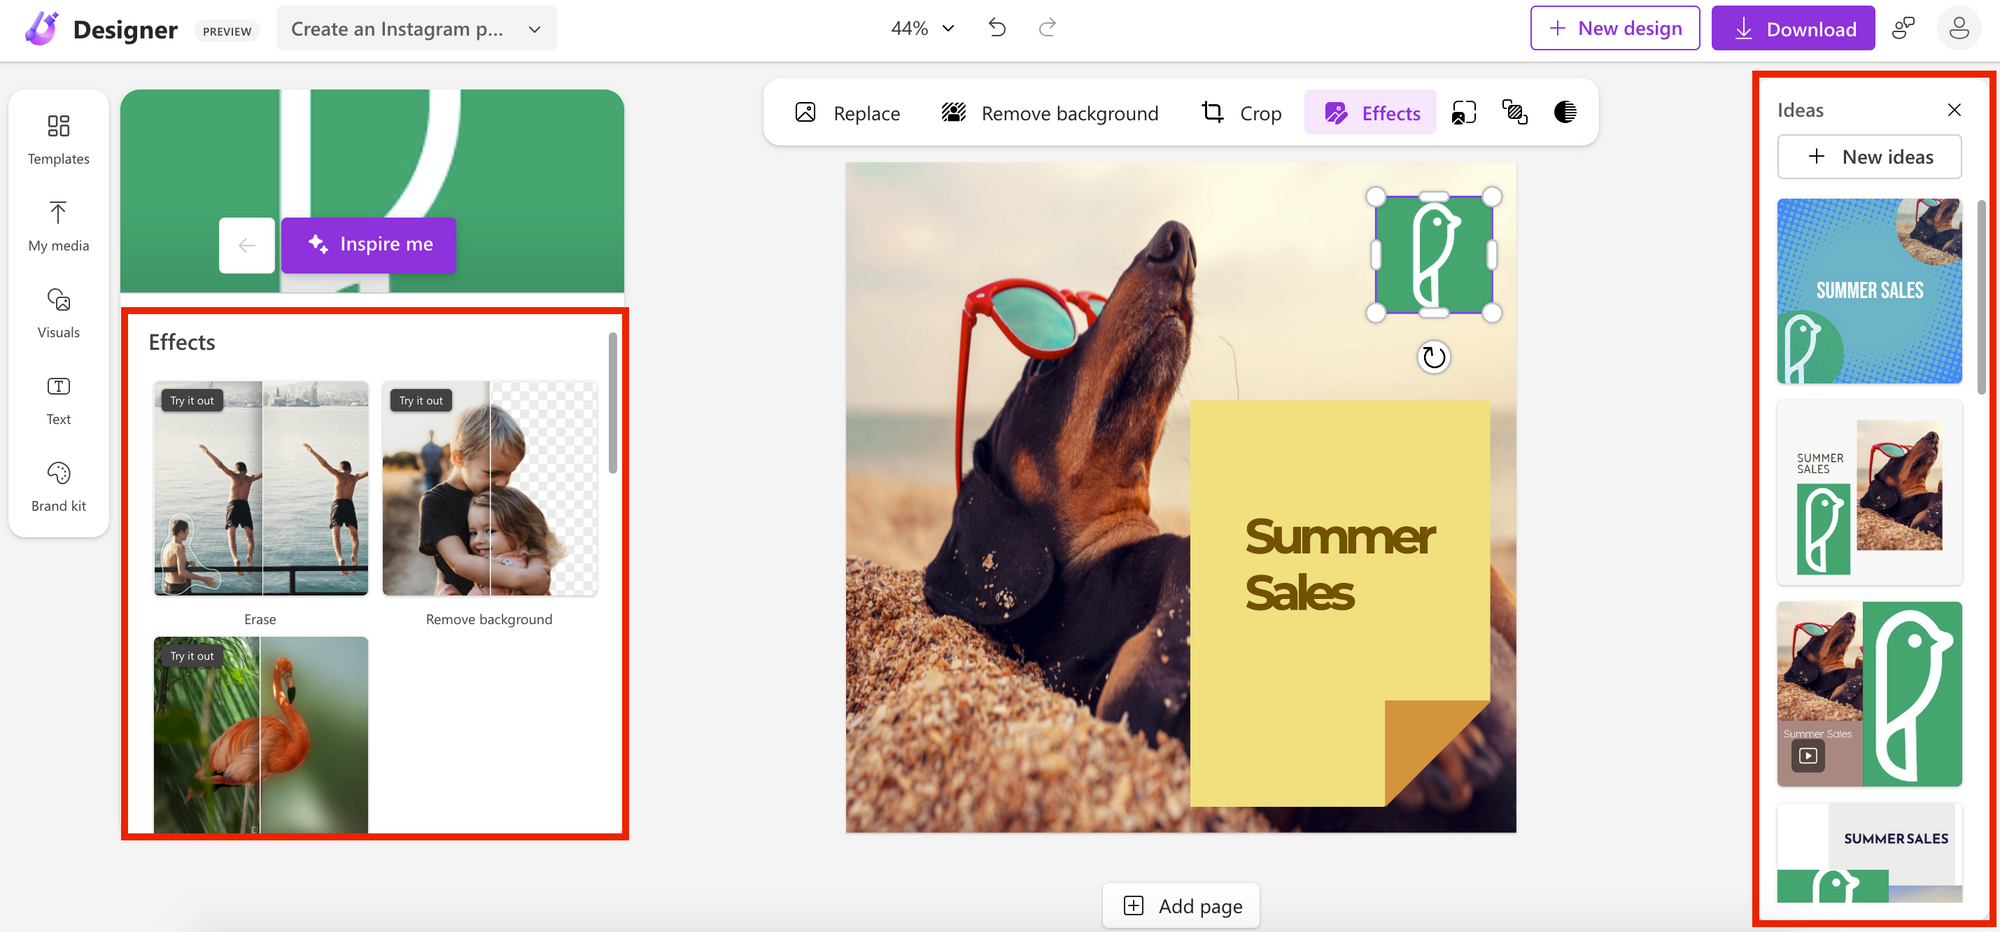
But that's not the coolest part. As you will seeafter uploading the Heyzine logo to the designa column reappears on the right-hand side to offer me new ideas that combine the three elements I currently have in my design: the logothe image and the text. Niceisn’t it?
Of courseapart from the multimedia elements that we can add to the designMicrosoft Designer also offers a lot of royalty-free visual elements that we can use in our post.
To access themjust go back to the menu on the leftclick on "visuals" and choose the type of graphic element that best suits your needs.
You have at your disposal: ImagesFilled ShapesOrganic shapesVideosIconsand Graphics.
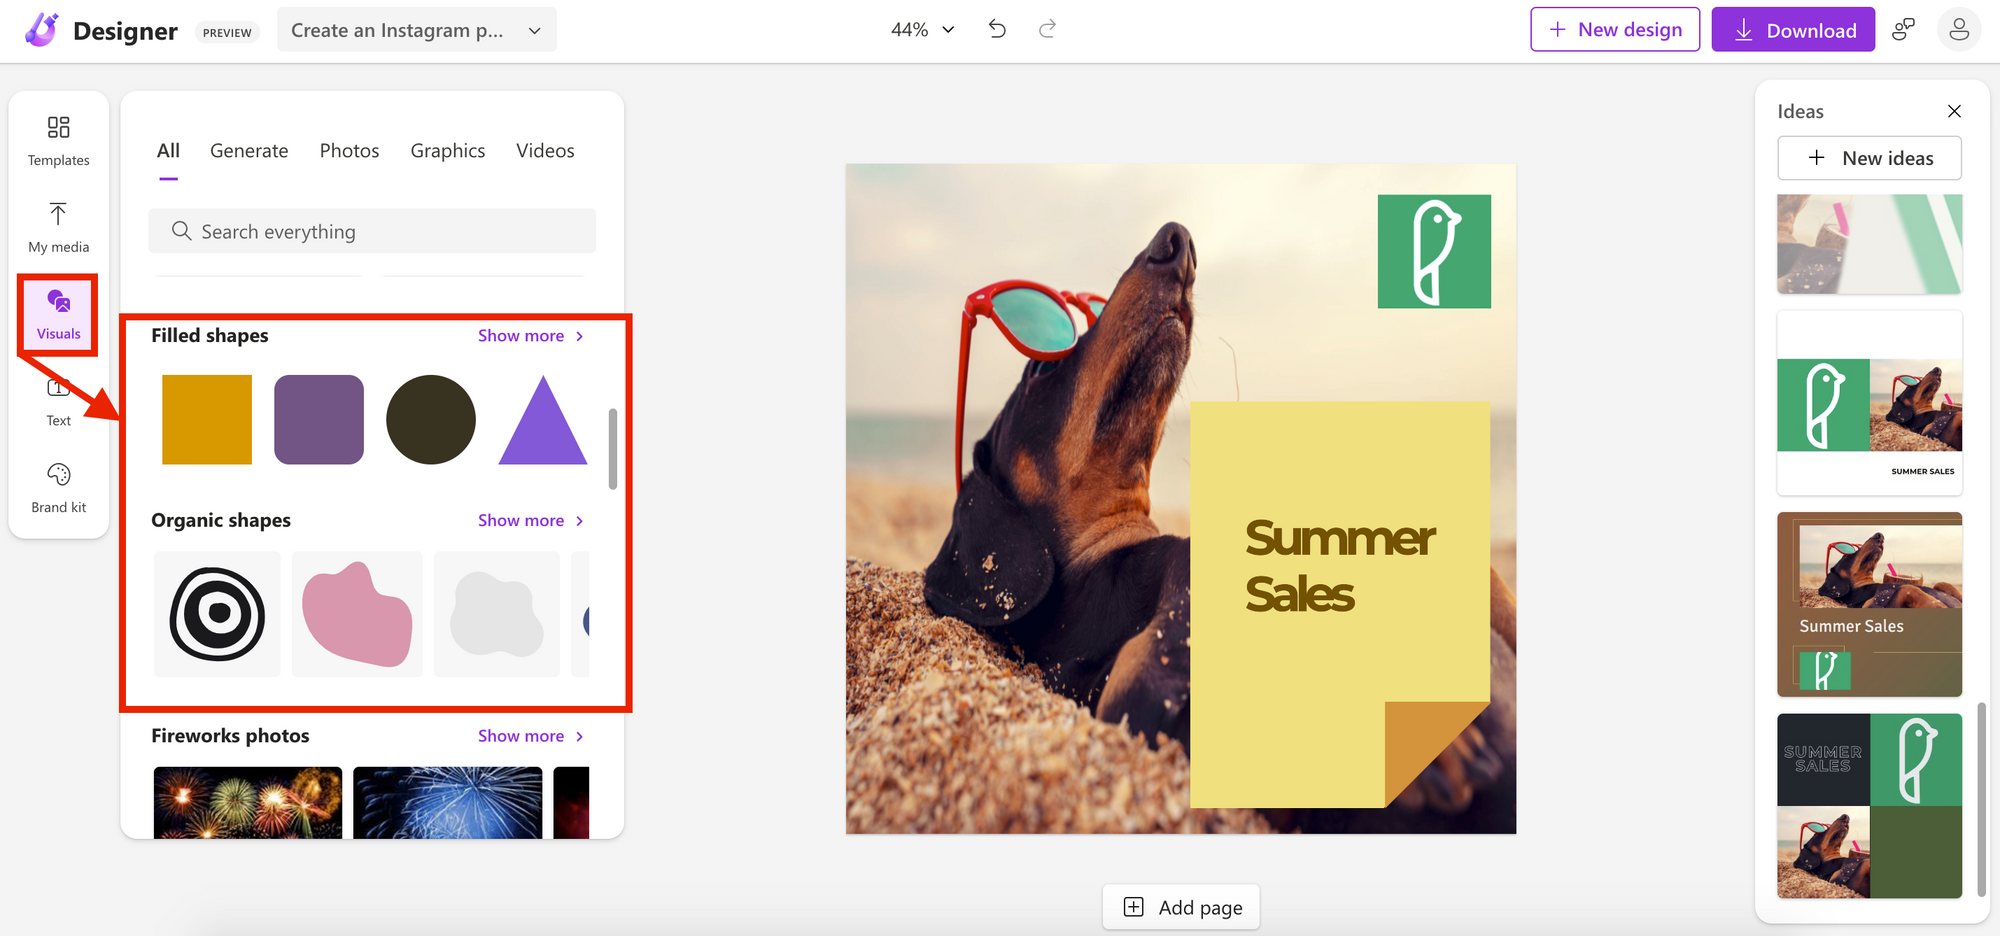
What is quite neat here is that the artificial intelligence seems to understand the context of the design you have created and therefore suggests related visual elements so that you can find exactly what you are looking for.
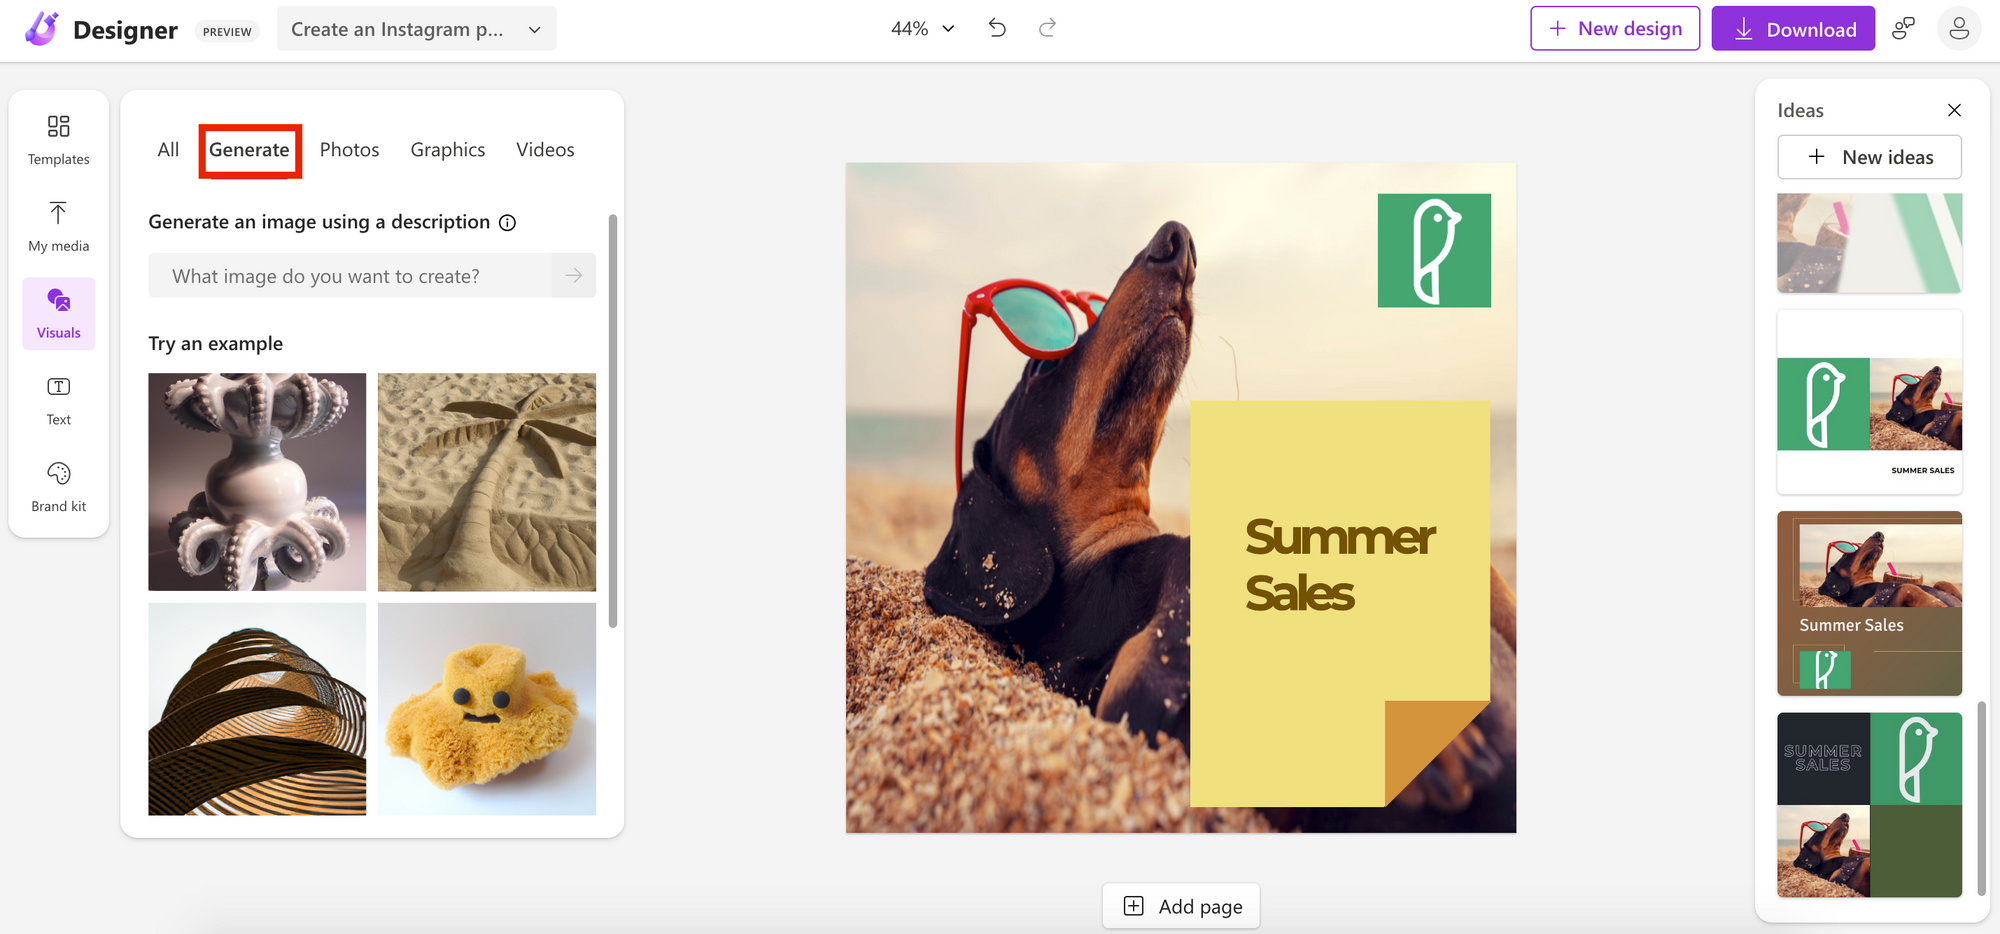
In factyou may even find what you didn't know you needed for your design. Crazy! And iffor whatever reasonyou don't come up with anything you likeyou can generate your own image throughagainthe platform's AI.
You just have to click on Generate and describe the type of image you want to create:
In case you haven't yet fallen in love with this new Microsoft toollet's take a look at one last feature of the dashboardthe Brand Kit.
As its name suggestsit is used to set up a brand kit with the colors and typography of your company or project. This wayyou can save them as default and use them whenever you wantwhich will save you a lot of time with your new designs.
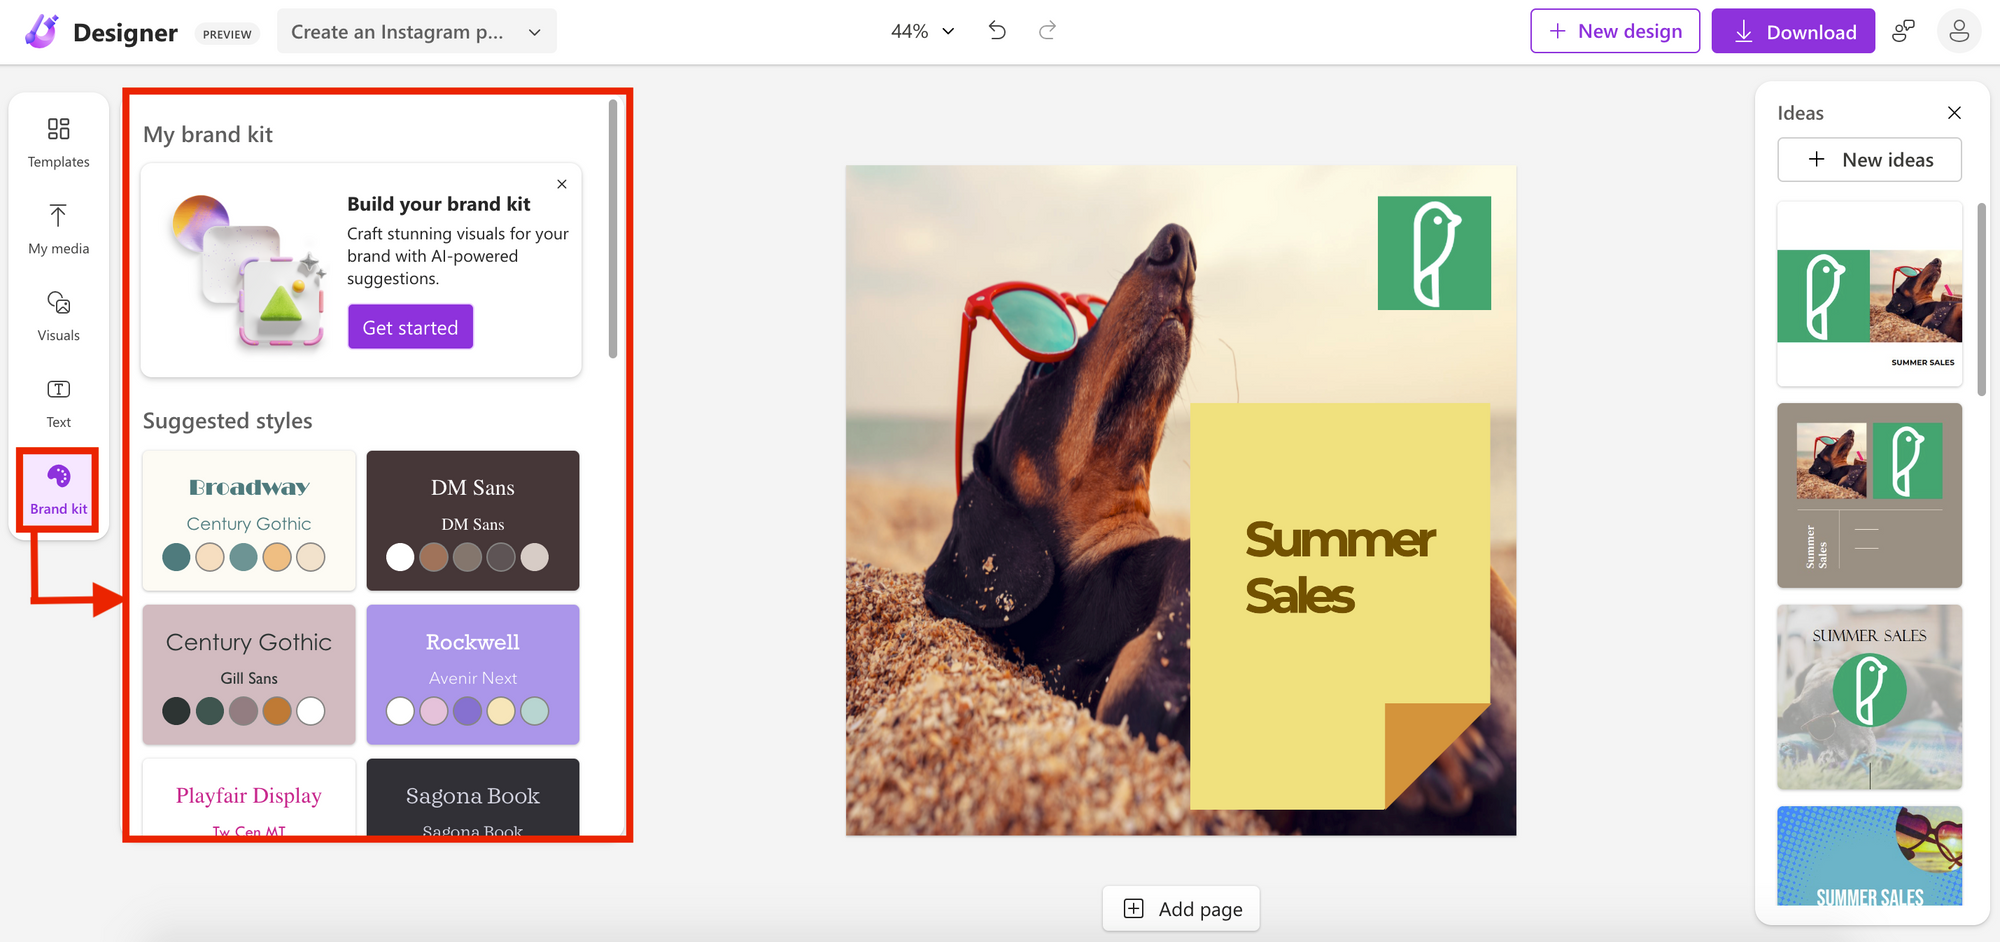
If you haven't designed your company's brand kit yetyou can use some of the suggestions the tool gives you to start shaping it.
Downloading your designs
Are you satisfied with your design? Then it's time to show it to the world!
The first thing you can doof courseis to download it to your computer or phone. You can choose between PNGJPEG or PDF format.
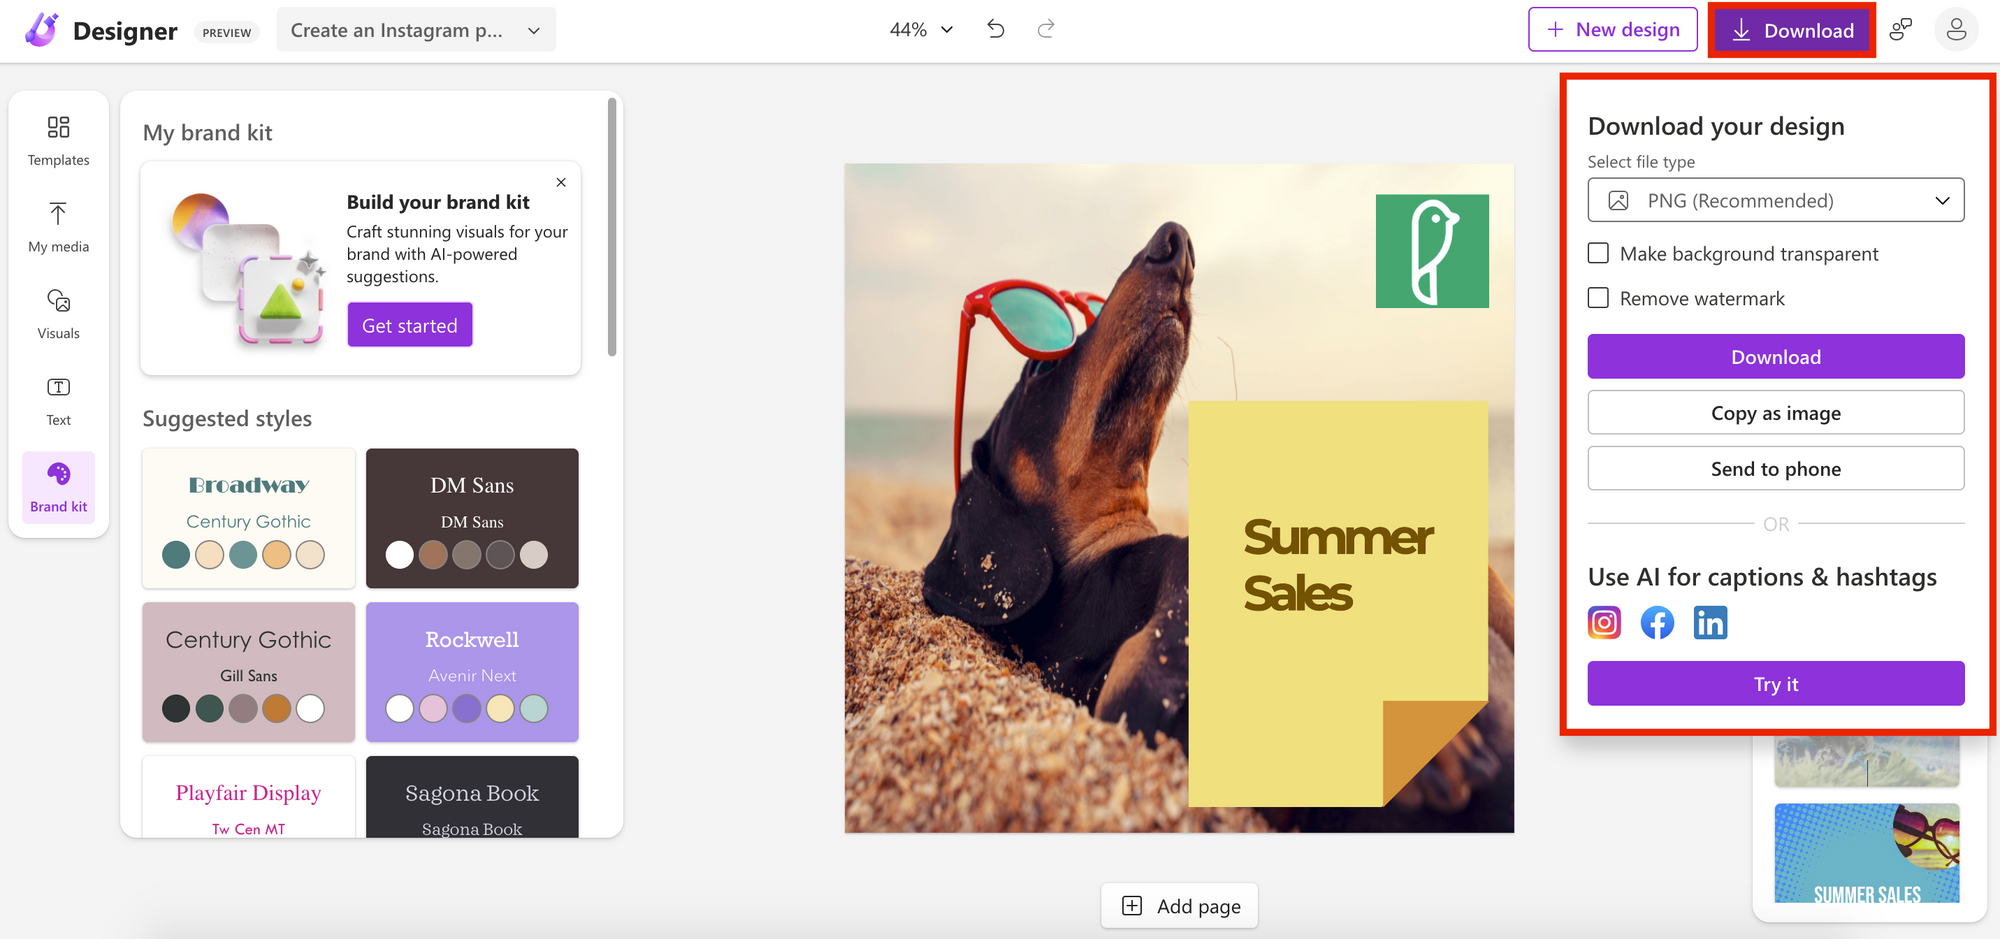
You can also make the background transparent if you need it. Once doneif you want to create more designsyou can do it by clicking on New Design or
from this button on the left:

If you click on My designs you can retrieve any of the previous assets you have created within the platform and continue editing to create as many assets as you need.
Sharing the designs online
In this quick guidewe have seen how you can create a simple post to share on networksbut Microsoft Designer also allows you to design reportscatalogsbrochuresand other formats that you can export to PDF and use in your business.
Once you have ityou can choose to leave it as is or go one step further and make it interactive.
With Heyzineyou can let your readers interact with the design you've just created and share it onlineoffering a breakthrough user experience.
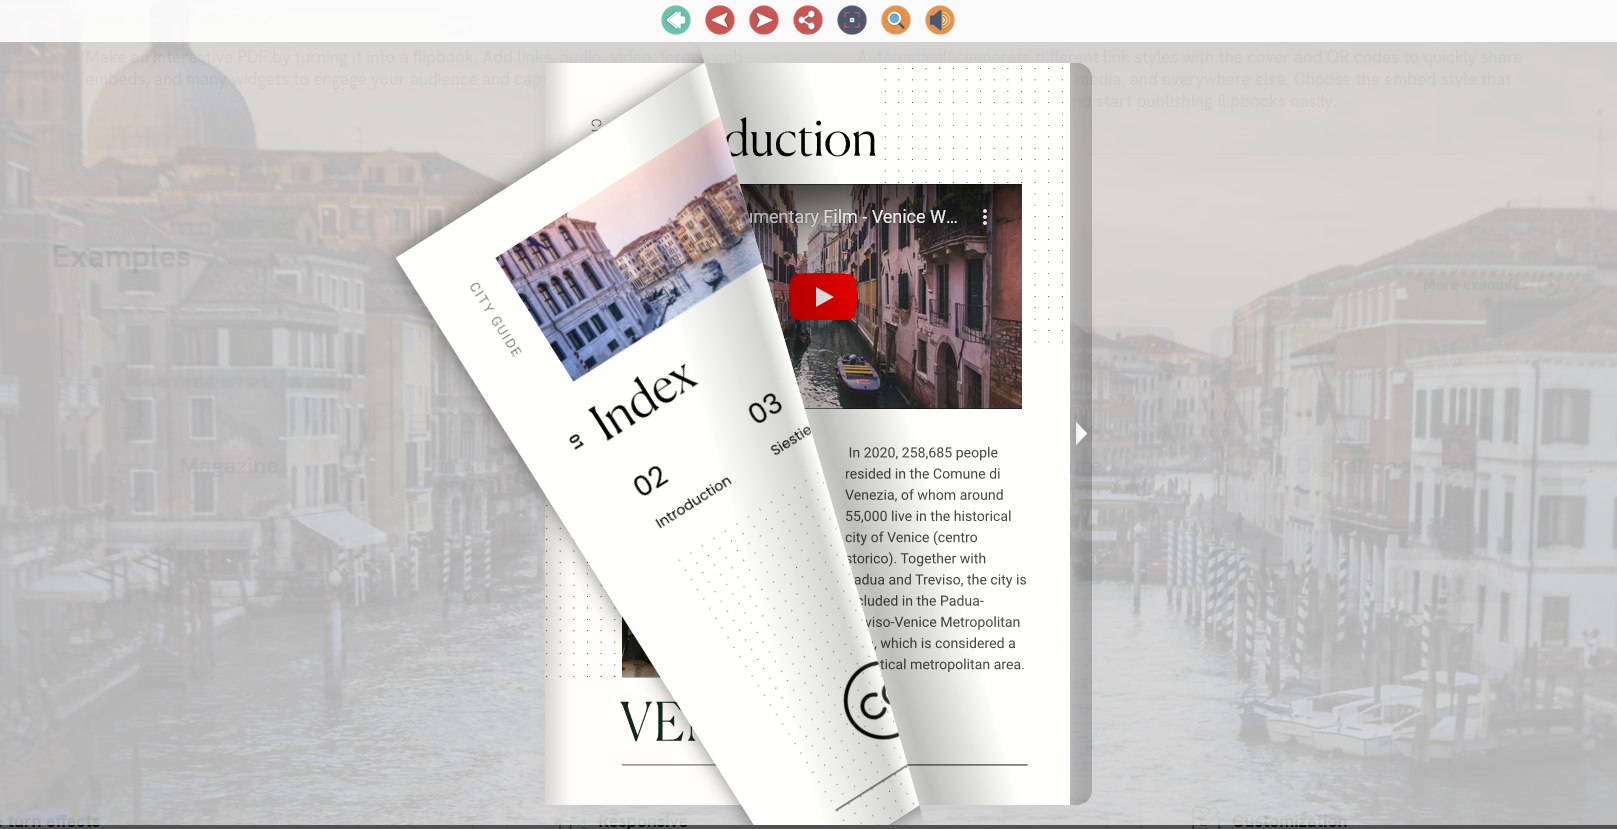
To do thisclick here and import the PDF document you created in Microsoft Designer. When the conversion finishesclick Customize to add elements and interactions to your file.
This will not only help you create your first flipbookbut you will also be able to add interactive imagesembed videostake the user to specific pages of the documentuse forms in your fileand many other features. It's very intuitivebut you can also find how to do it here.
You can even protect your publications with a passwordif you wishshare them easily on any of the communication channels you use in your businesscollect information about the visits your documents receiveand much more.
Discover all the possibilities Heyzine offerscreate your interactive online PDFsand share them. It's completely free.
Ready to try it? Combine Microsoft Designer with Heyzine and make a difference with your next presentation!

